From getting started to everyday work, boldly go into the world of LiveChat.
This Handbook is for sales reps, support heroes, agents, chat operators, and all those using LiveChat to stay in touch with customers.
It’s here to help you use LiveChat to create the best customer experience. We’ll cover topics like:
Setting up LiveChat for the first time.
Everyday workflow with chats and tickets.
Team collaboration.
Useful tips from our Support Heroes and the Sales Team.
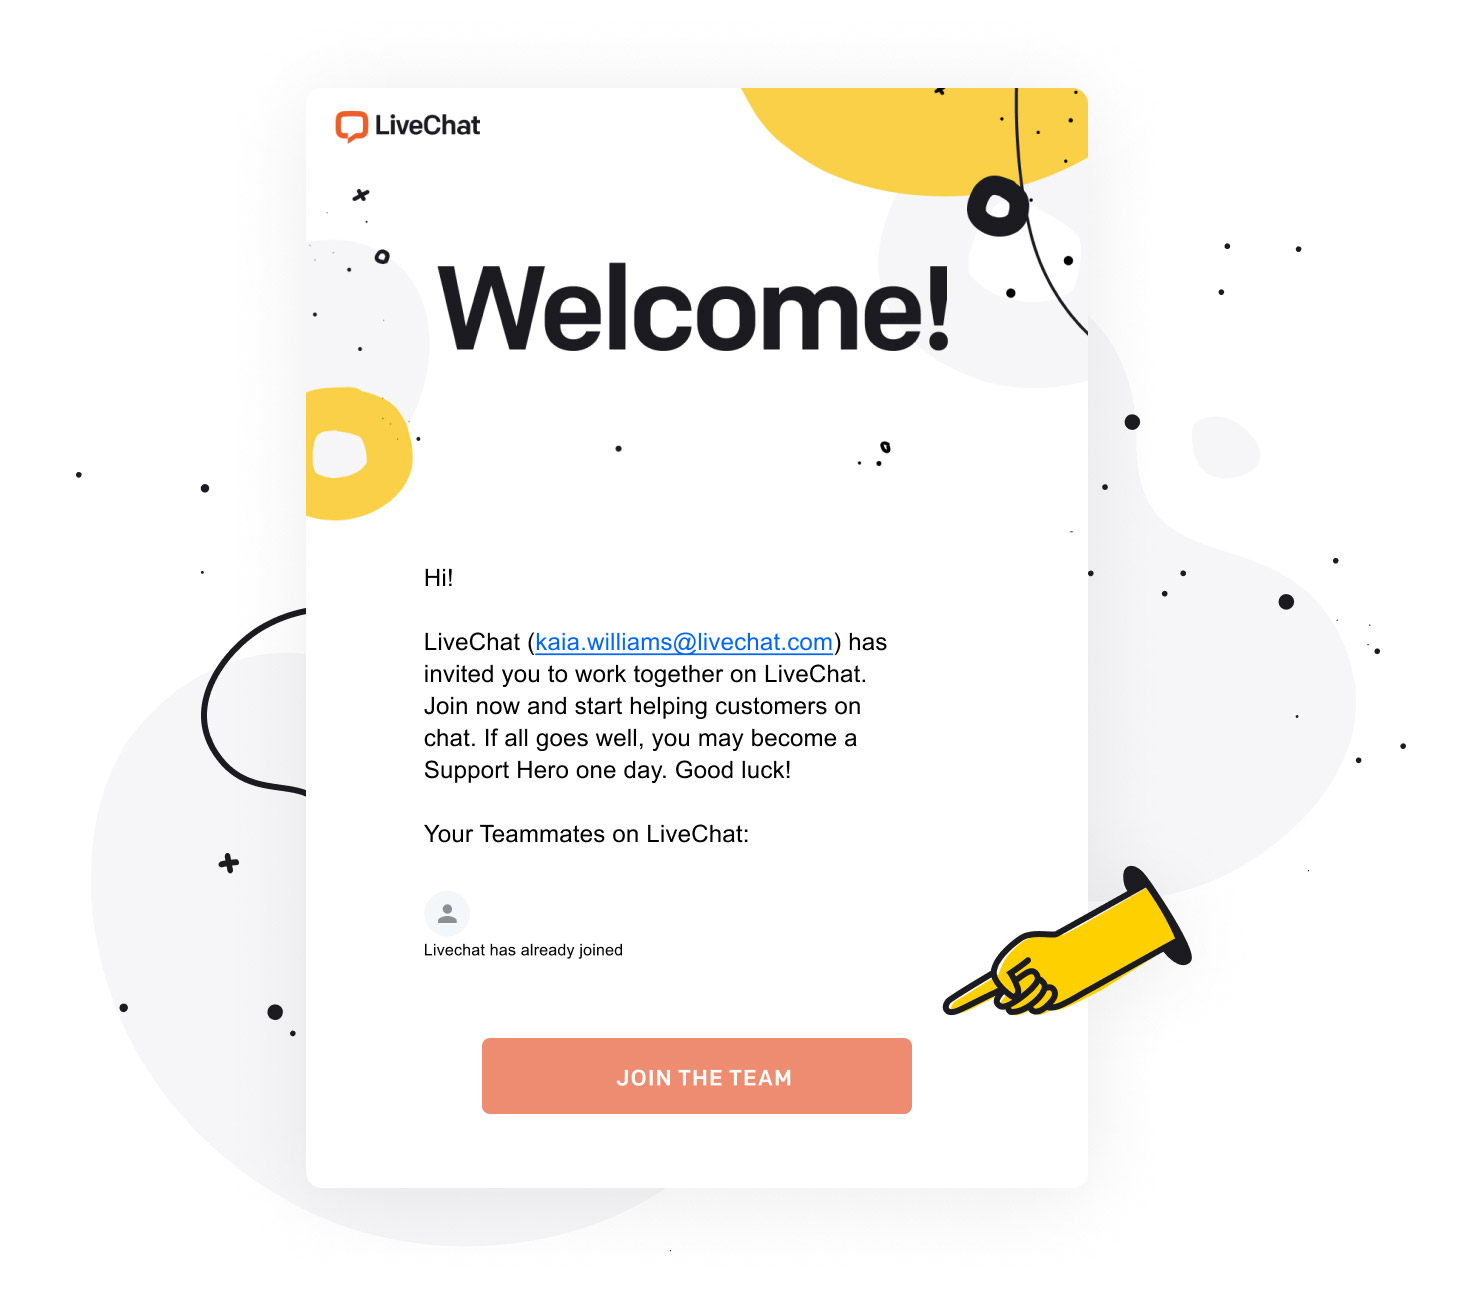
When you join your team on LiveChat, you either receive an invitation email or an invitation link. Whether you click the Join the team button or click on the link, you’re first asked to set up your password. Make sure it’s secure, and save it. You’ll need it to log into the LiveChat Agent app.

Once you set up the password, you’re redirected to the LiveChat Agent app. When you’re there, you can start receiving chats straight away.
If you would like to have a look around the app first, switch your Accept chats status off. If you’re going to continue later, use the Log in option on livechat.com or, better still, download the LiveChat Agent app.
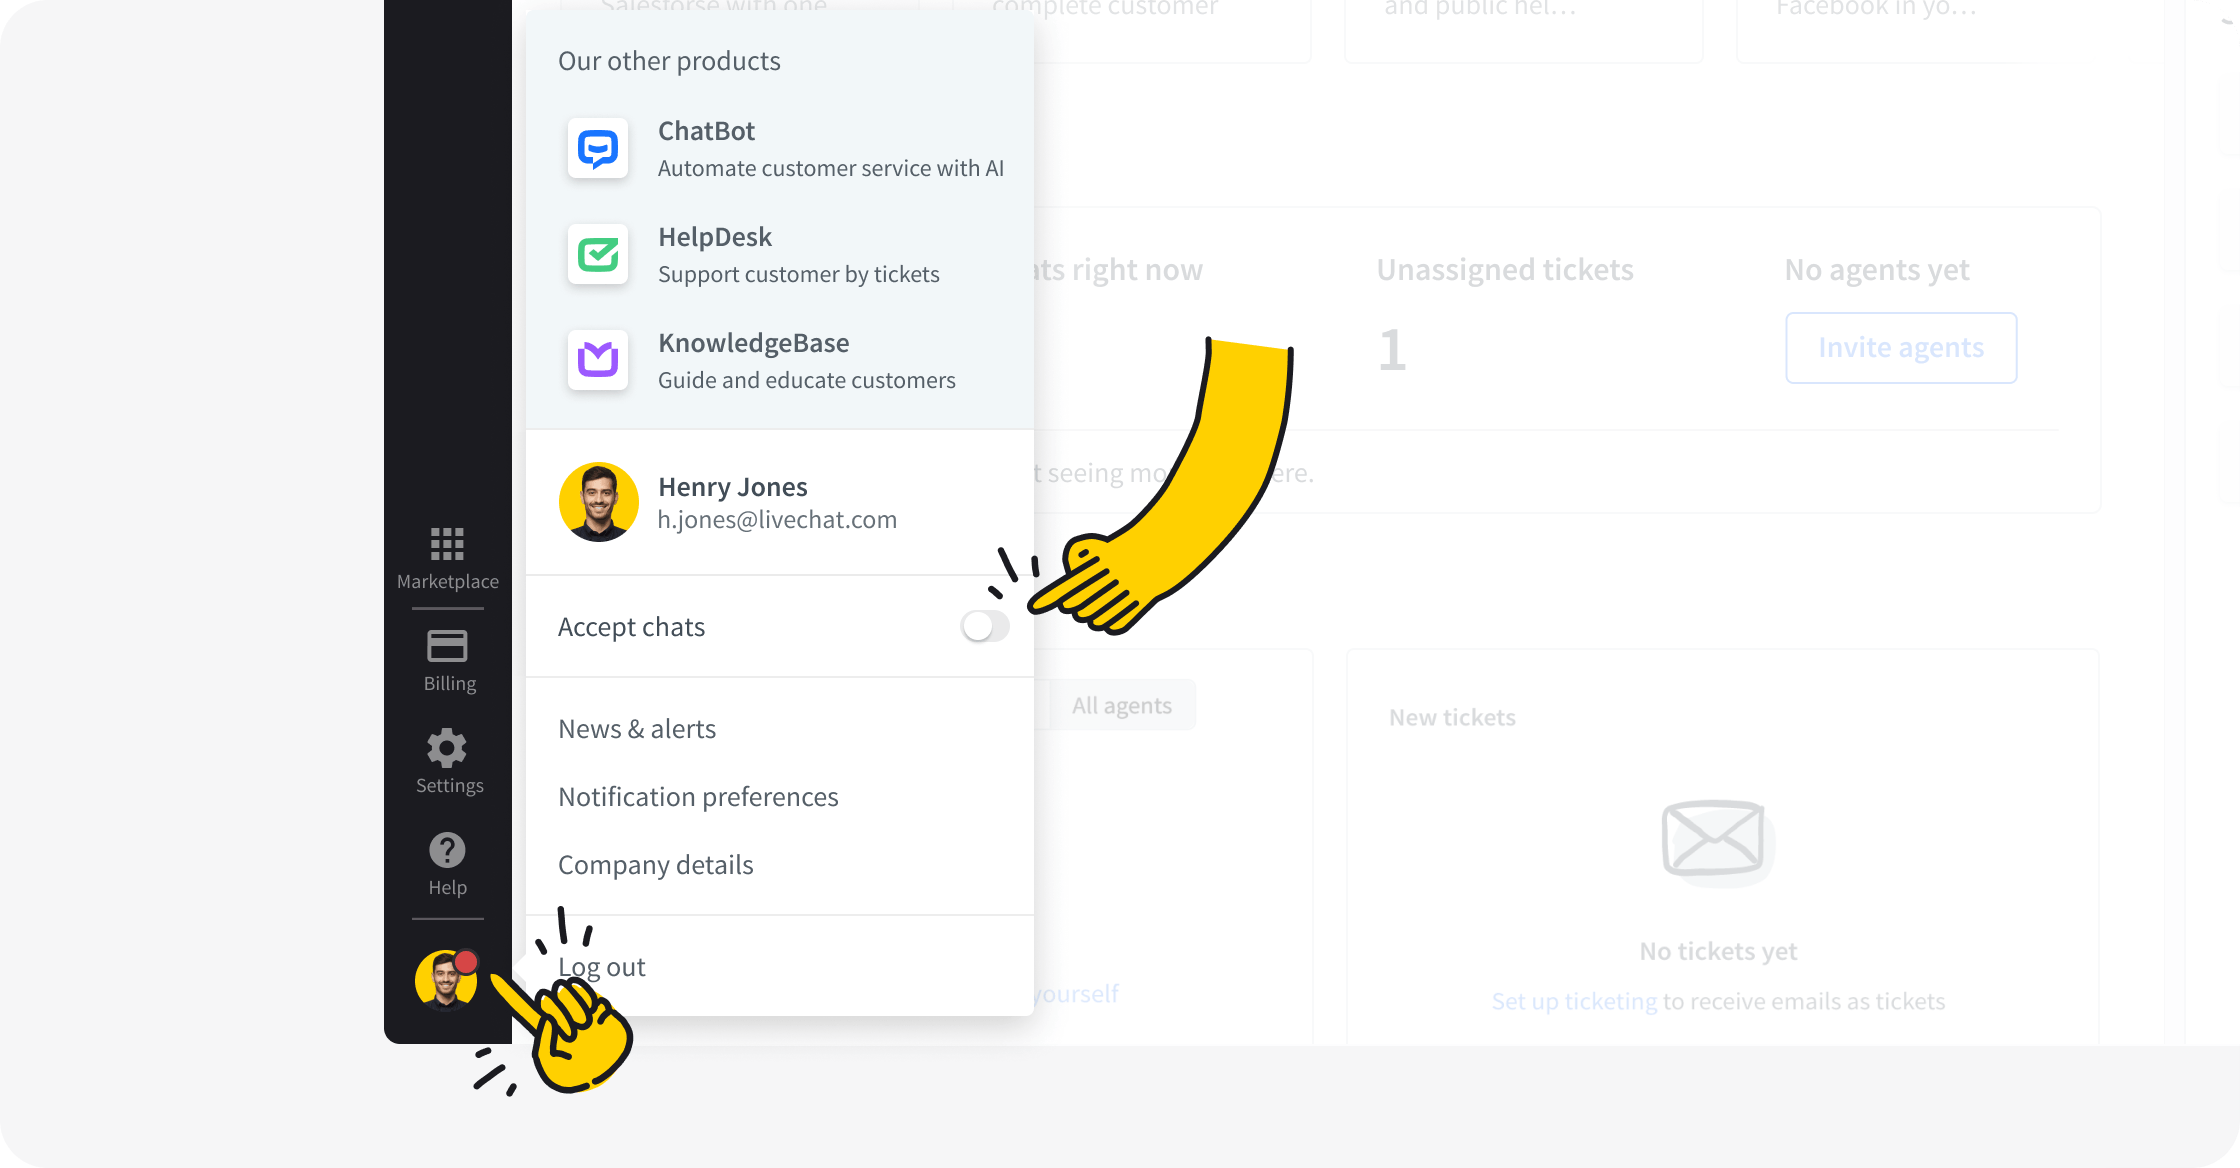
When you start your shift on chats, make sure the Accept chats toggle is switched on. You can use this toggle to take yourself out of active chatting at the end of your shift, during a break, or when you need to attend to other duties.


When you’re off accepting chats, no new chats will be assigned to you. You will still be able to:

Finish any ongoing chats you may have (when you switch off before the end of your shift).
Assign new chats to yourself, or start a chat manually (we’ll get into that in the Chats section below).
Receive a transferred chat, if one of your teammates transfers one specifically to you (e.g., when you are a specialist who only takes chats after triage).
Do any other work inside the LiveChat Agent app (handle tickets, monitor traffic on your website, supervise the chats of other agents and more).
You can read more about statuses in our Help Center.
Check your status
If you notice you’re not receiving any chats, always make sure that your status is set to Accept chats.
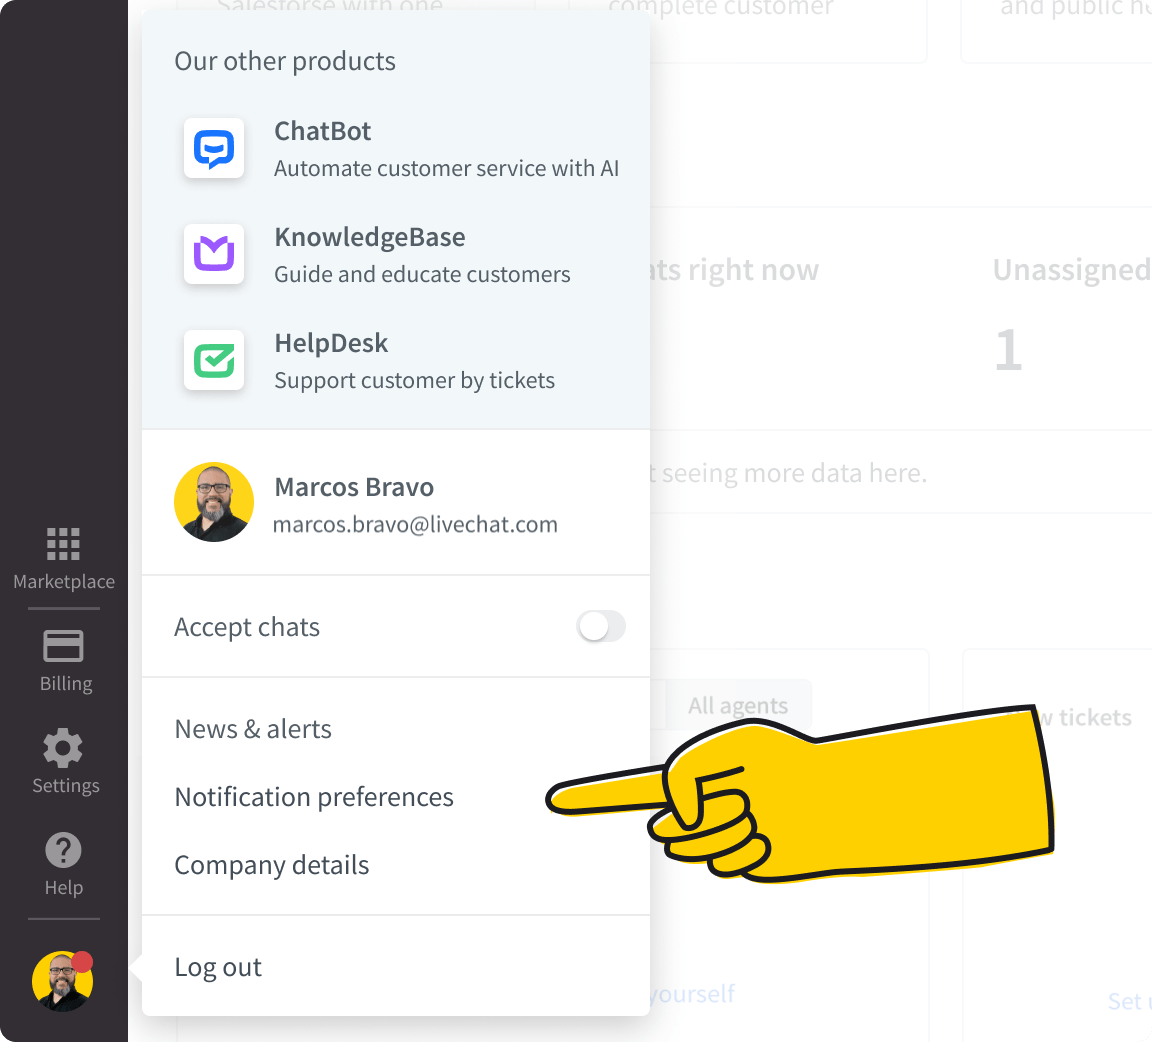
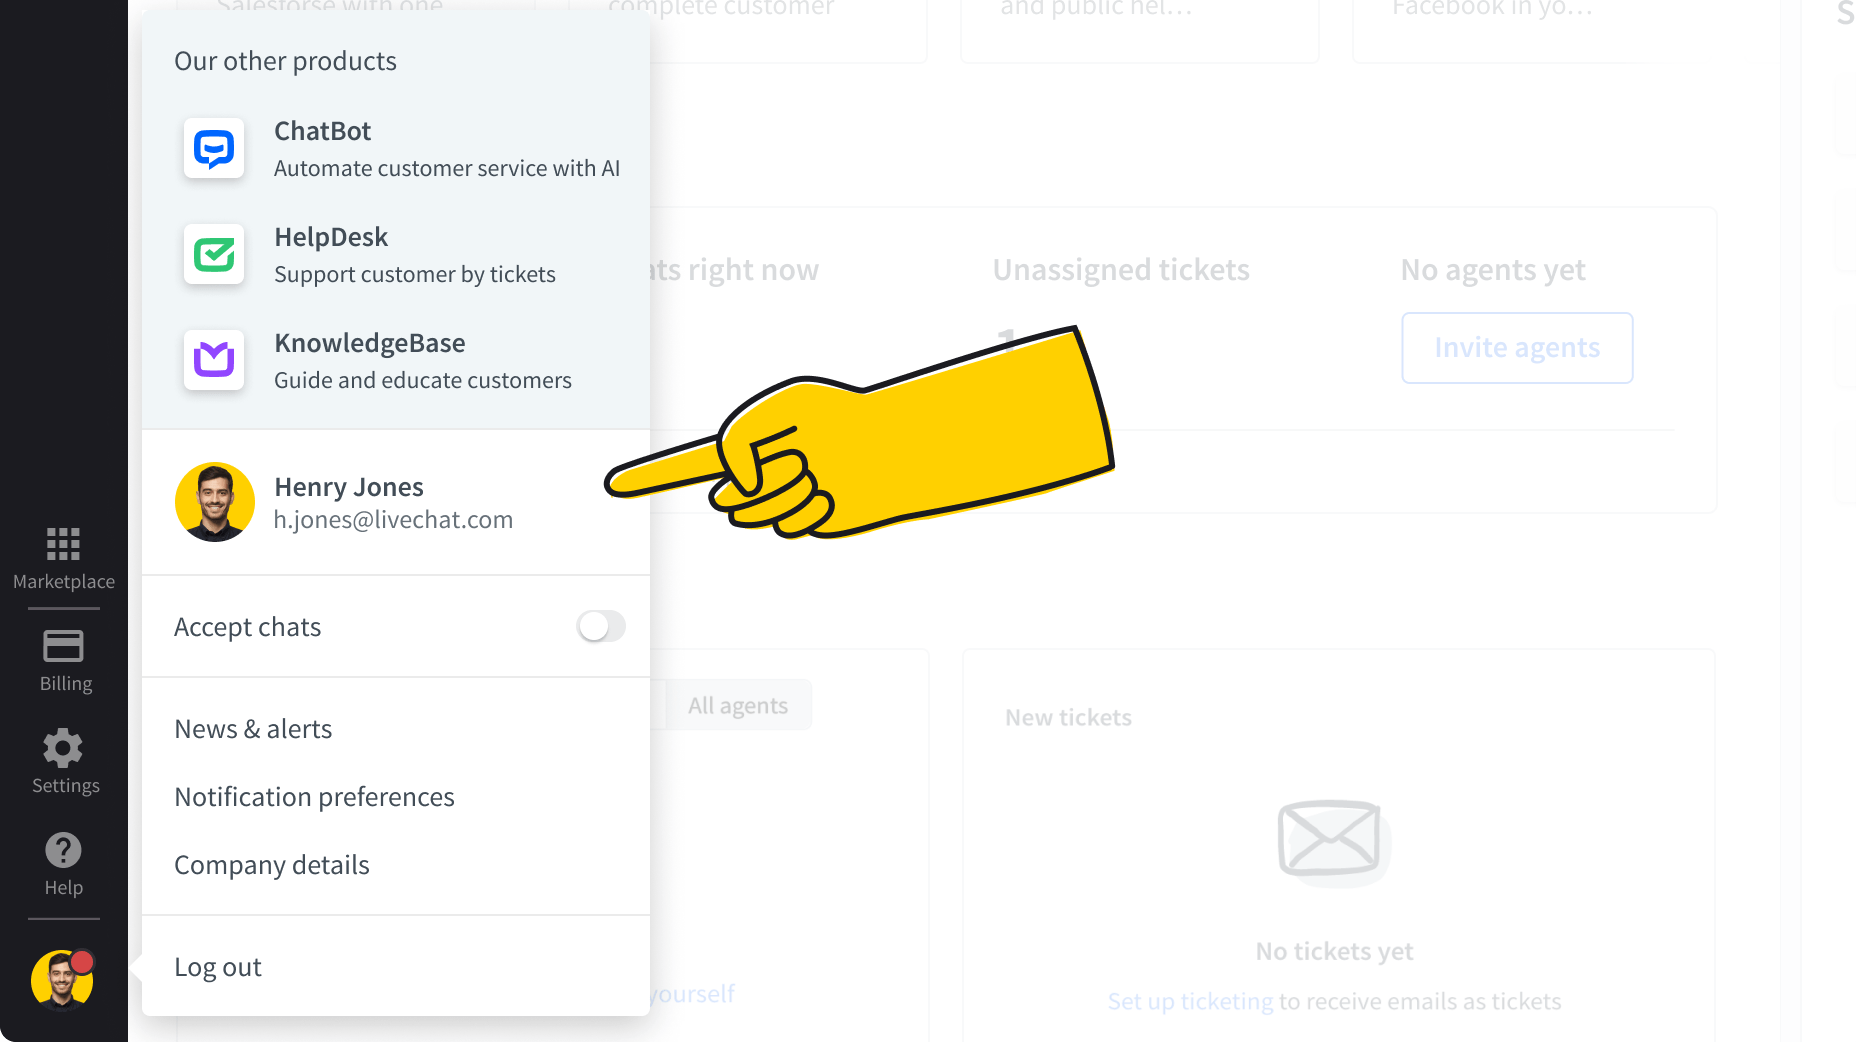
In this menu you can also log out at the end of your shift, and set your notification preferences.
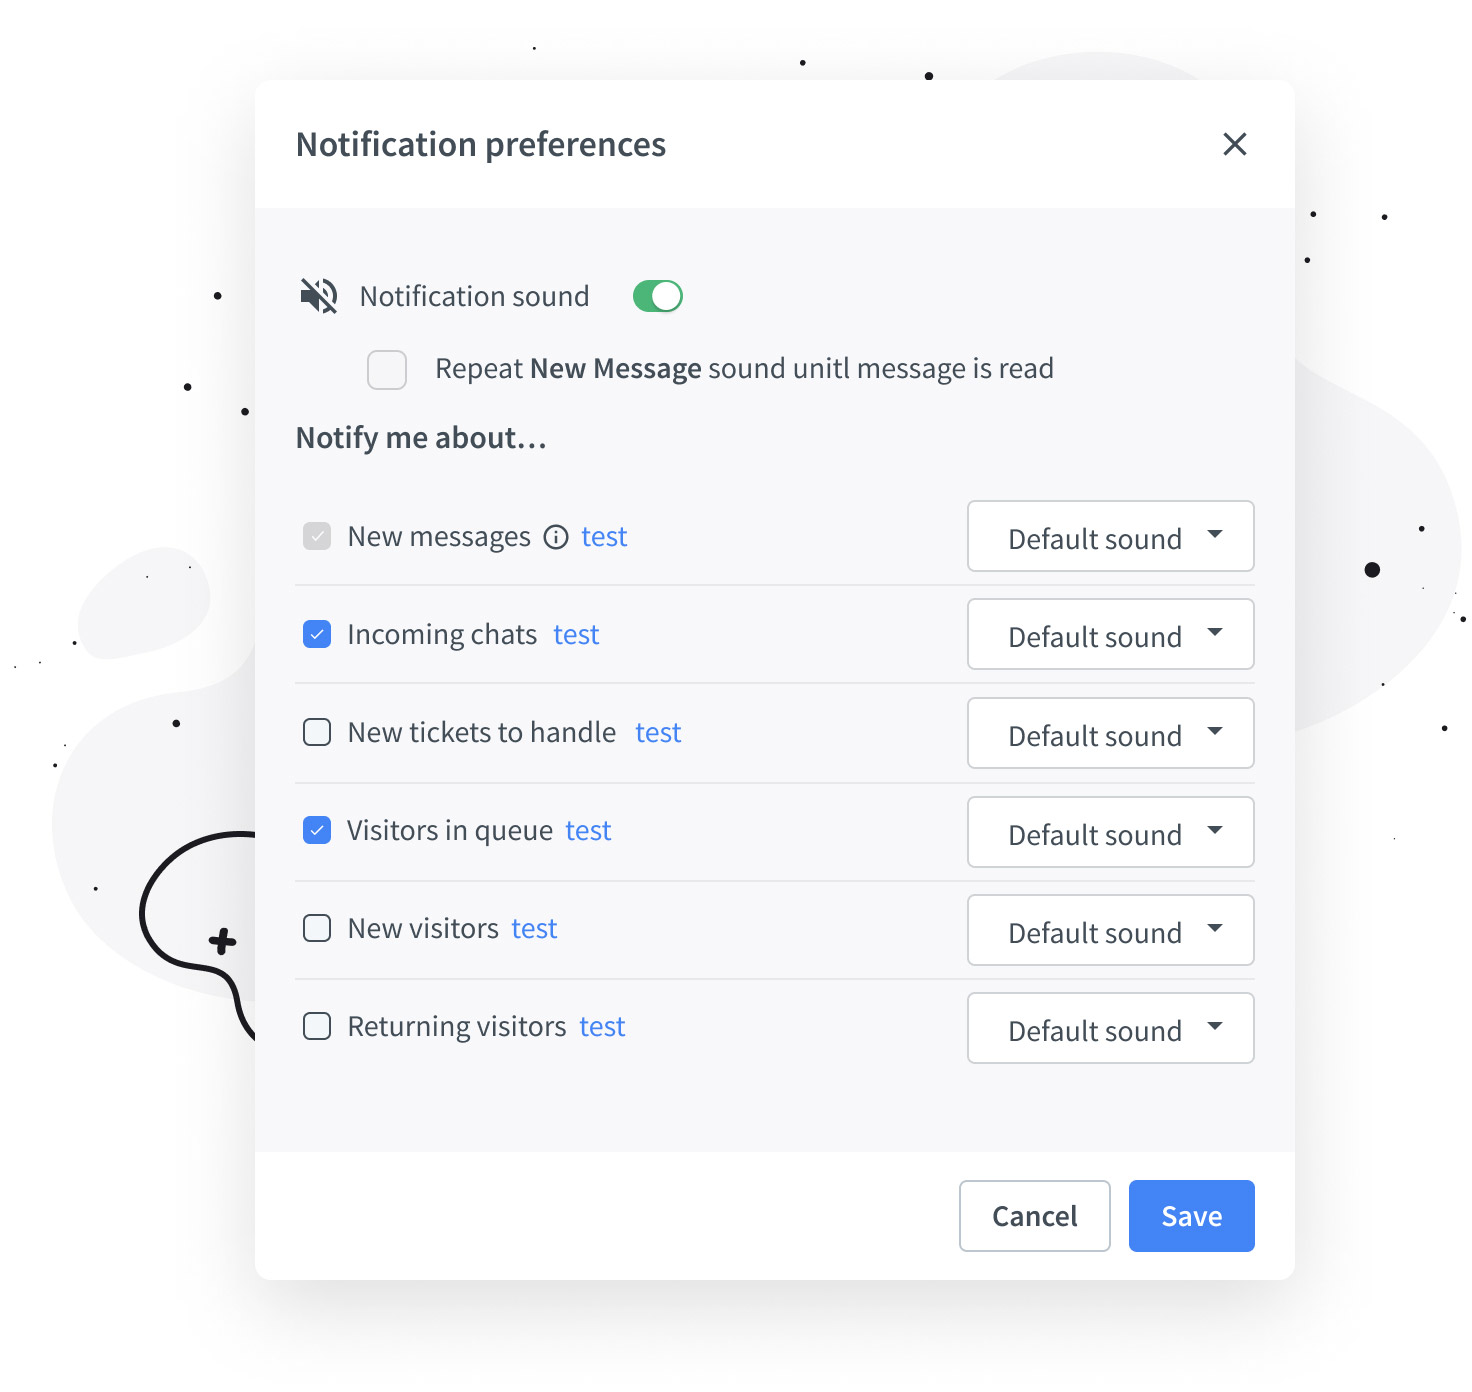
When you click on Notification preferences, you will be able to configure the notifications to match your workflow.

Make sure that the sound is on and that you can see and hear the notifications well. You can test them in the configuration panel.
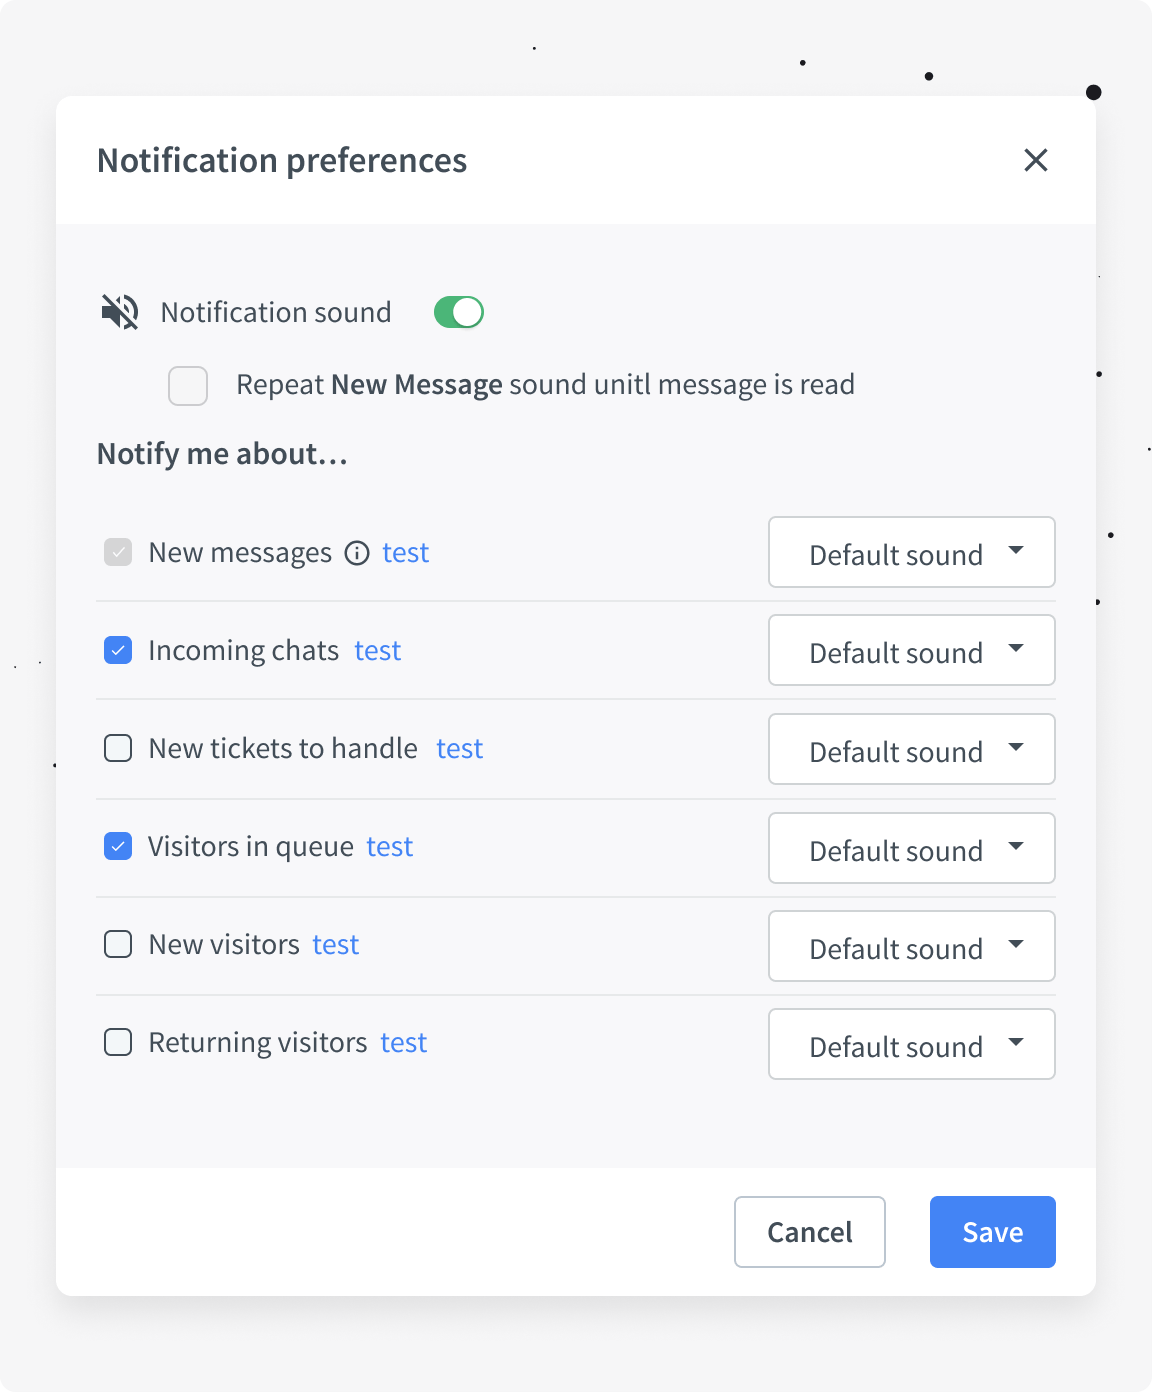
Turn off what you don't need
If there is heavy traffic on your website, you might want to disable the New visitor notification not to drown out the sound of events you need to know about, like incoming chat, new message in chat, or new ticket.
Turn on what you need
If your business is just starting out, you might want to be notified about new and returning visitors on your website, to be able to see in real time which pages they visit, how much time they spend there, and even proactively start a chat with them.
Customize notifications
Download our desktop app to be able to customise the notification sounds and even upload your own. You can also customise the notification sounds in our mobile apps for iPhone and Android.
Now, let’s set up your Agent profile. To edit your Agent profile, click on your name in the profile menu.

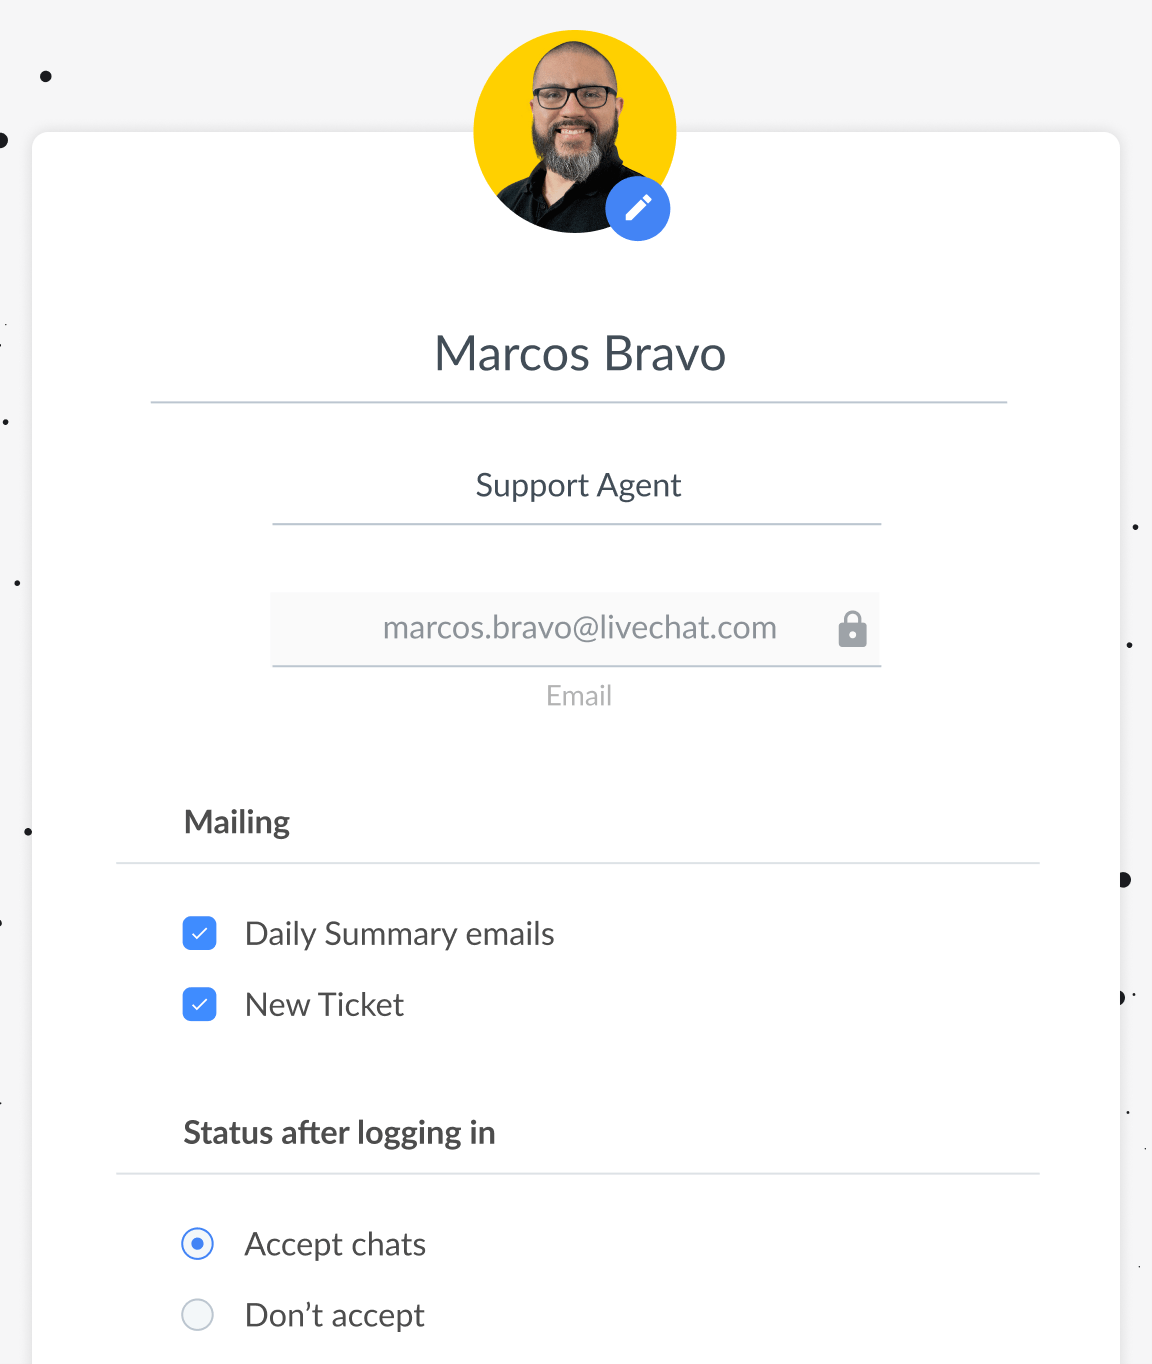
Add a photo to your profile. Customers appreciate seeing who they’re chatting with. You can also pick a photo from our gallery of default faces.
Make sure that your Name is one you want to be displayed to the customers.
Make sure the Job title reflects your company’s naming convention. Both your name and your job title will be displayed to the customer when they start the chat.
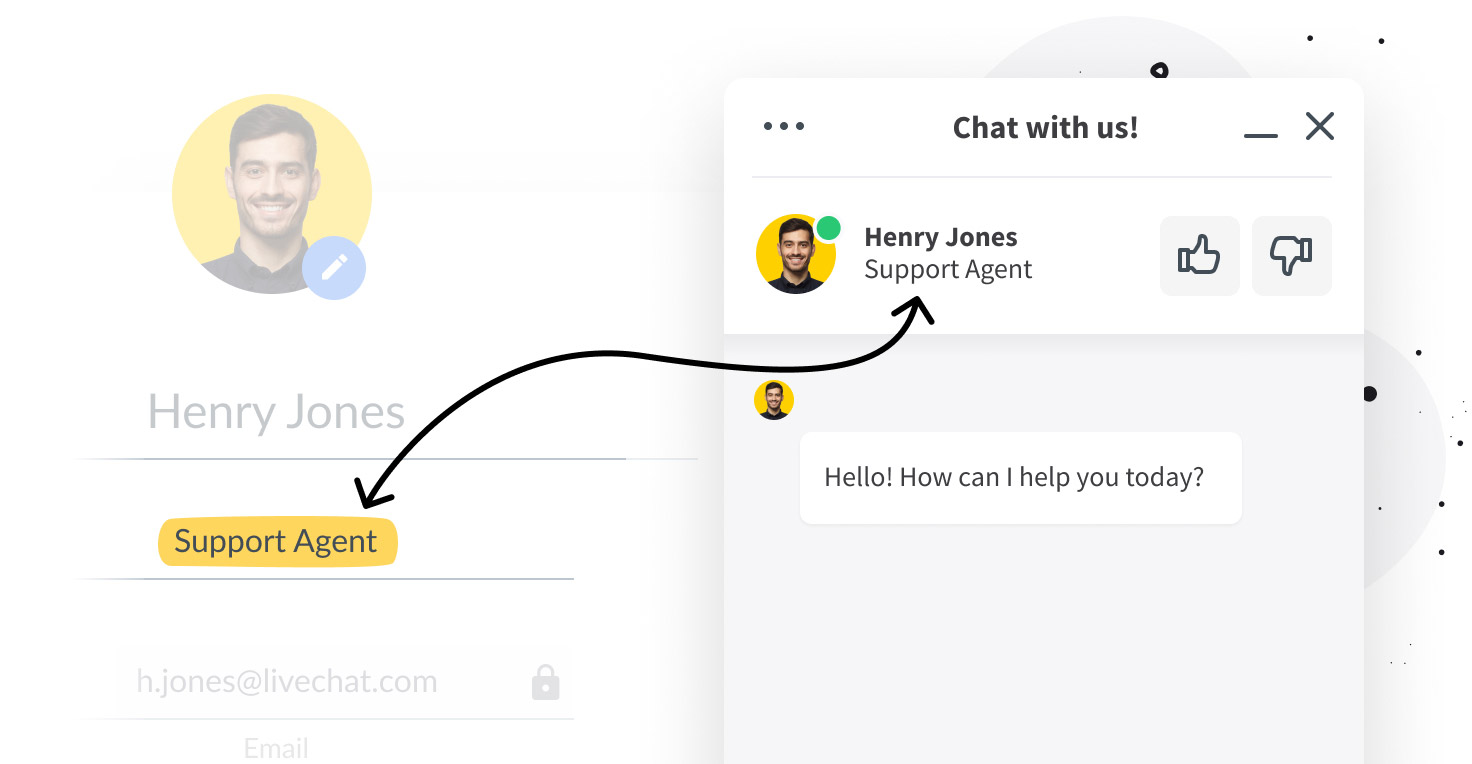
Your email is not displayed for the customers to see.
Set your Status after logging in. If you jump on chat right after logging in to the LiveChat Agent app, leave it at Accept chats. If you need time in the app before getting your first chat, e.g., to handle tickets, look through Archives, or supervise your teammates’ chats, switch your Status after logging in to Don’t accept chats.
Set up working hours
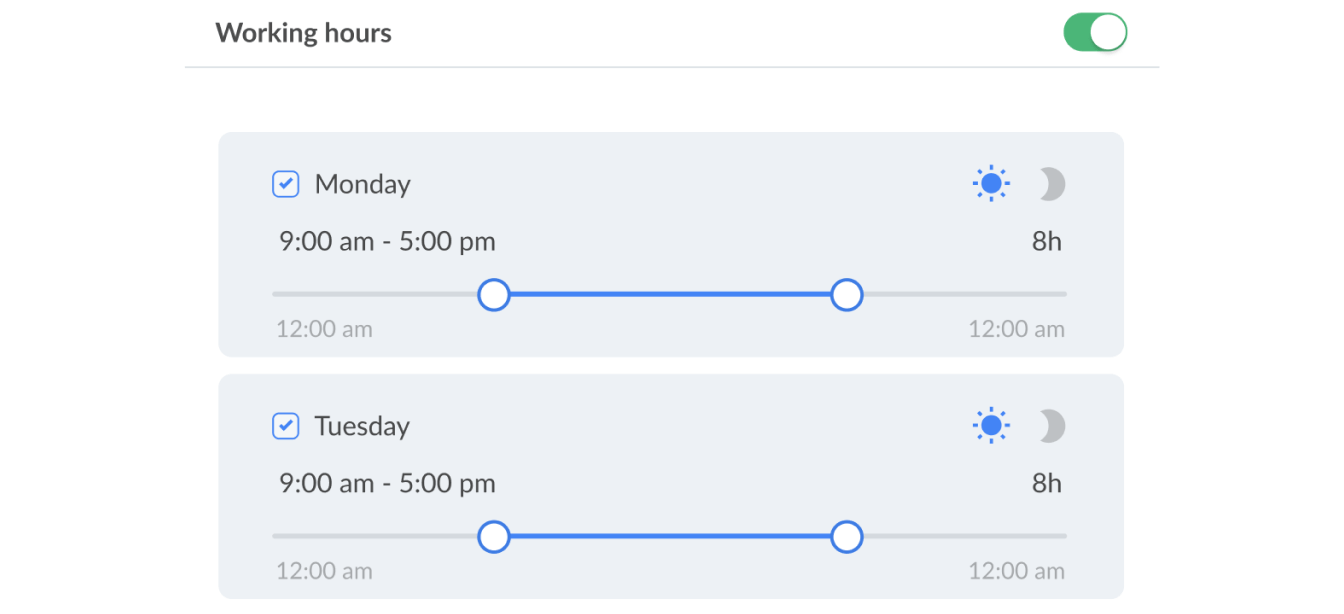
Your team may be using the Work scheduler. If this is the case, the Working hours toggle will be switched to green, and you won’t need to set the Status after logging in. Your Status will be set to accepting chats during your working hours and to not accepting chats after hours. You’ll still be able switch off chats for breaks, and to attend to other duties. All you need to do is make sure you are logged into the LiveChat Agent app. Work scheduler is available in Business and Enterprise plans.

Check if you're on the right team
Your company may be using Groups to direct chats to different departments or teams. Check with your leader if you are added to the appropriate Groups to be able to receive chats, access tickets and archived chats as well as canned responses or tags. Read more about Groups in our Help Center.
In the Team section, you can see your whole team. You can see the roles that various team members have. Depending on the role, you have access to different sections of the LiveChat Agent app. Read more about roles.
Your team leader will usually have an Admin or Owner role, and in this Handbook, we’ll sometimes recommend consulting them for the specific ways your company uses LiveChat.
One such thing is the Concurrent chat limit. This is set in your Agent profile by an Admin on your team. Concurrent chat limit is the max number of chats you may be assigned at the same time. We usually recommend 3 concurrent chats for rookies and up to 6 for seasoned agents, but it can depend on many business-specific factors.


Every time a customer starts a chat, the chat will go to the agent with the fewest ongoing chats. Once all agents have met their chat limit, the next customer is directed to the queue, where they will wait until one of the agents has a slot available, i.e. finishes one of their ongoing chats.
When a customer starts a chat the first message they receive is an automatic message set up in the LiveChat Agent app. This way when you get a chat, you have a bit of time to get ready.
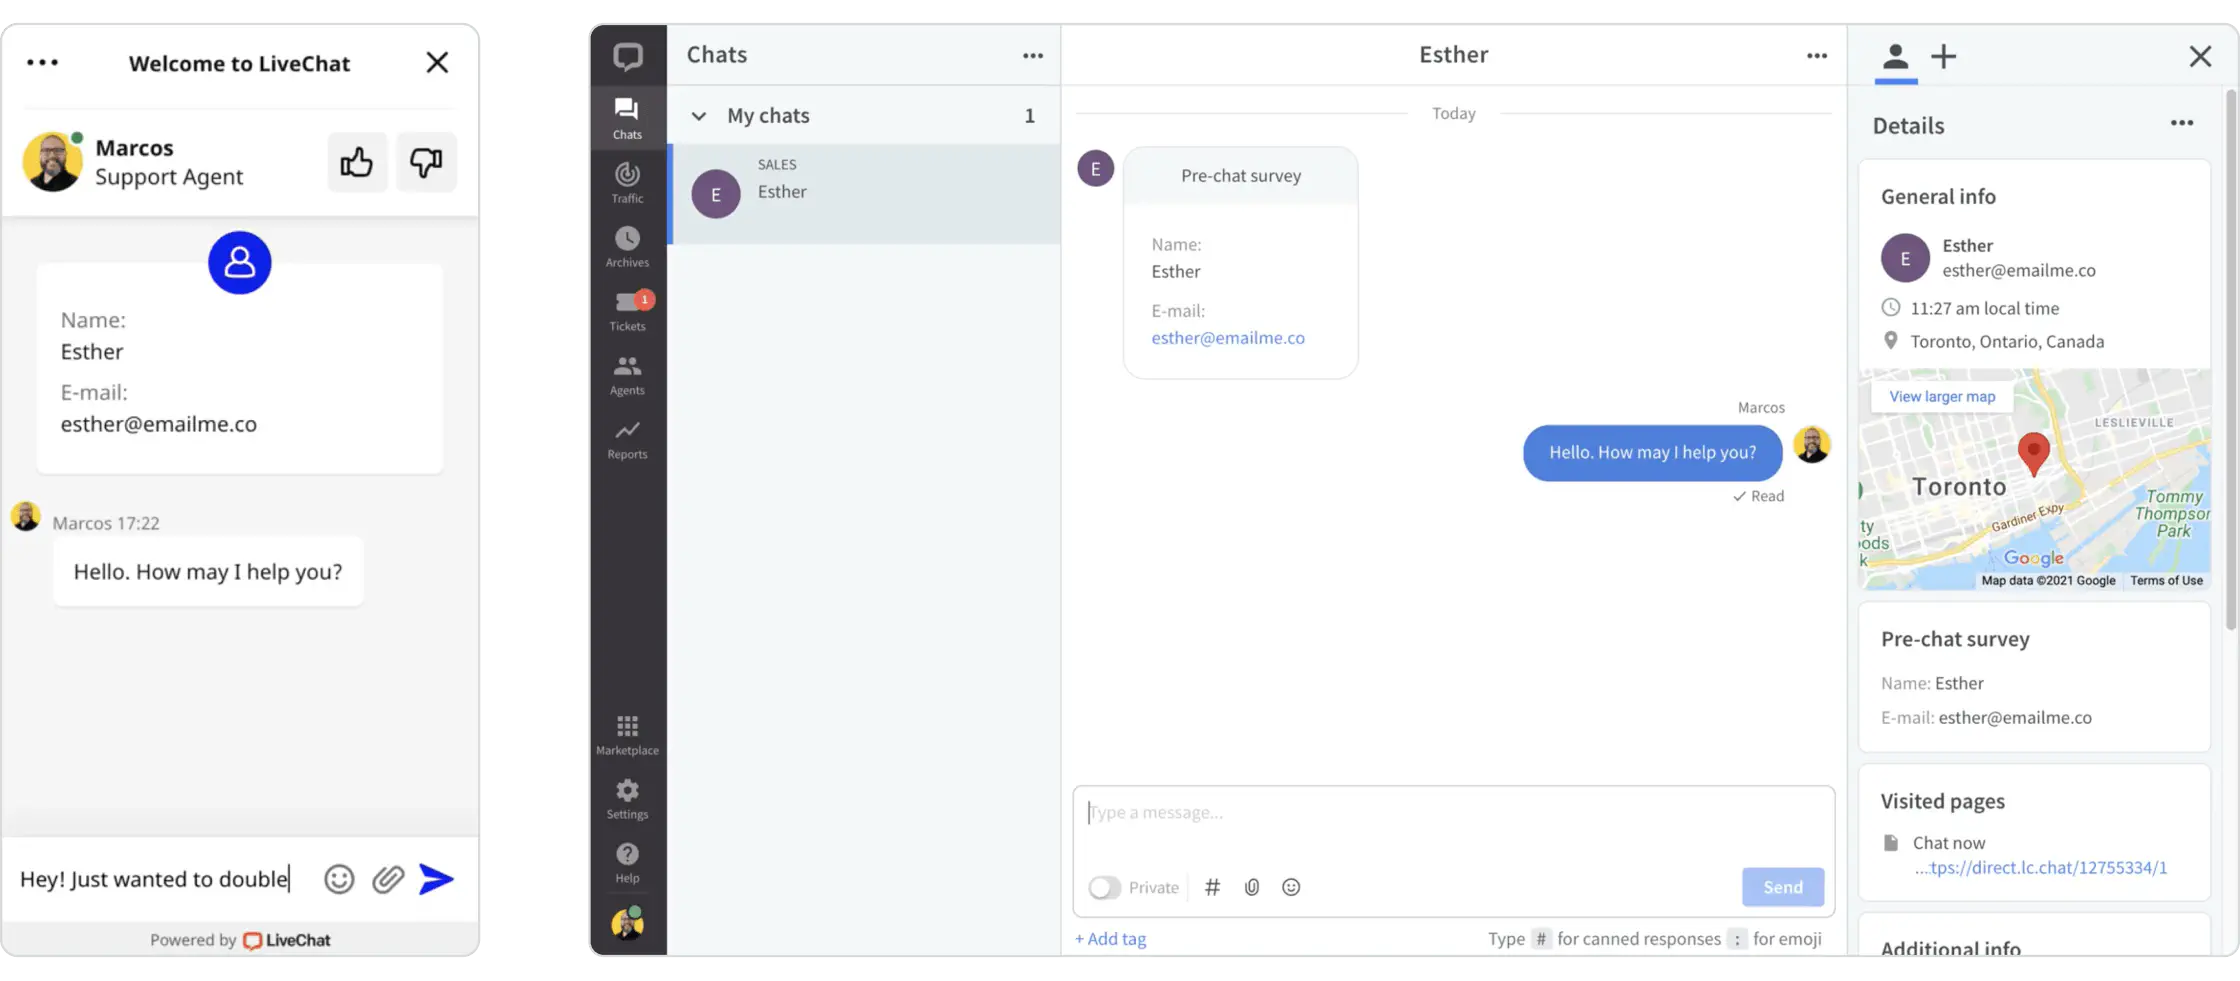
When the customer starts to type their message, you’ll see what they are writing in real time. When you write a response, the customer can see that you are composing a message, but they can’t see what you’re writing.

Chats are started by the customer. The customer can send a message in the Chat Widget on your company’s website, on the chat page, or in your company’s mobile app, if the Chat Widget has been implemented there.

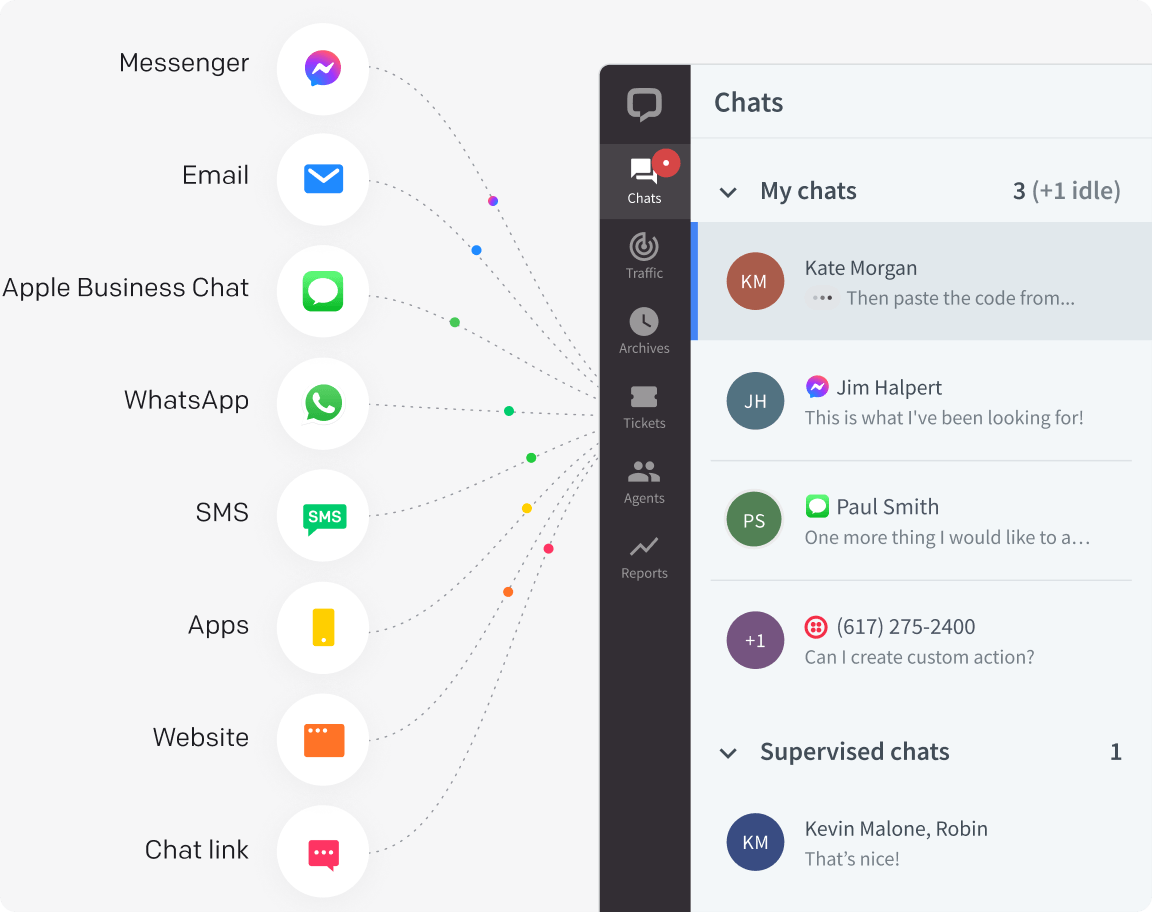
Additionally, LiveChat can be integrated with social media messengers, Apple Messages for Business, or SMS. Check with your team leader which channels you use as a company.
One more source of chats is the chat transfer. A colleague can transfer a chat to your team, or to you specifically. You can read more about it in Team collaboration below.
Check it for yourself
Start a chat on your company’s website to see what the experience is like for the customer. You can ask your teammate to transfer the chat to you, and try having a chat with yourself.
While technically the chat starts when the customer sends a message or clicks on a button in the Chat Widget, LiveChat lets you invite customers to chat. This can be done automatically, with targeted messages, or manually, from the Traffic section of the LiveChat Agent app.
In the Traffic section you see customers as they browse your website in real time.

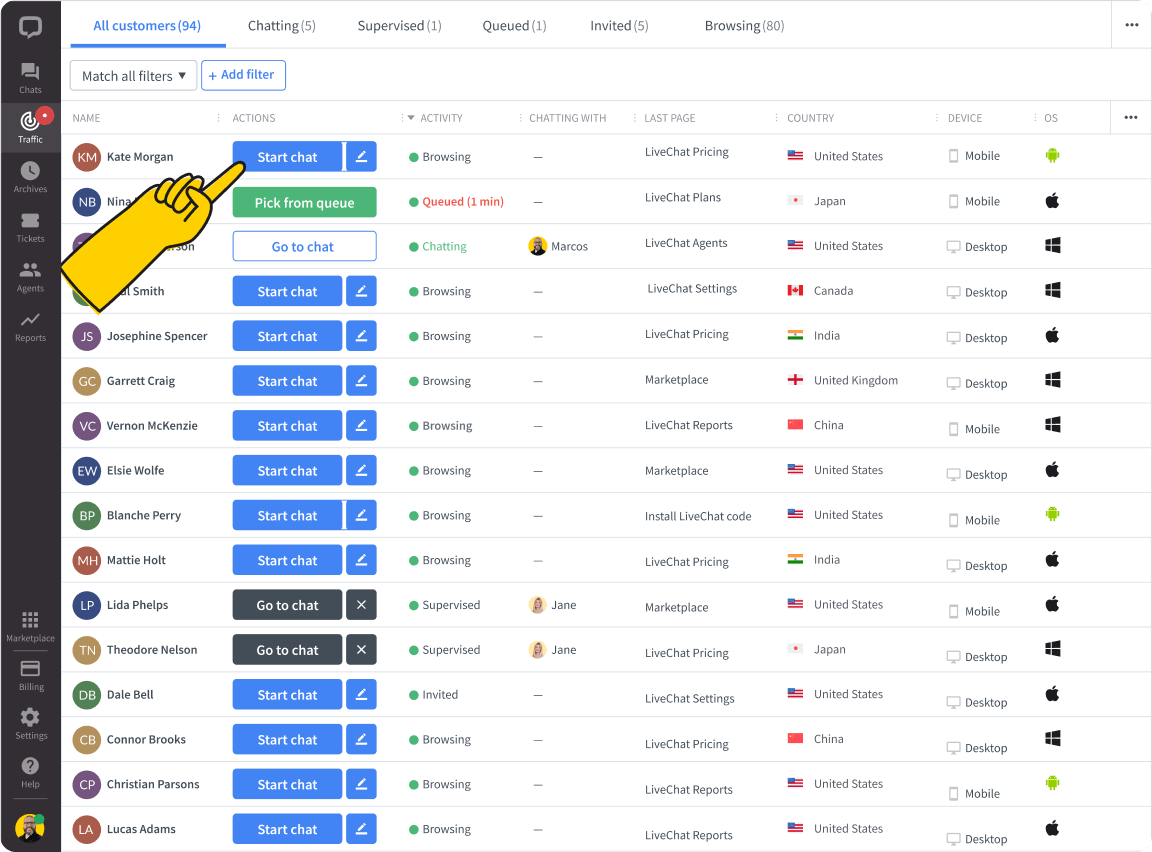
Click on Start chat to send a preset welcome message or on the pen icon to customize the message you want to send to the customer. Once you do, you’ll see the chat on the list in the Chats section.
Chat with your leader
Sending manual invitations is a strategic choice, so check with your team leader if you should use it.
On the left of the Chats view there is a list of all chats that may require your attention.

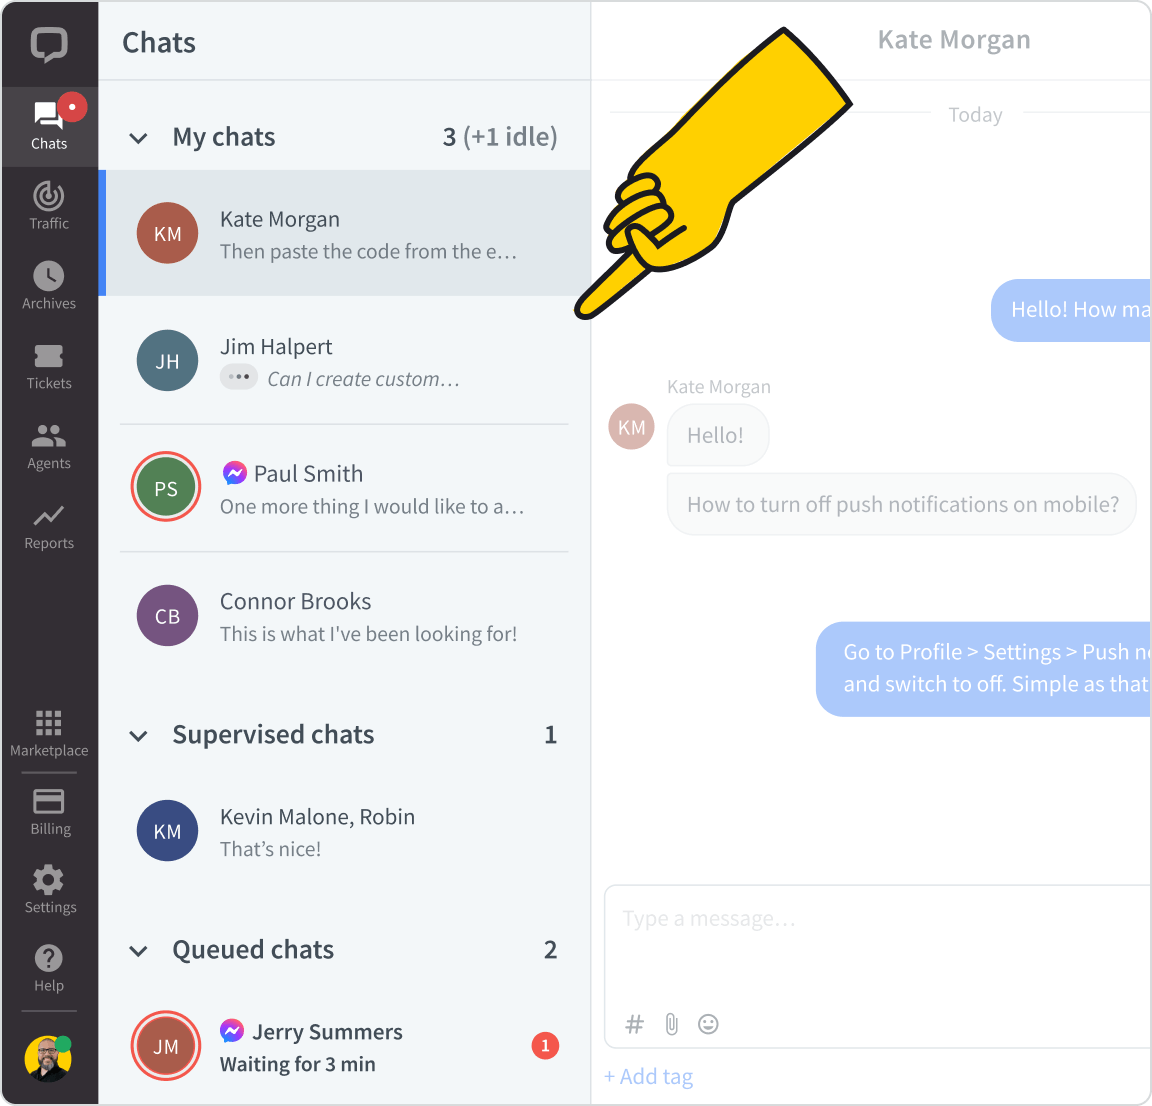
My chats are the ongoing chats that have been assigned to you. Make sure that customers don’t wait too long for a reply. If they wait for more than 40 seconds, there will be a red rim around their circle. If they don’t reply for too long, the circle will be grayed out. Read more about active and inactive chats.
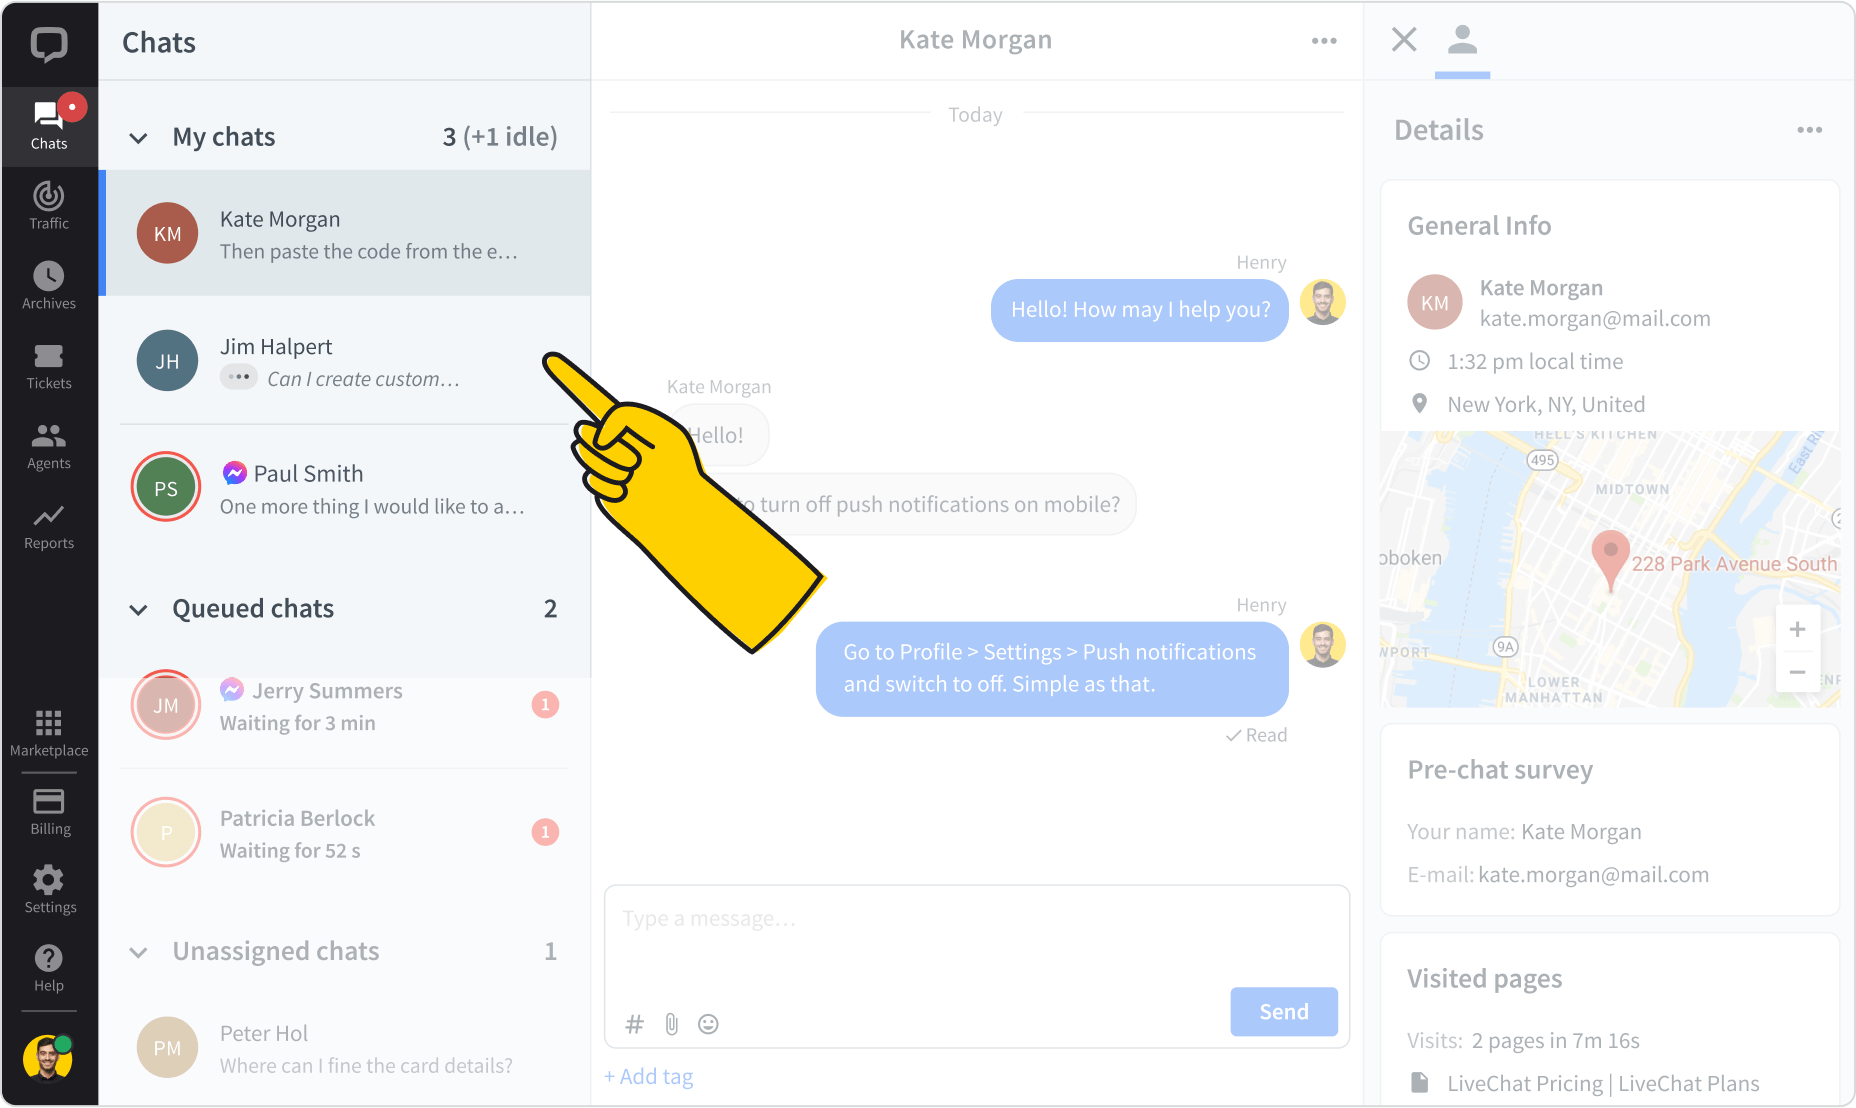
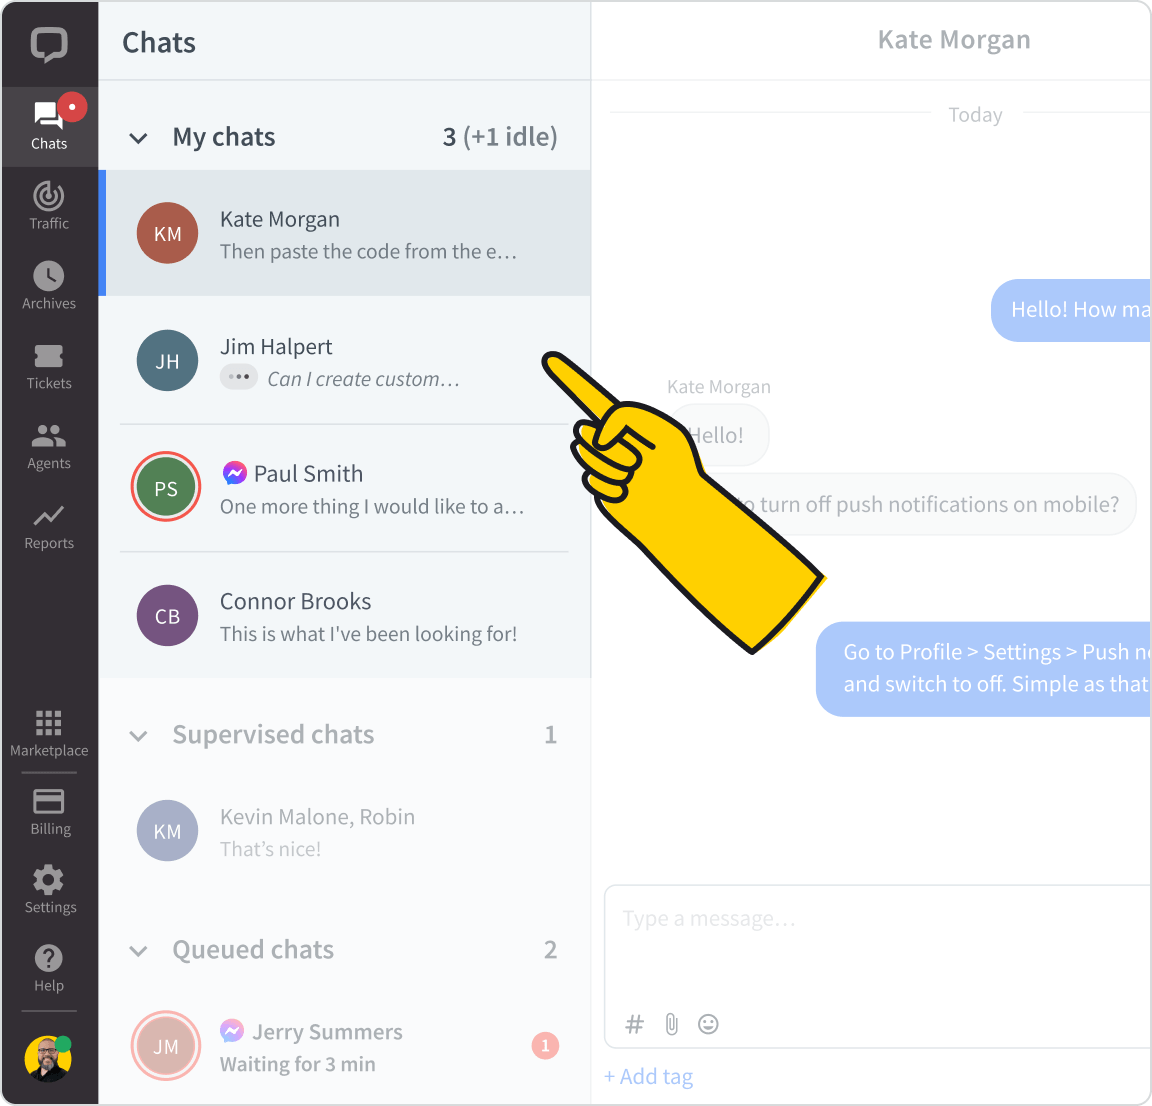
Queued chats are a list of customers waiting in the queue. Customers are queued for two reasons. One, there are more customers starting a chat than the agents on duty can handle, that is, all the agents have met their concurrent chat limit. Two, the chat routing set up for your team is Manual selection. With manual selection, all of the customers who start a chat begin in the queue. Agents can select one when they’re available. Read more about queue configuration.
To select a chat from the queue, click on the chat and then on Pick from queue.
Unassigned chats are chats started by customers when your team was offline, if the availability of your Chat Widget is set to Always. Otherwise, they can be messages sent on Facebook Messenger, Apple Messages for Business, WhatsApp, or Twilio. Ask your team leader if your company uses these options. To assign a chat to yourself, click on a chat on the list, and then click on Assign to me.
Supervised chats is a list of your teammates’ chats you have picked to supervise. You can supervise those chats and see how other agents communicate with visitors. For more details, see the Team collaboration section.
This is where you will see the entire conversation with the customer, together with the data the customer provided in the pre-chat survey. If the customer chatted with your team before, you’ll be able to see their previous chats when you scroll up.
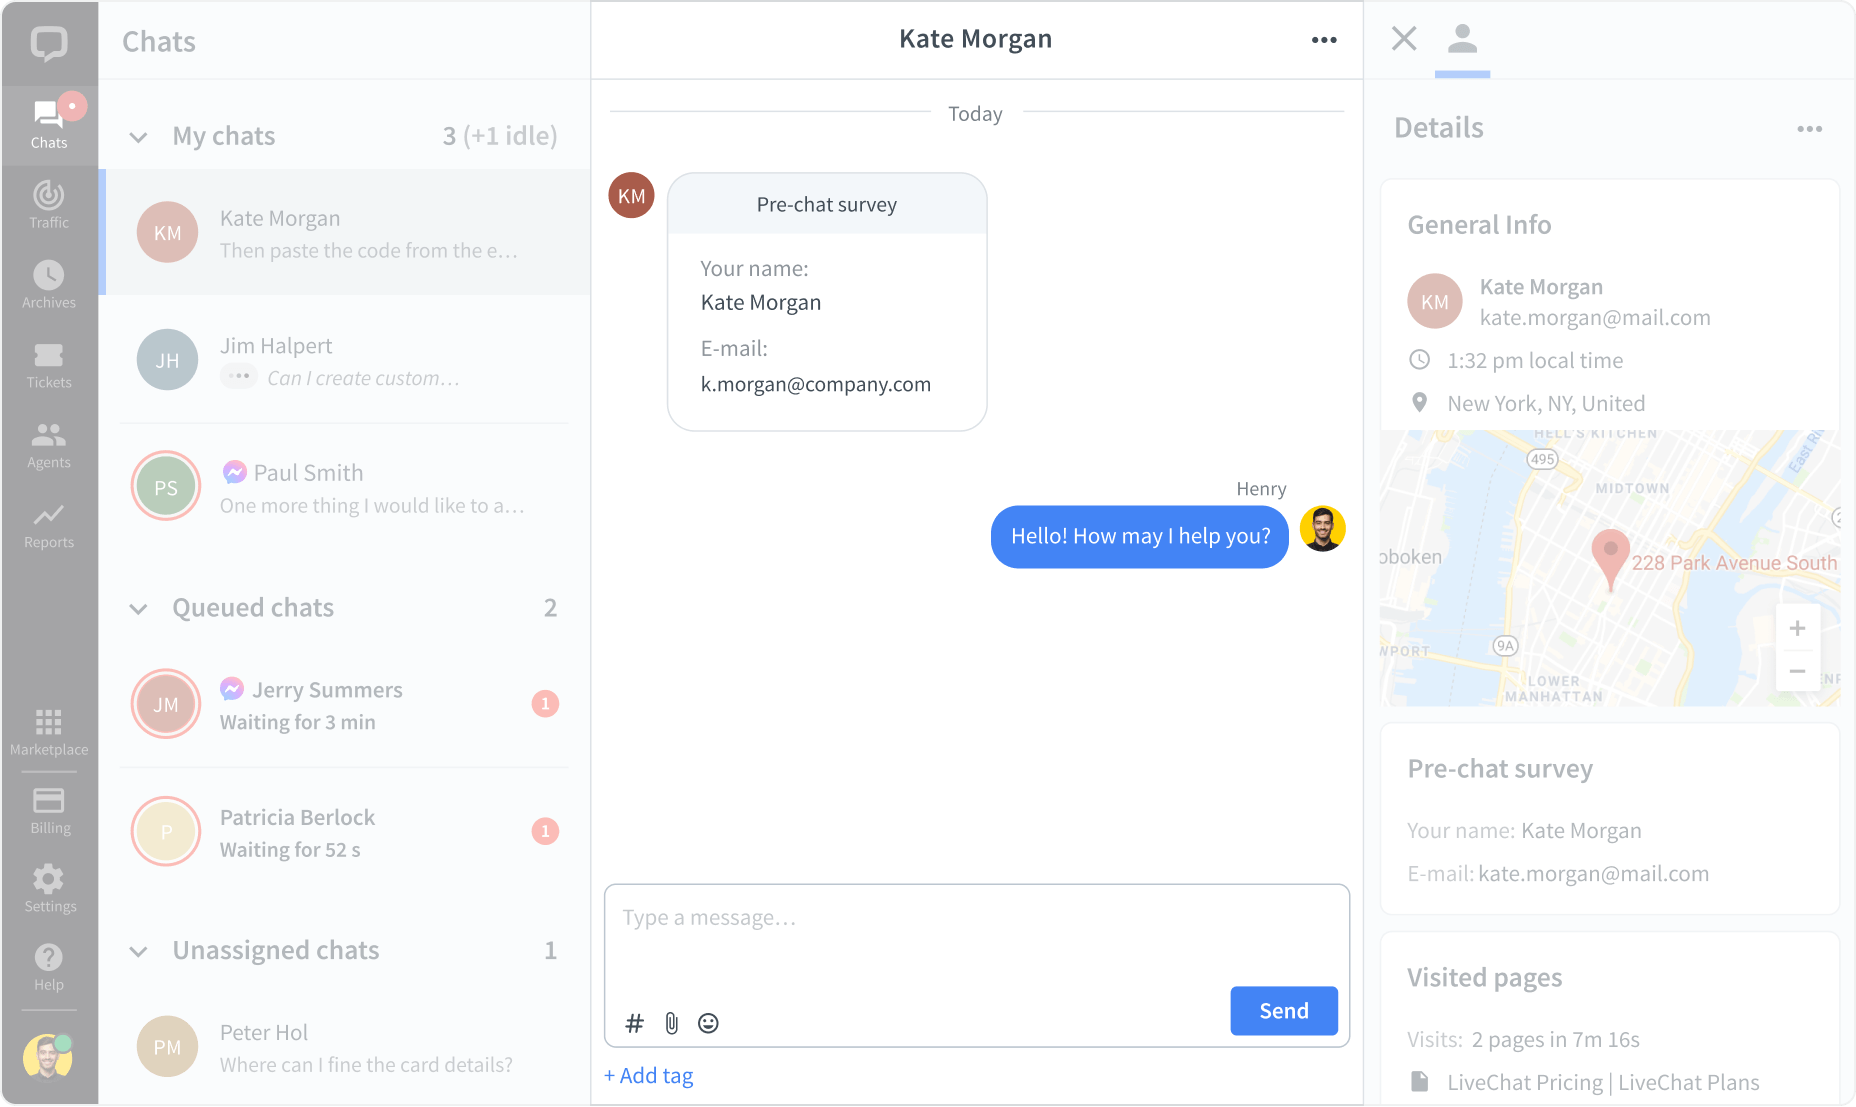
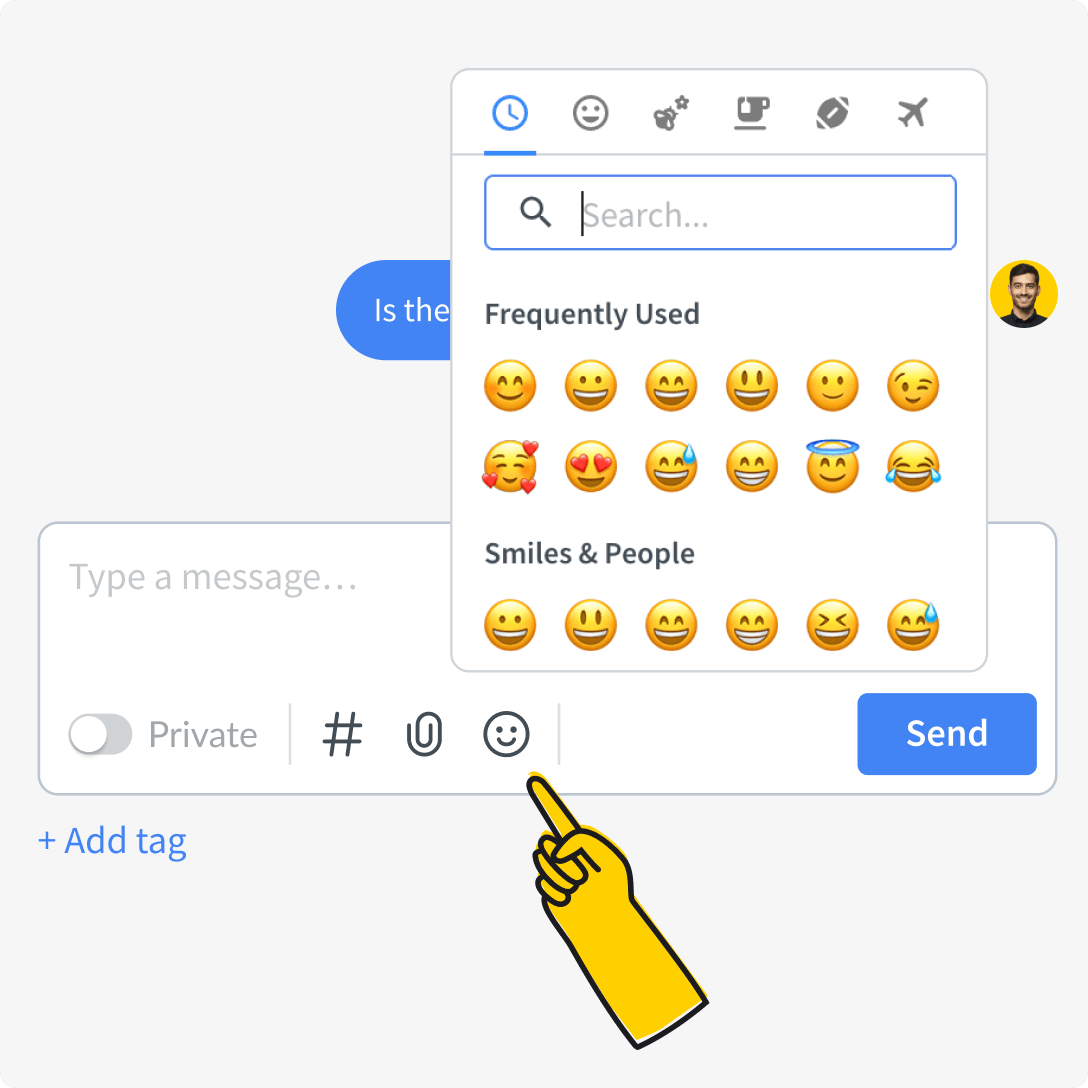
Here you type in the messages you want to send to the customer, add emojis, upload files, use canned responses and whisper to your teammates.
Canned responses can take your customer support to the next level. Learn all about them in Team collaboration.

If you need to send a file to the customer, just attach it right in the chat. You can upload files up to 10MB to send them in chat.

One rule of good customer relations is mirroring your customer’s language. If they use emojis, be sure to respond in kind using our emoji picker!
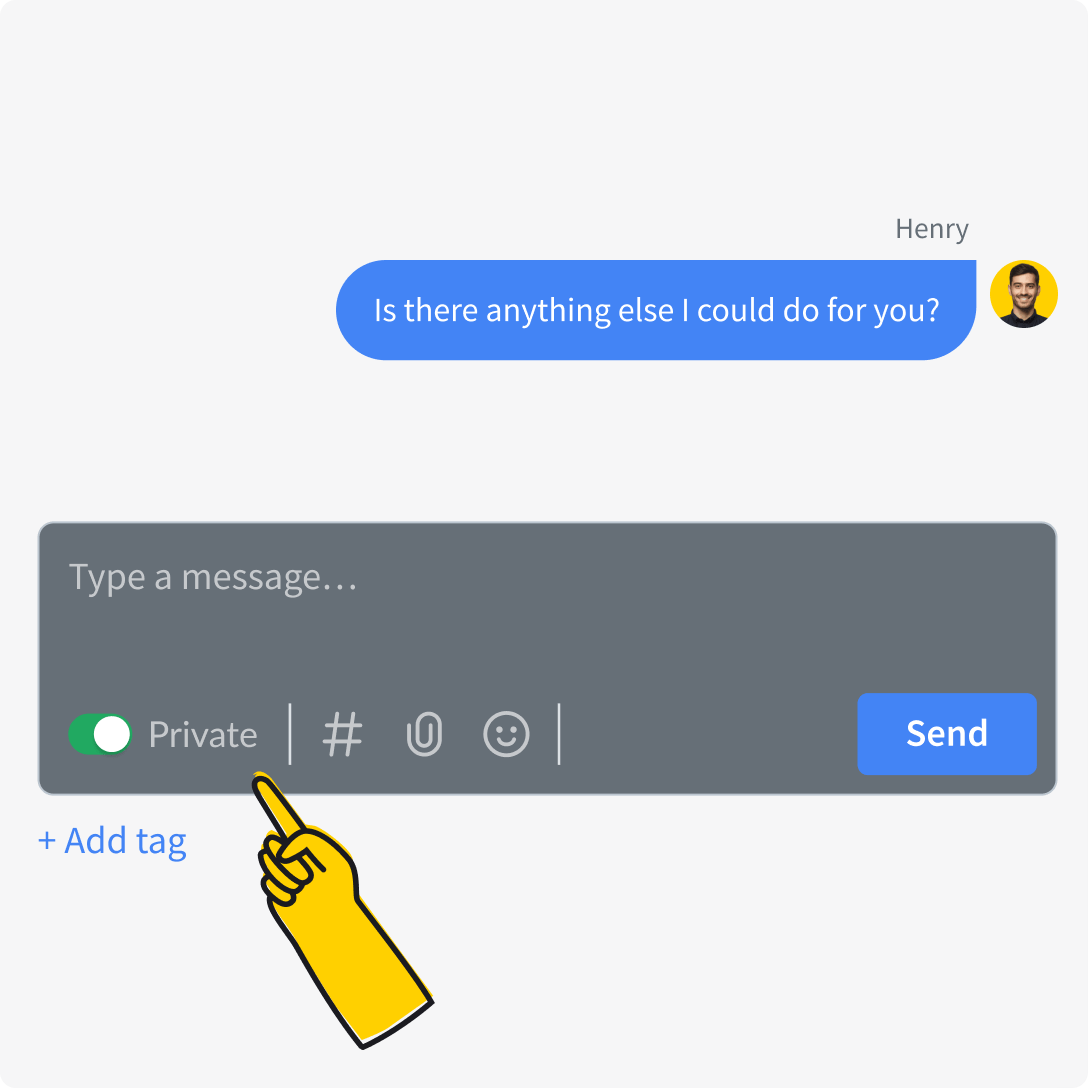
When a teammate supervises your chat, you can switch the toggle to Private to send them a message the customer won’t see. For more, see Team collaboration below.


Take individual approach
It’s always a good idea to take an individual approach. Address the customer with the name they provided in the pre-chat to make them feel welcome.
Mirror customer’s language
Mirroring customer's language goes beyond using emojis. Whether the customer is formal and serious or informal and makes jokes, respond in kind.
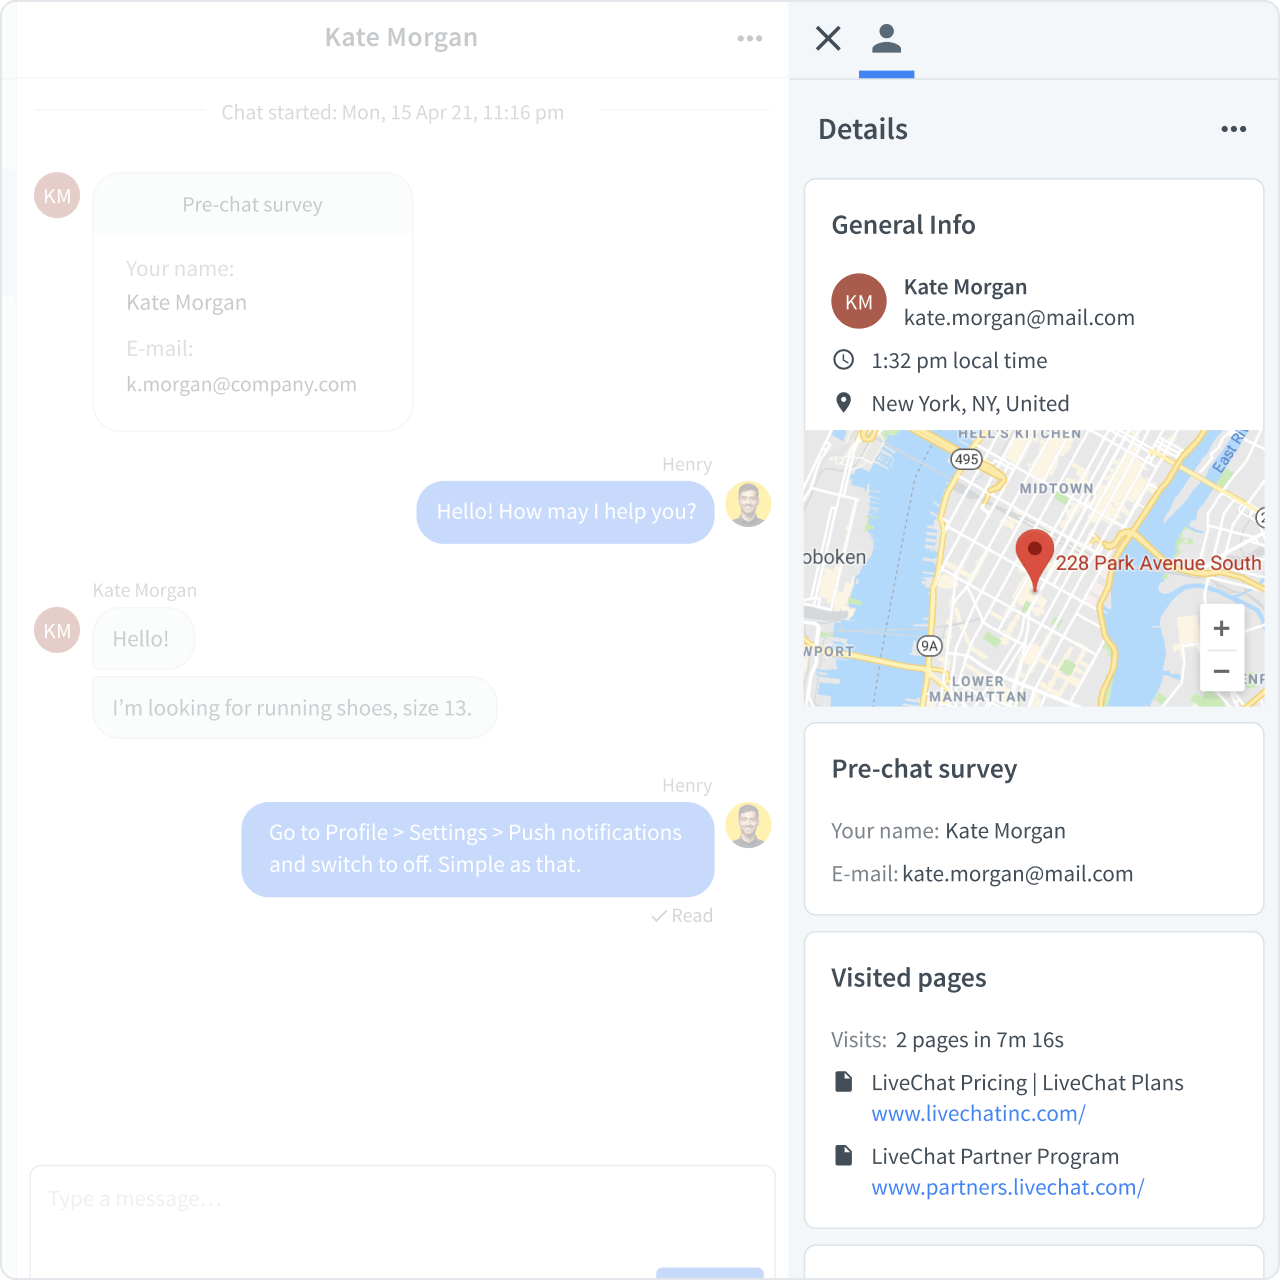
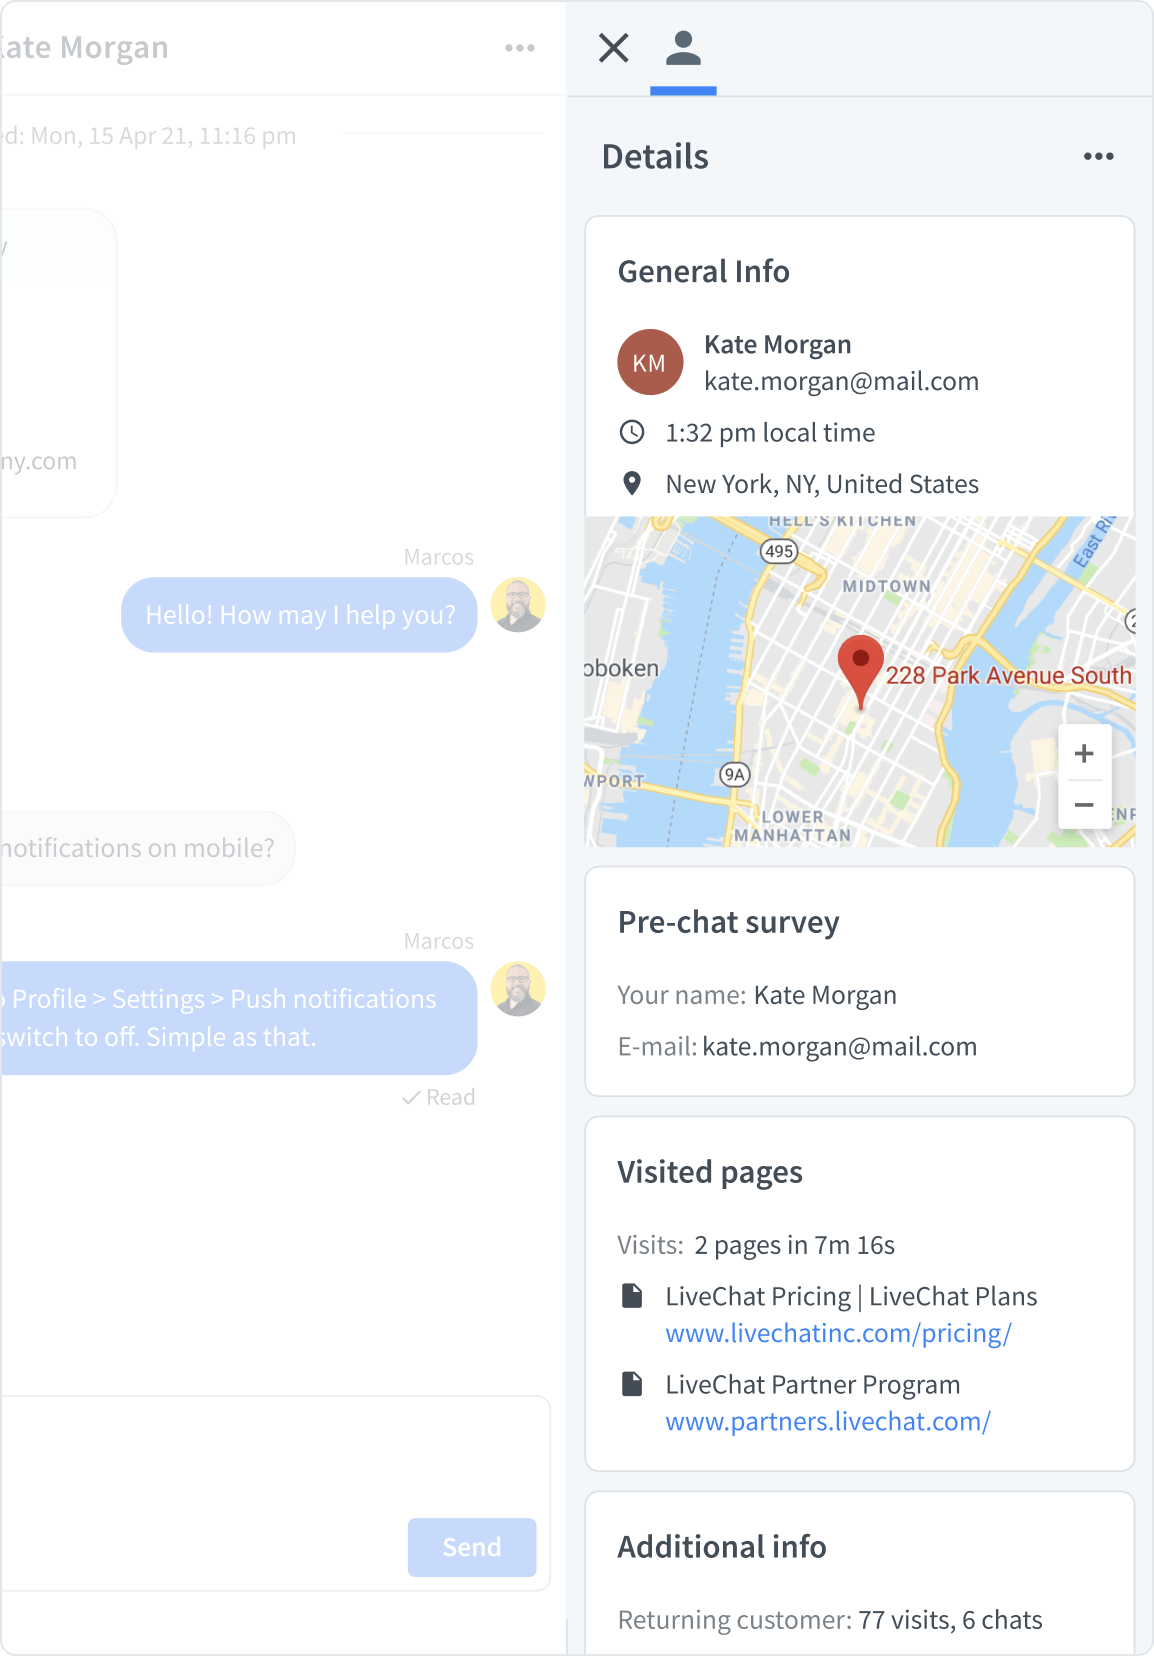
Here you will find all the information about your customers.
You can check their email address, location, the page they are currently on, and much more.
You can adjust the type of information displayed in this area as well as the order in which particular segments appear. Check how to customize Details.
You can also forward leads into your CRM or view customer information from your company’s CRM, if it has been integrated with LiveChat. Find out more about CRM integrations.
A chat ends:
Tag your chats
Before you close the chat, remember to tag it to let the rest of your team know what the chat was about. Learn more about tags.

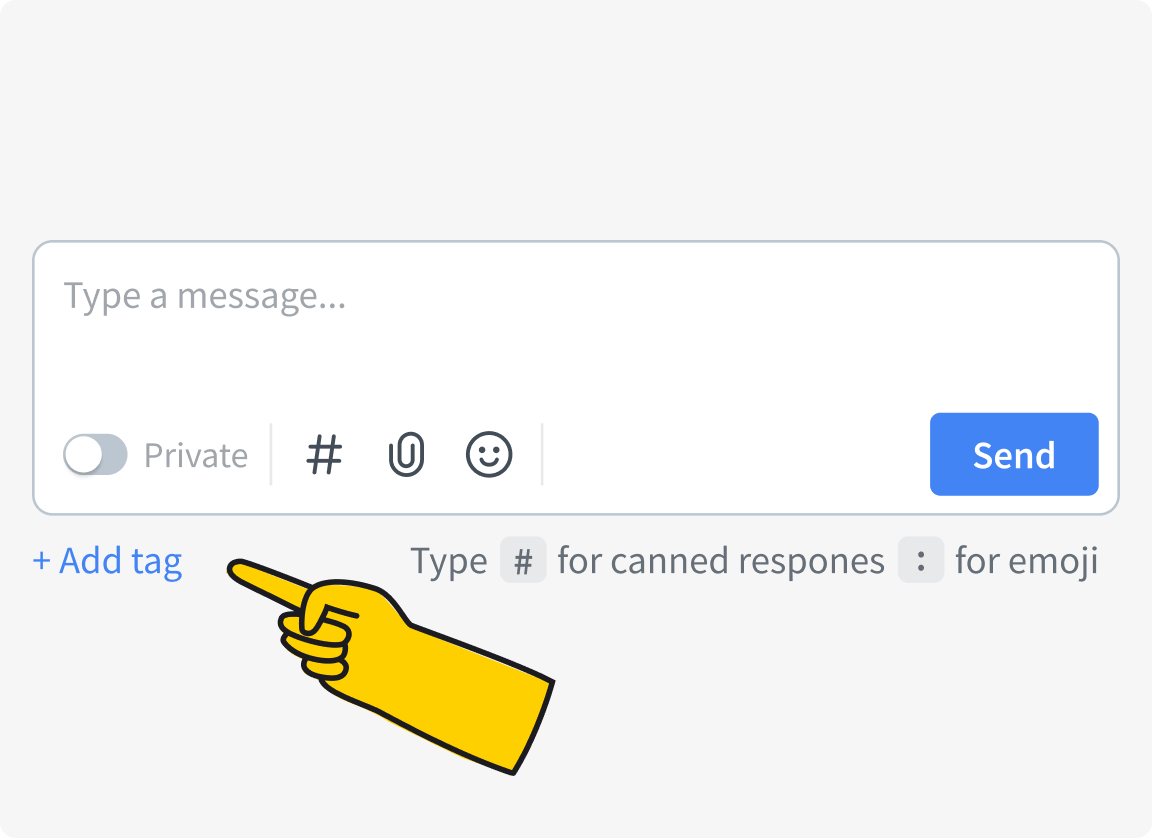
This section refers to the legacy LiveChat ticketing system available to new customers till June 1, 2023. To let customers leave a message after working hours, switch your LiveChat availability to Always. For more complex chat cases and managing email channel, you can integrate with HelpDesk, our ticketing system, to optimize your workflow with tags, statuses, and more. If you’re already using HelpDesk tickets, please refer to the HelpDesk dashboard guide.
Tickets are usually cases that take more than one chat to finish. Sometimes you need to consult a colleague or a supervisor, sometimes both you and the customer need to wait for something to happen. It is our experience that customers don’t mind waiting as long as they know what they are waiting for, and approximately how long it will take.
There are four ways you can receive a ticket:
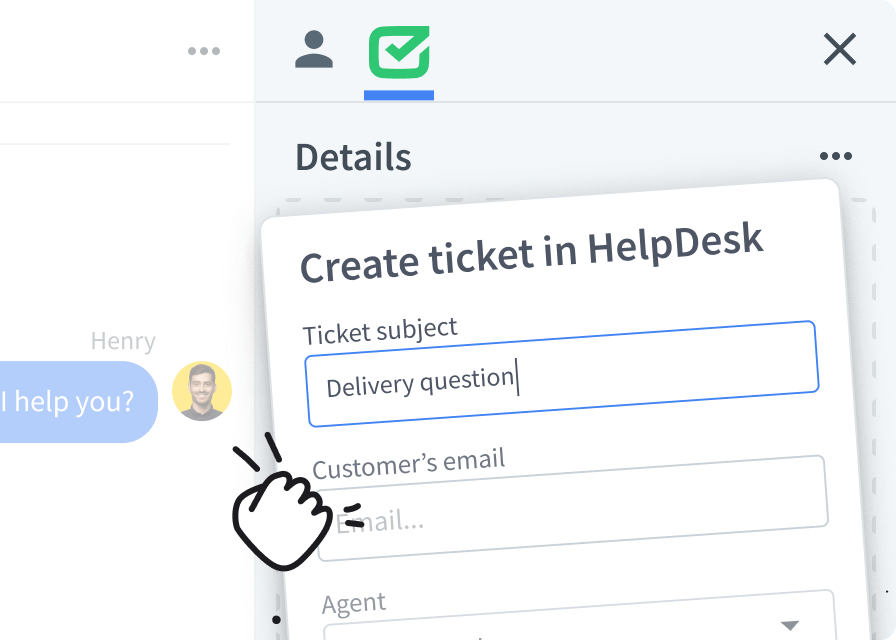
From chat
You can create it manually during chat or from Archives by clicking on the buttonand selecting Create ticket.
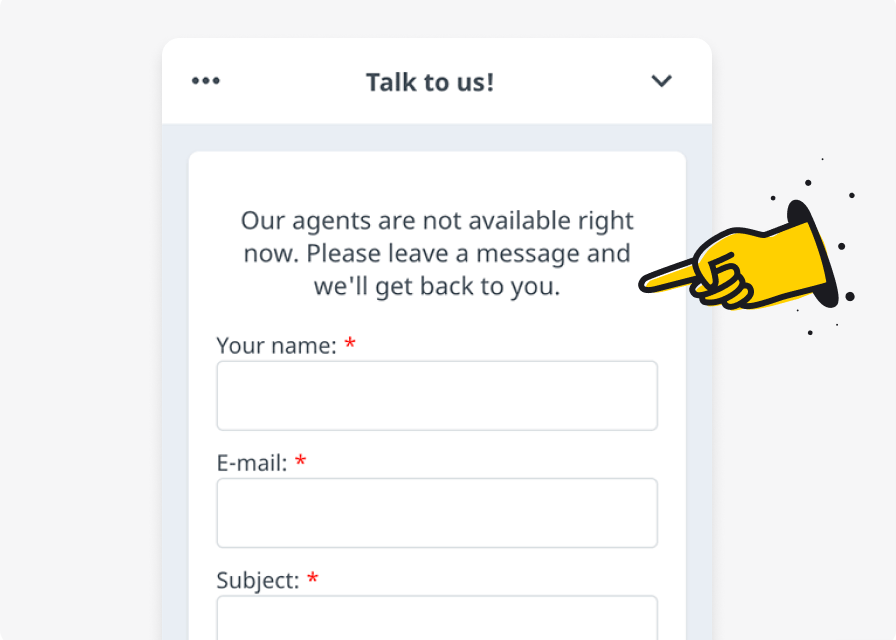
From ticket form
Customers can leave a message in the ticket form on your website when your team is off duty (no one is available to chat and the ticket form is enabled).
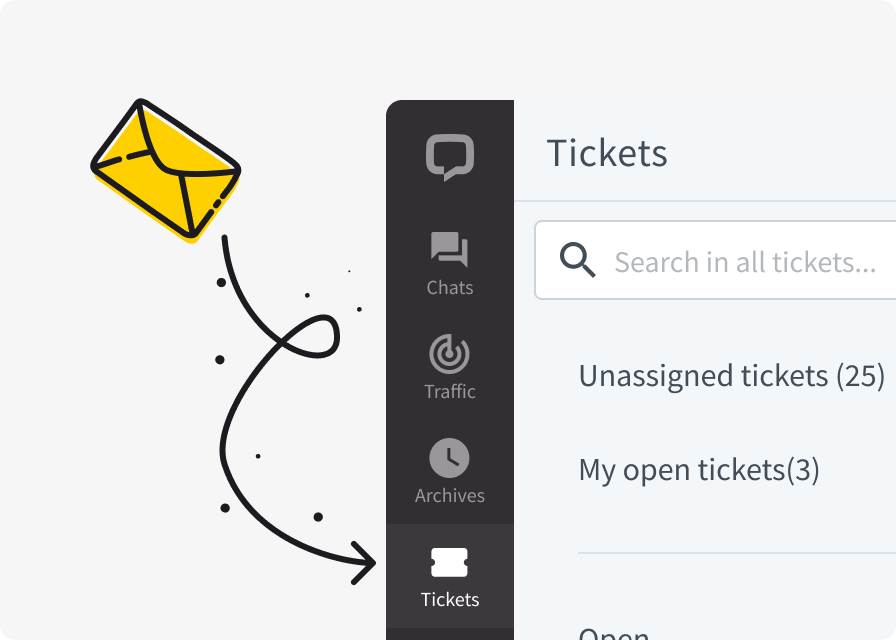
From your inbox
Your company may forward your support emails into LiveChat as tickets.

Basic information regarding the ticket and its current state.
The person responsible for the ticket. To change the assignee, click on Change.
The customer requesting the ticket. You can change the customer’s email at any time (e.g. when the customer wants you to follow up on the issue with their colleague), you can also add more people to the loop.
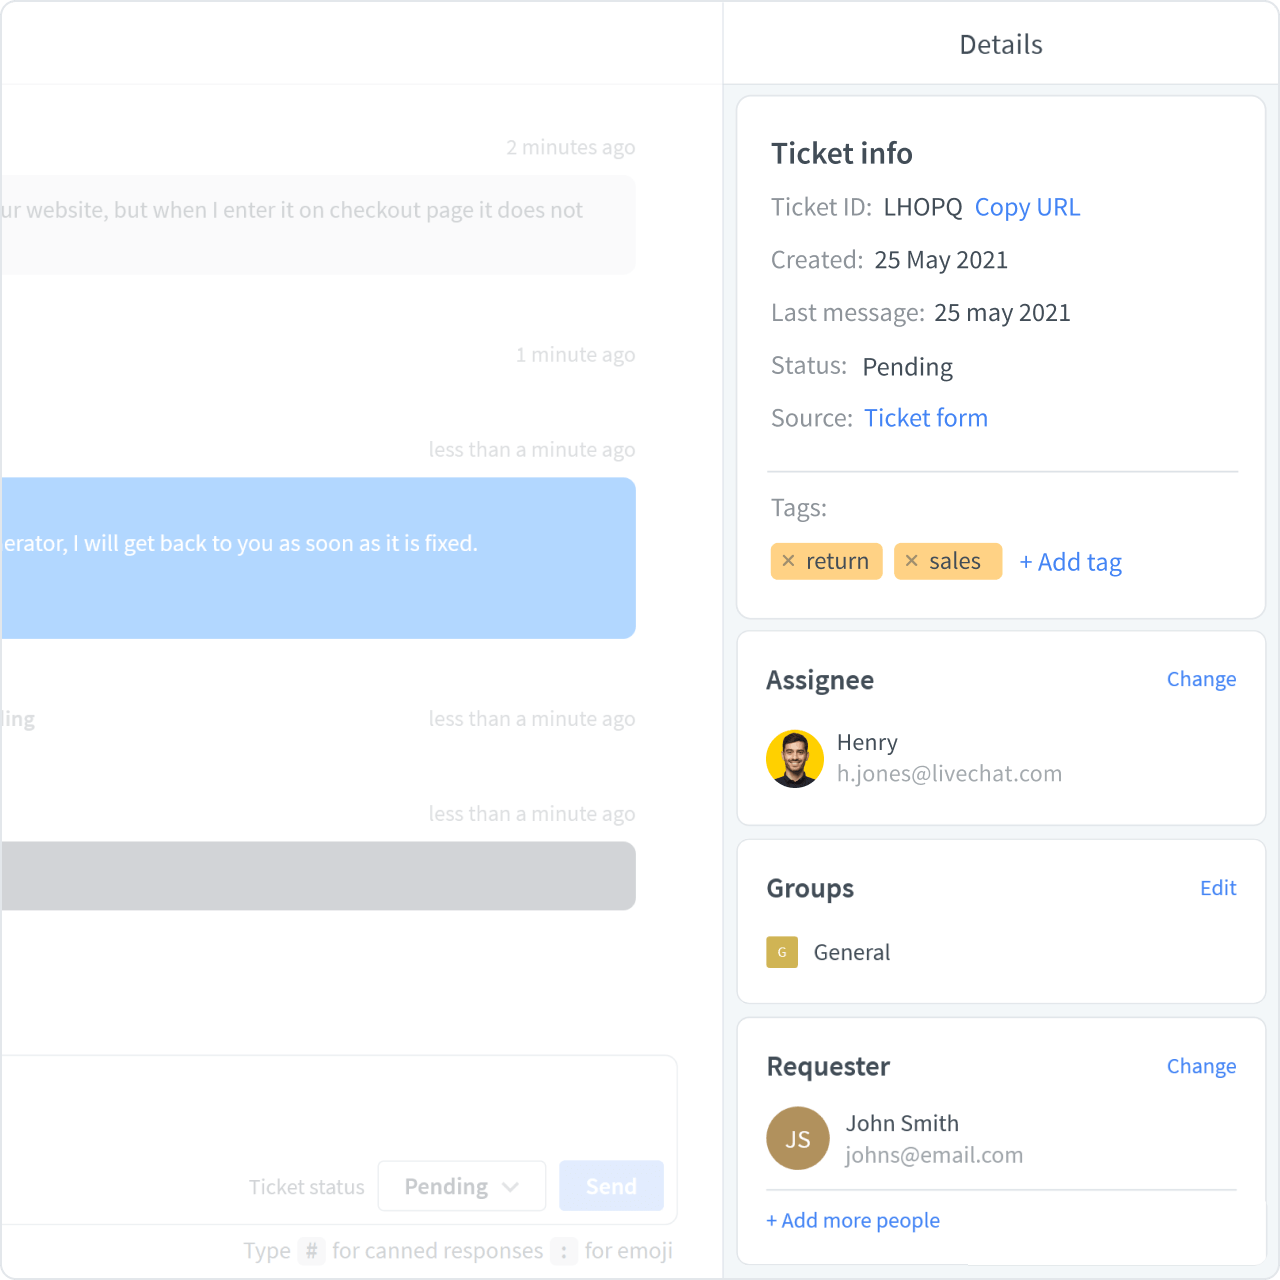

The status of tickets changes automatically as you work.
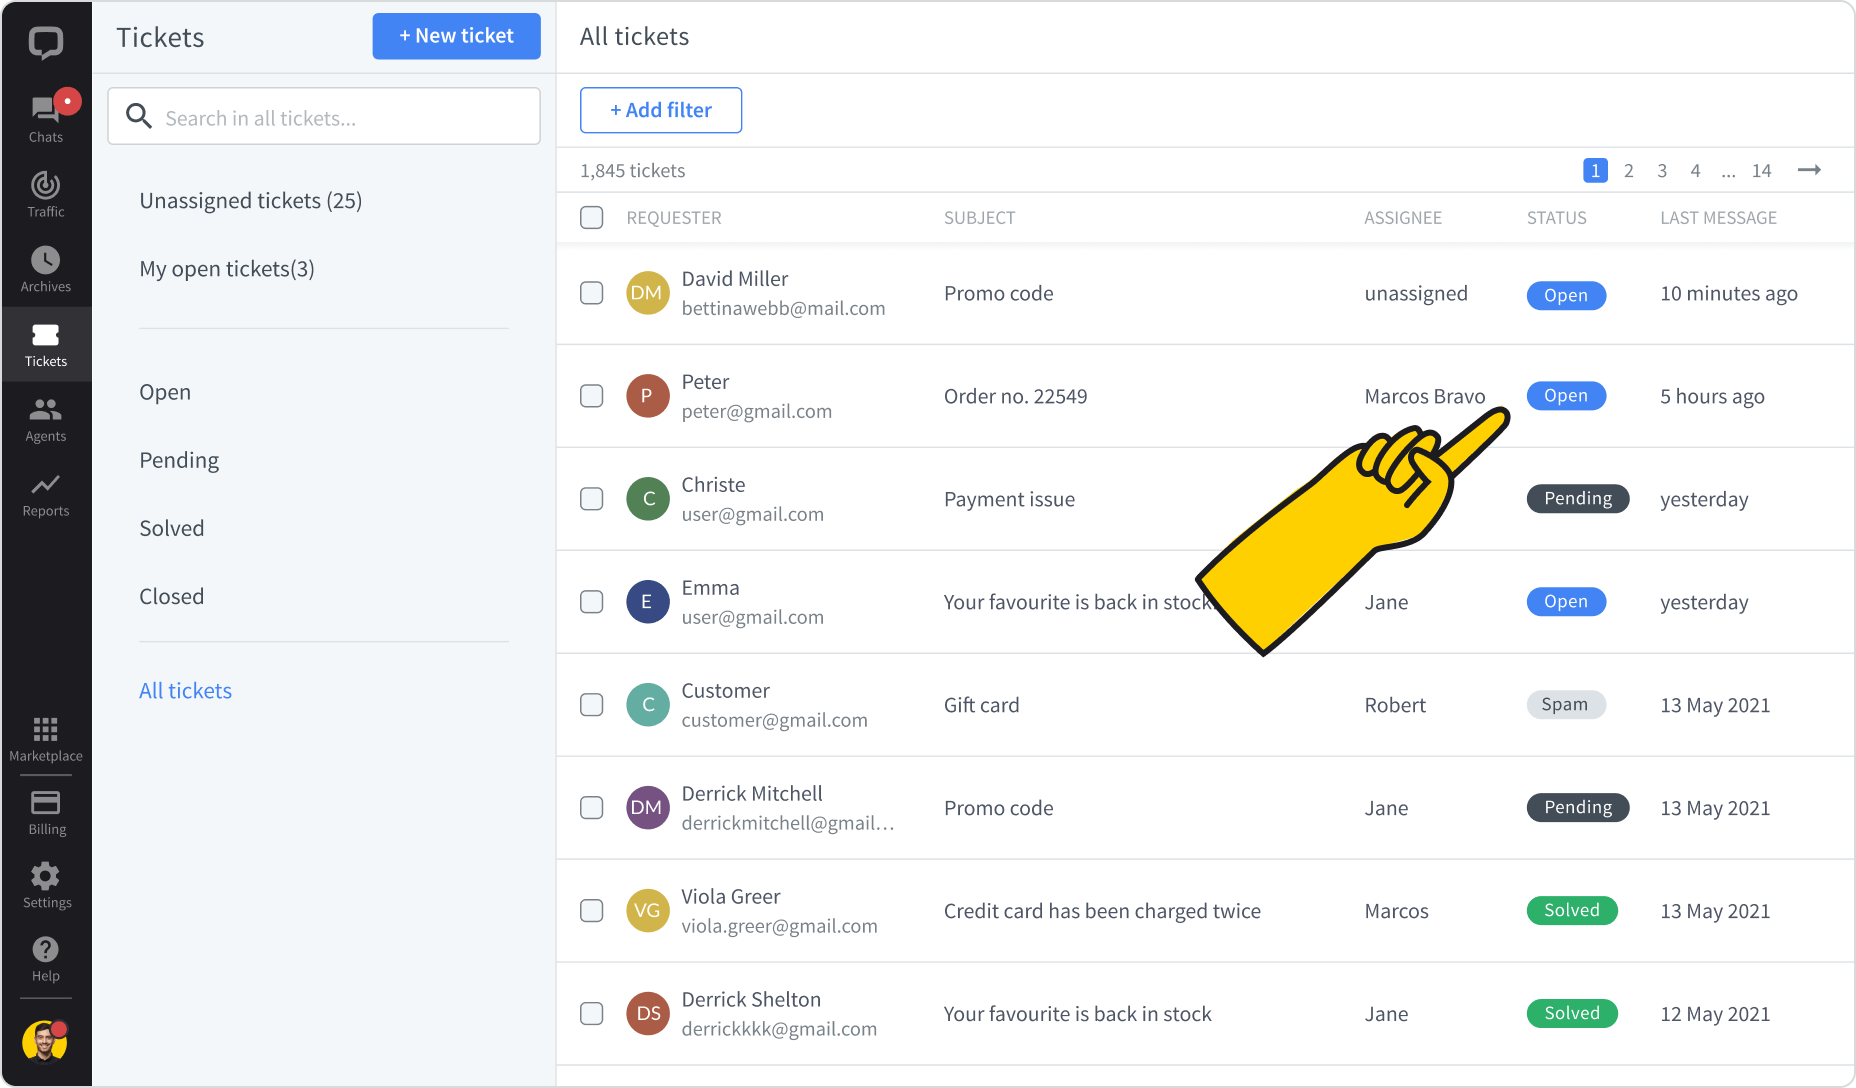
Every time you receive or create a ticket, it will have the Open status. This means that the case is ongoing and needs attention.
When you send a message to the customer, e.g., ask the customer for some additional information, the status of the ticket will change to Pending. As soon as you get an answer, it will switch back to Open. If the customer does not respond in three days, LiveChat will send an automatic reminder. If the customer still does not respond, the ticket status will be automatically changed to Solved after additional 4 days.
When a case is finished, you can close the ticket by changing its status to Solved. The customer will be notified about it and asked to rate their experience.
If the ticket you received contains malicious and unwanted content, you can mark it as Spam. Use this status carefully, all emails from an address marked as spam will automatically be assigned this status in the future.
Is it spam?
If a ticket is not malicious, but it’s been sent by mistake, for example, it is better to switch its status to Solved without replying to it. In this case, the customer will not be notified that the ticket has been solved, but if they need your attention at another time, their email will not be blocked.
Connect with HelpDesk
If your team relies heavily on tickets and asynchronous communication in your everyday work, you might want to integrate LiveChat with HelpDesk, another one of our products. It has more sophisticated customisation options, collaboration tools and automated workflows.
At LiveChat we truly believe that our greatest strength is our team. This is why the LiveChat Agent app supports teamwork every step of the way.
Probably the biggest asset and time saver for your team will be the canned responses. They allow you to recall premade answers by typing in hash (#) and the shortcut for the desired response.

Connect with ChatBot
By the way, if you get a lot of similar questions, perhaps your company could use our ChatBot? It will answer all those FAQs for you, letting you focus on more interesting cases.
All of this leaves you more time for personal touch. Add the customer’s name to your #hello, divide a multi-step instruction into manageable chunks and send them one by one, put the time you save on looking for links and information into engaging the customer. It is easy when you are secure in the knowledge that your voice is consistent throughout your team, without sacrificing the personality of individual team members.
Add canned responses on the go
Create canned responses on the go from chats whenever you notice that you use a phrase regularly and for those phrases you know you’ll use, like “You’re welcome” or “Hi there!”.

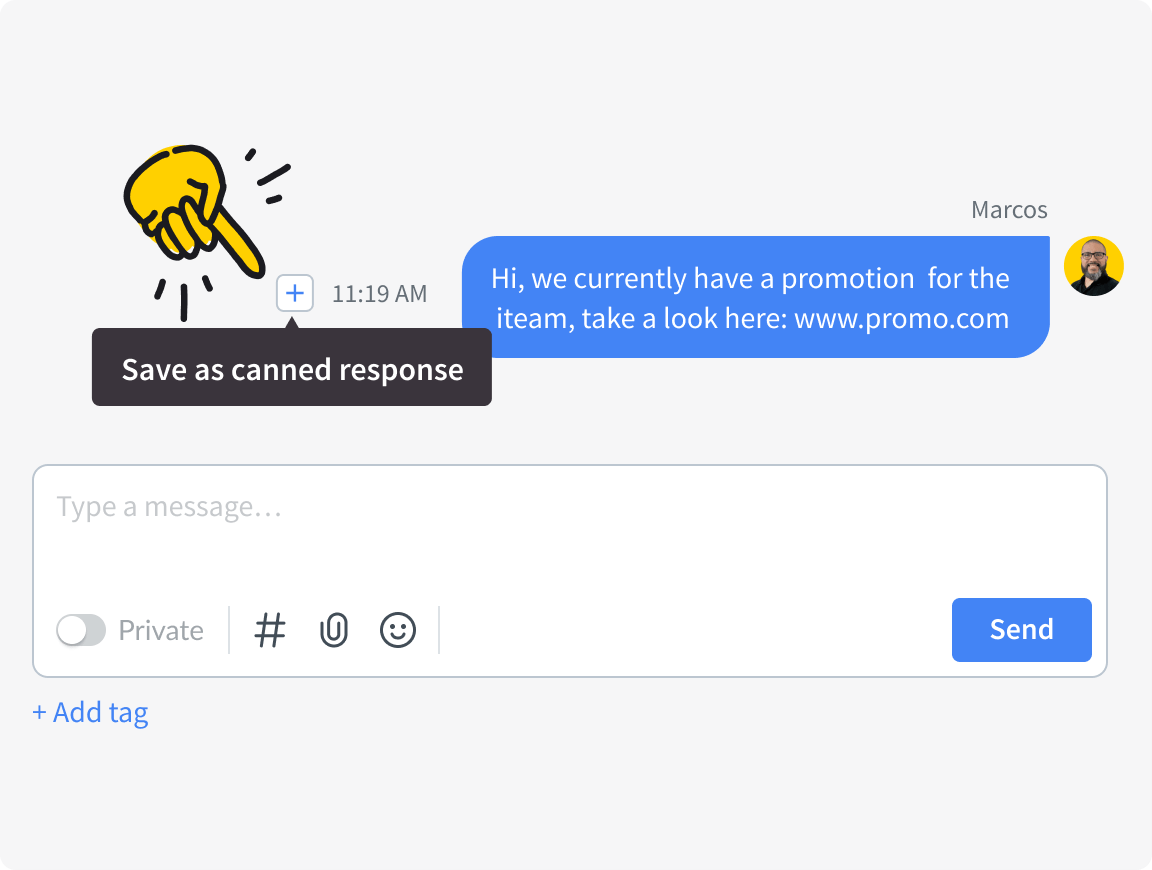
To access all canned responses go to Settings > Canned responses in the LiveChat Agent app. Read more about canned responses in our Help Center.
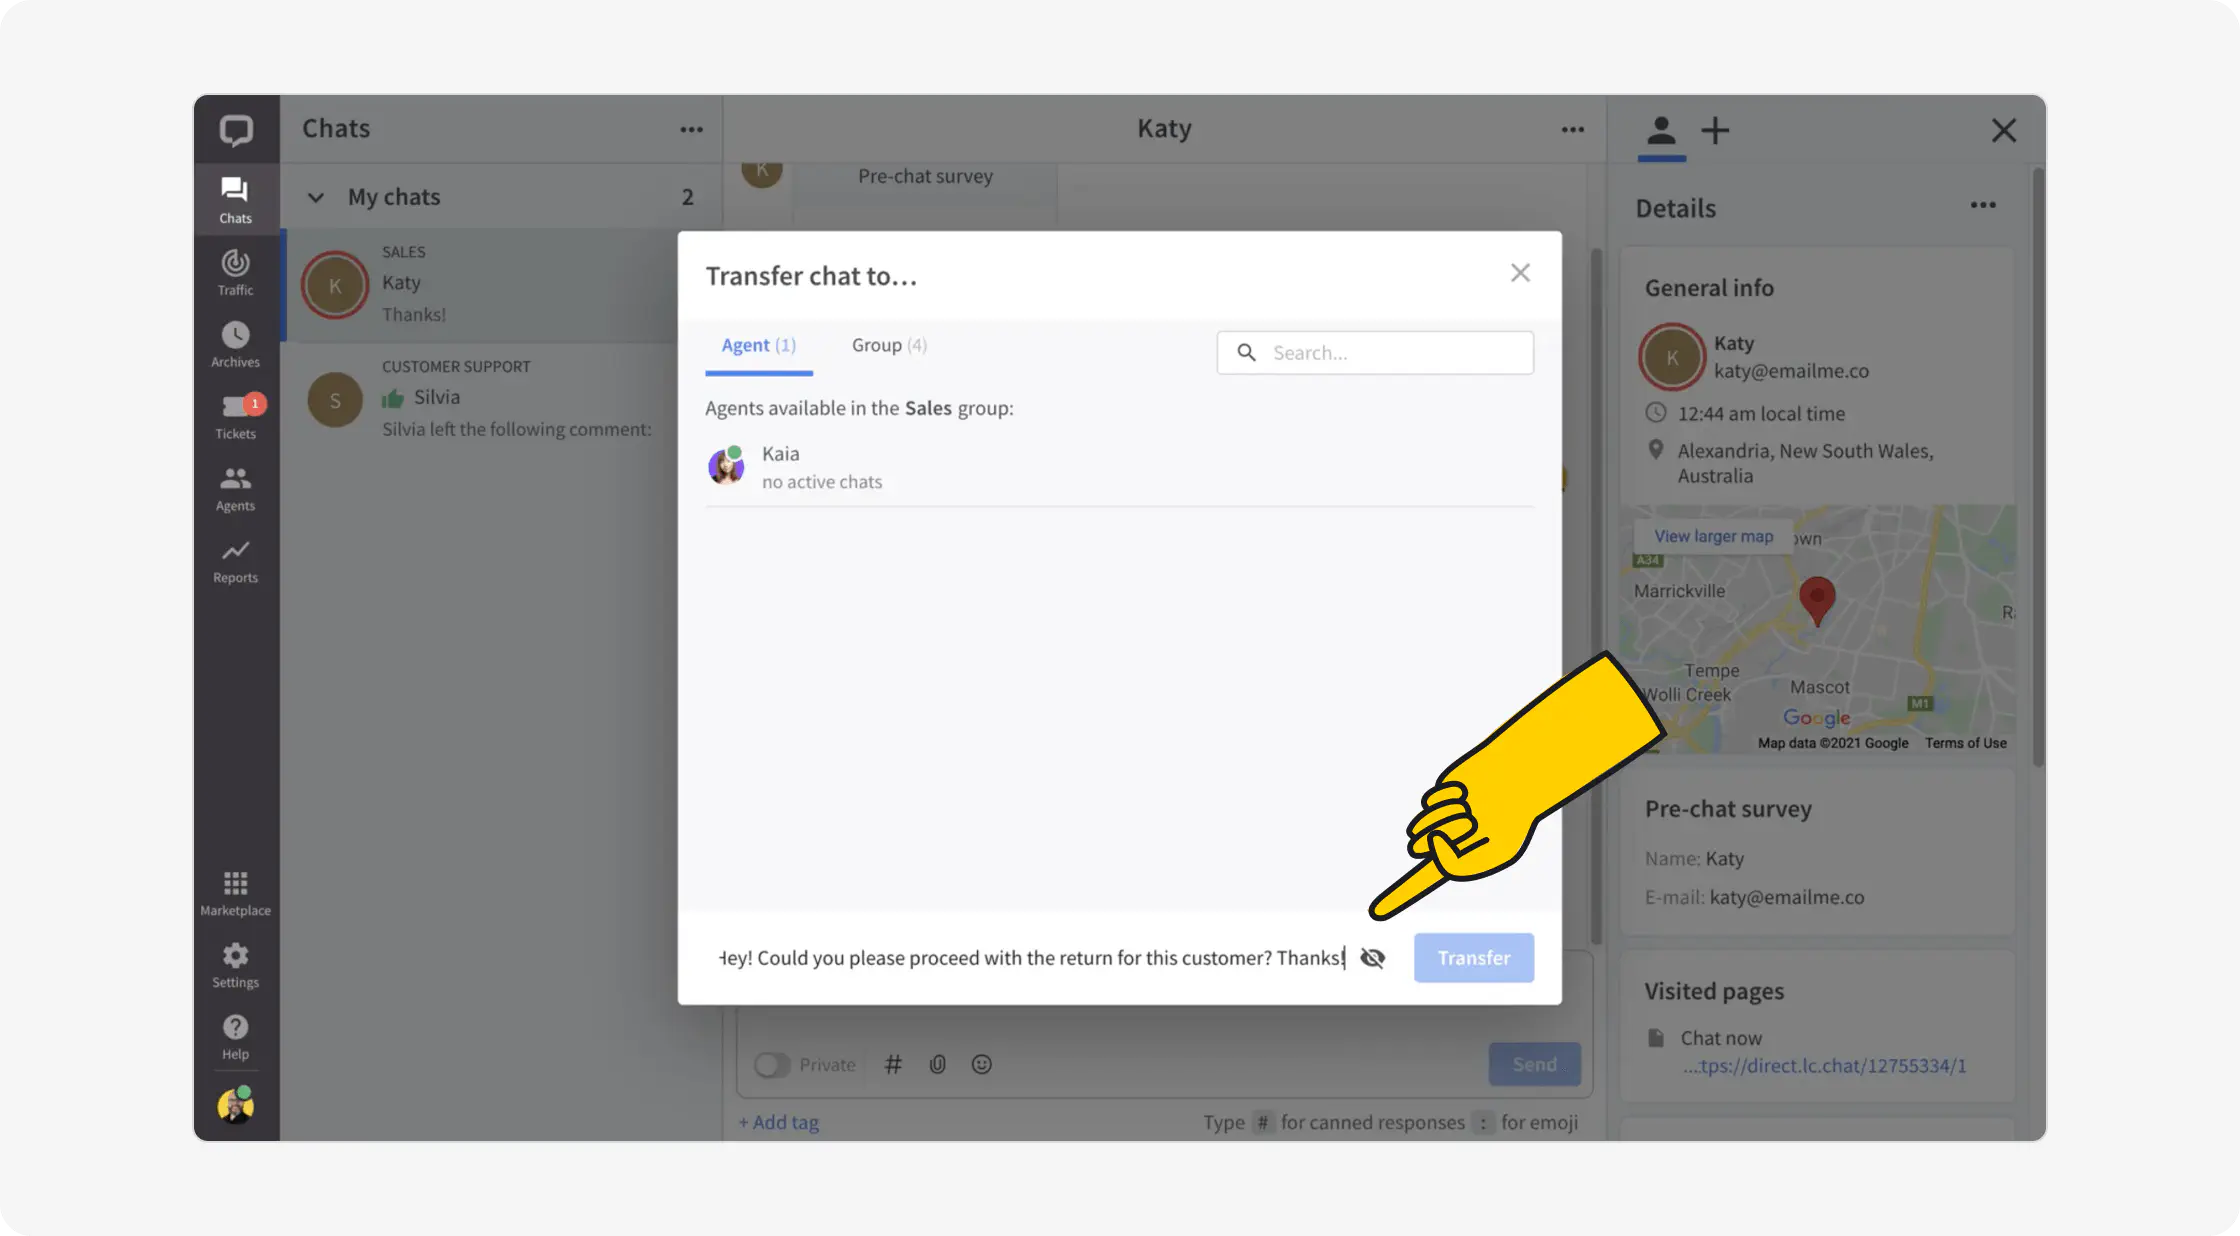
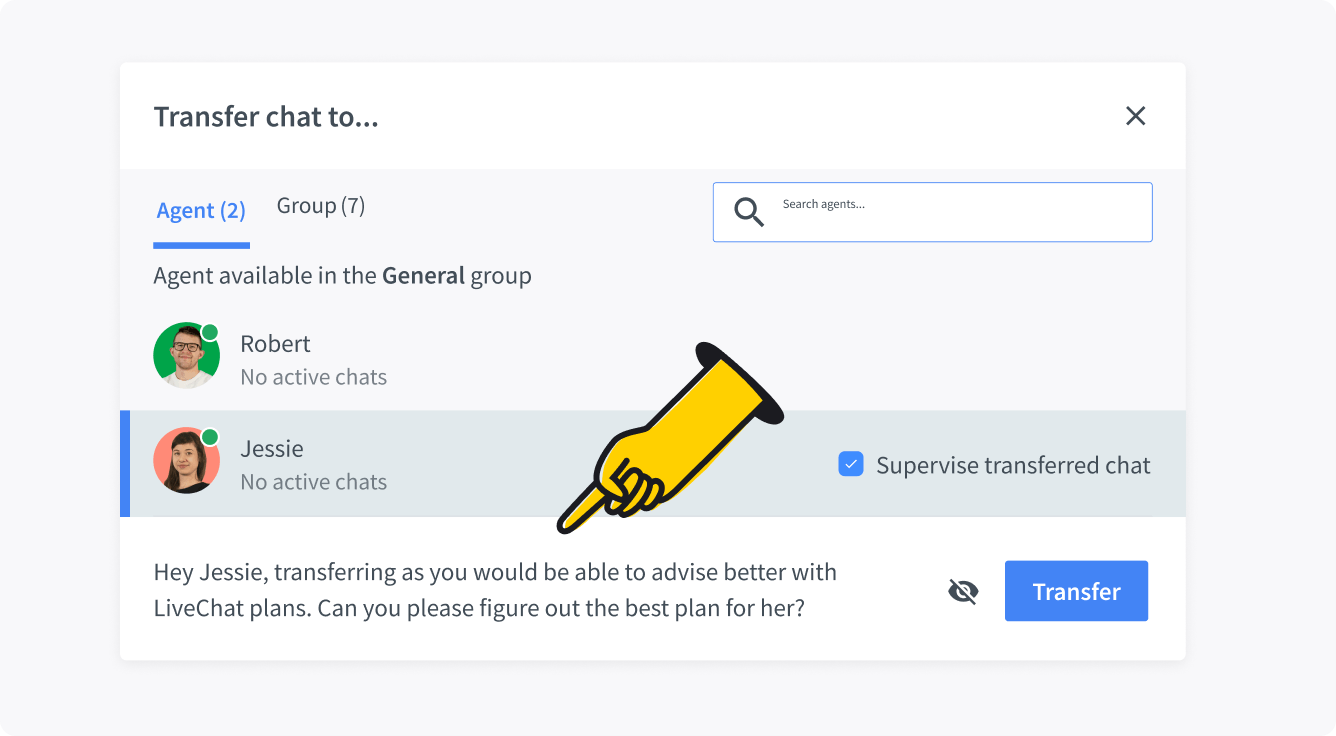
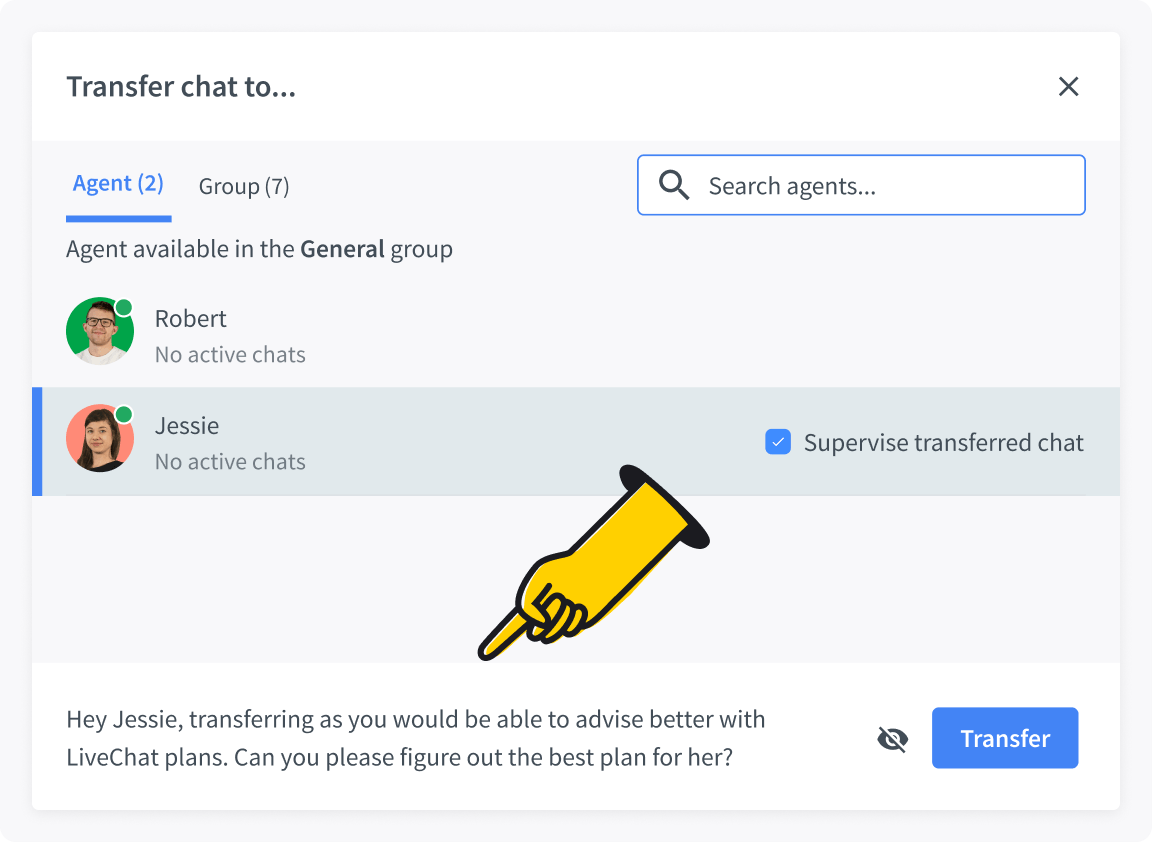
Depending on the workflow in your team, you may sometimes need to transfer the chat to another agent. You can do it by clicking on  while the chat is ongoing, and picking Transfer.

Transfer carefully
Most of us don’t like being bounced from one rep to the next, so when you transfer, make sure that the customer knows that they are being transferred. If it is relevant, provide the reason as well.
Tip off your teammates
Make sure that the teammate to whom you are transferring knows that they are about to get a chat. Let them know what the case is about in advance. You can use the option to Add private note in the transfer modal. Private note is available in our Business and Enterprise plans.
Keep the customer informed
If you are on the receiving end of a chat transfer, let the customer know that they don’t need to explain the matter at hand again because you can see their chat thus far. Ask for a moment to read through the chat. If the customer knows why they need to wait they are more likely to be patient.
Organise your work
If you find yourself transferring chats often, ask your leader to consider using the Groups feature. With Groups customers can be directed to specific departments when they start a chat, or chats from specific websites can go to dedicated departments. Read more about Groups in our Help Center.
Another great way in which LiveChat facilitates teamwork is the fact that you can supervise the chats of your teammates.
Supervising chats is the best way to learn from real life examples how your team communicates with the customer, from the tone of voice of your company to at what point it is good to create a ticket or transfer to another colleague or team.
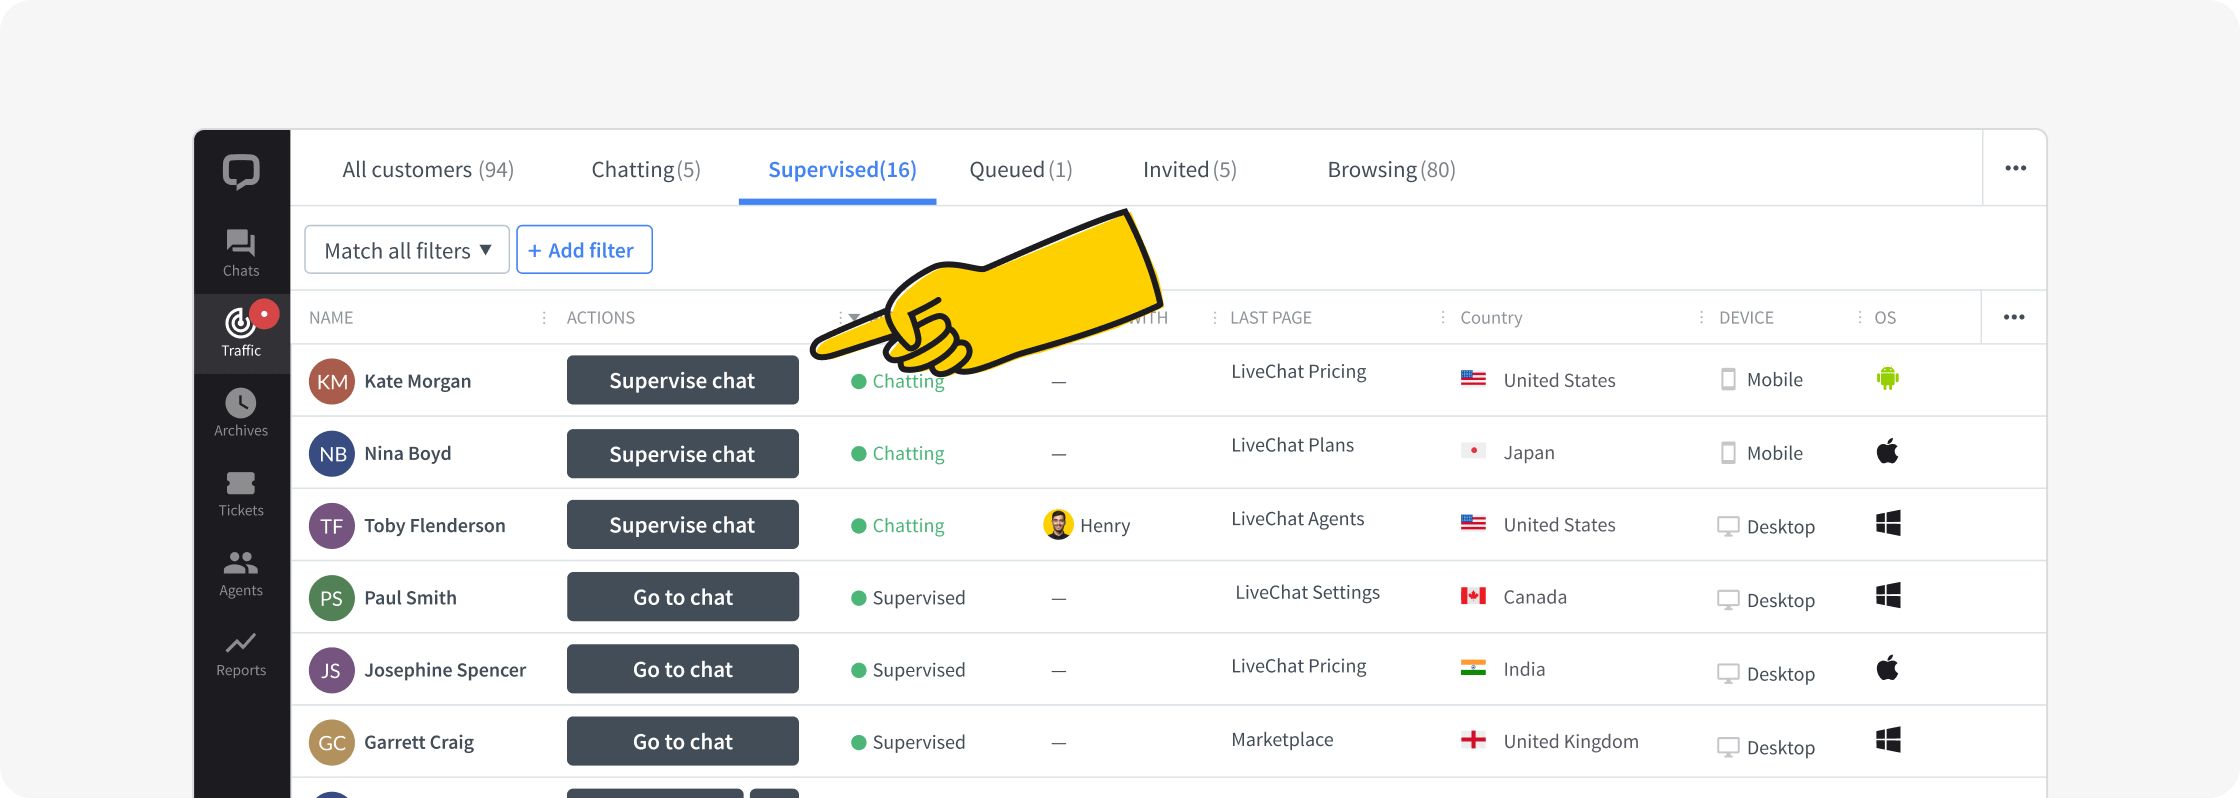
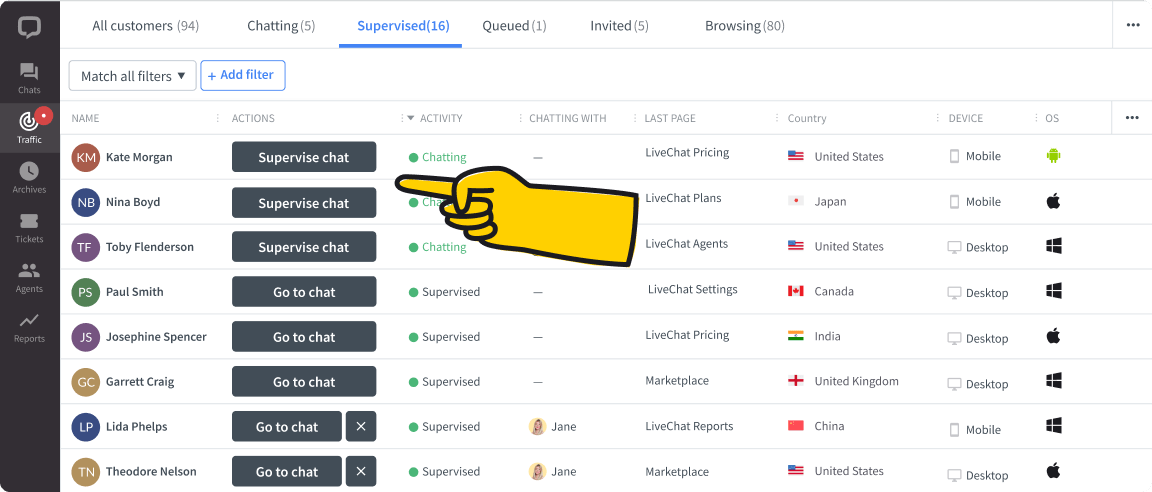
To supervise a chat, go to the Traffic section of the LiveChat Agent app. Click on Chatting, to see who is currently chatting, click Supervise on the chats you want to supervise, and then click on Go to chat.
If you are dealing with a problematic case or a problematic customer, you can ask your teammates or supervisor to supervise your chat. They will be able to send you private messages, applying the strength of the team to the case at hand.

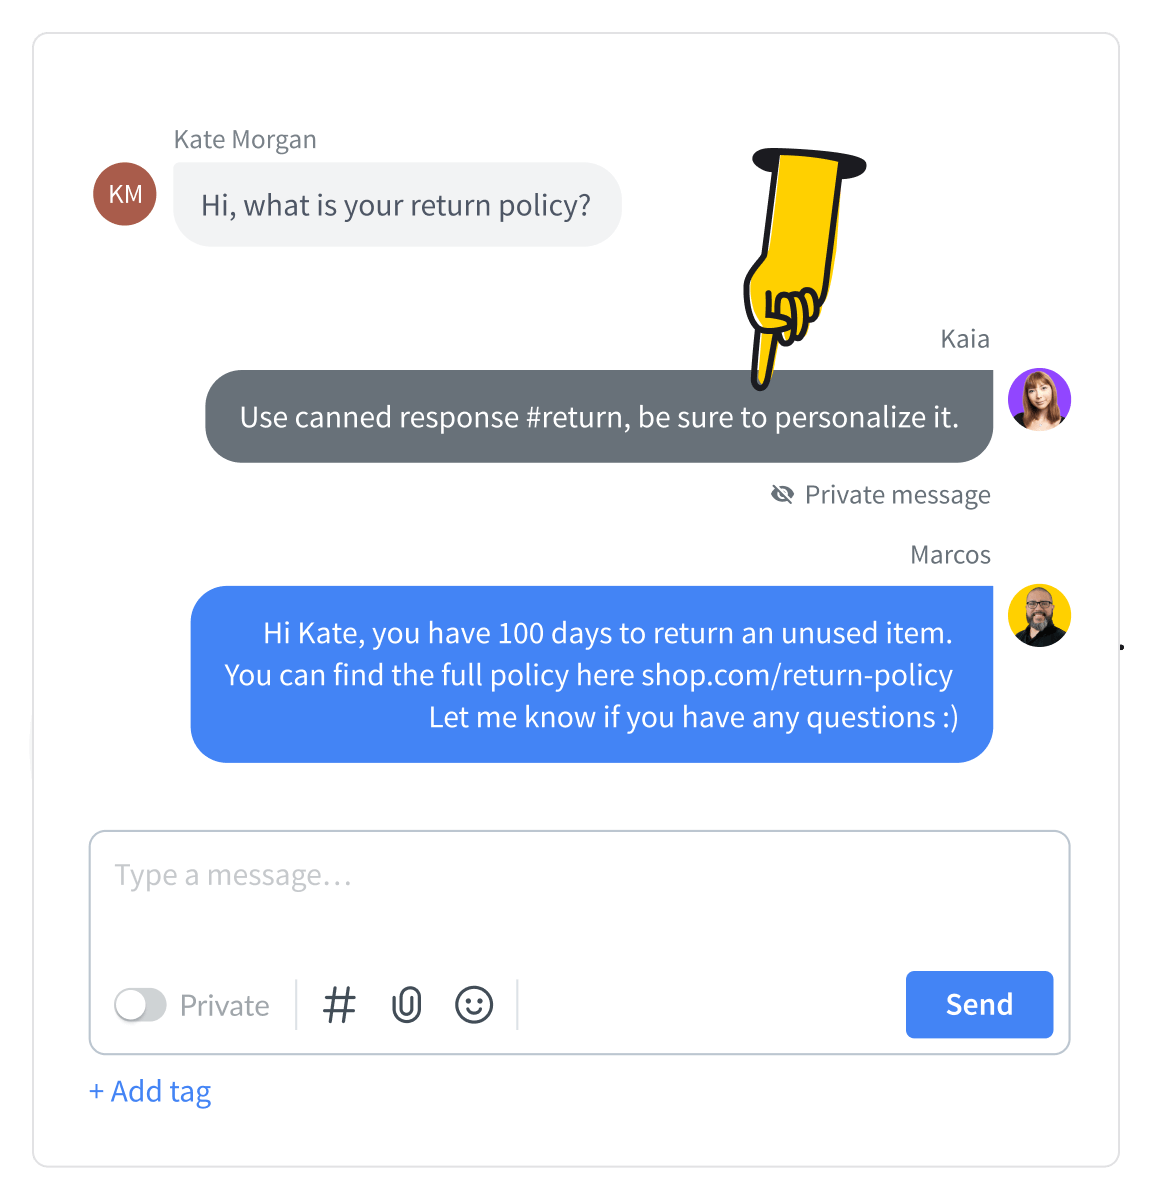
To send a private message back, just switch your message area to Private with the toggle, type your message in and send.
Make sure to have a good look around the Traffic section of the LiveChat Agent app. This is the section where you can manually invite customers to chat and pick chats for supervision. The Traffic section shows the list of current visitors on your website in real time. You can see their name, email address, location, time spent on your website, and much more.
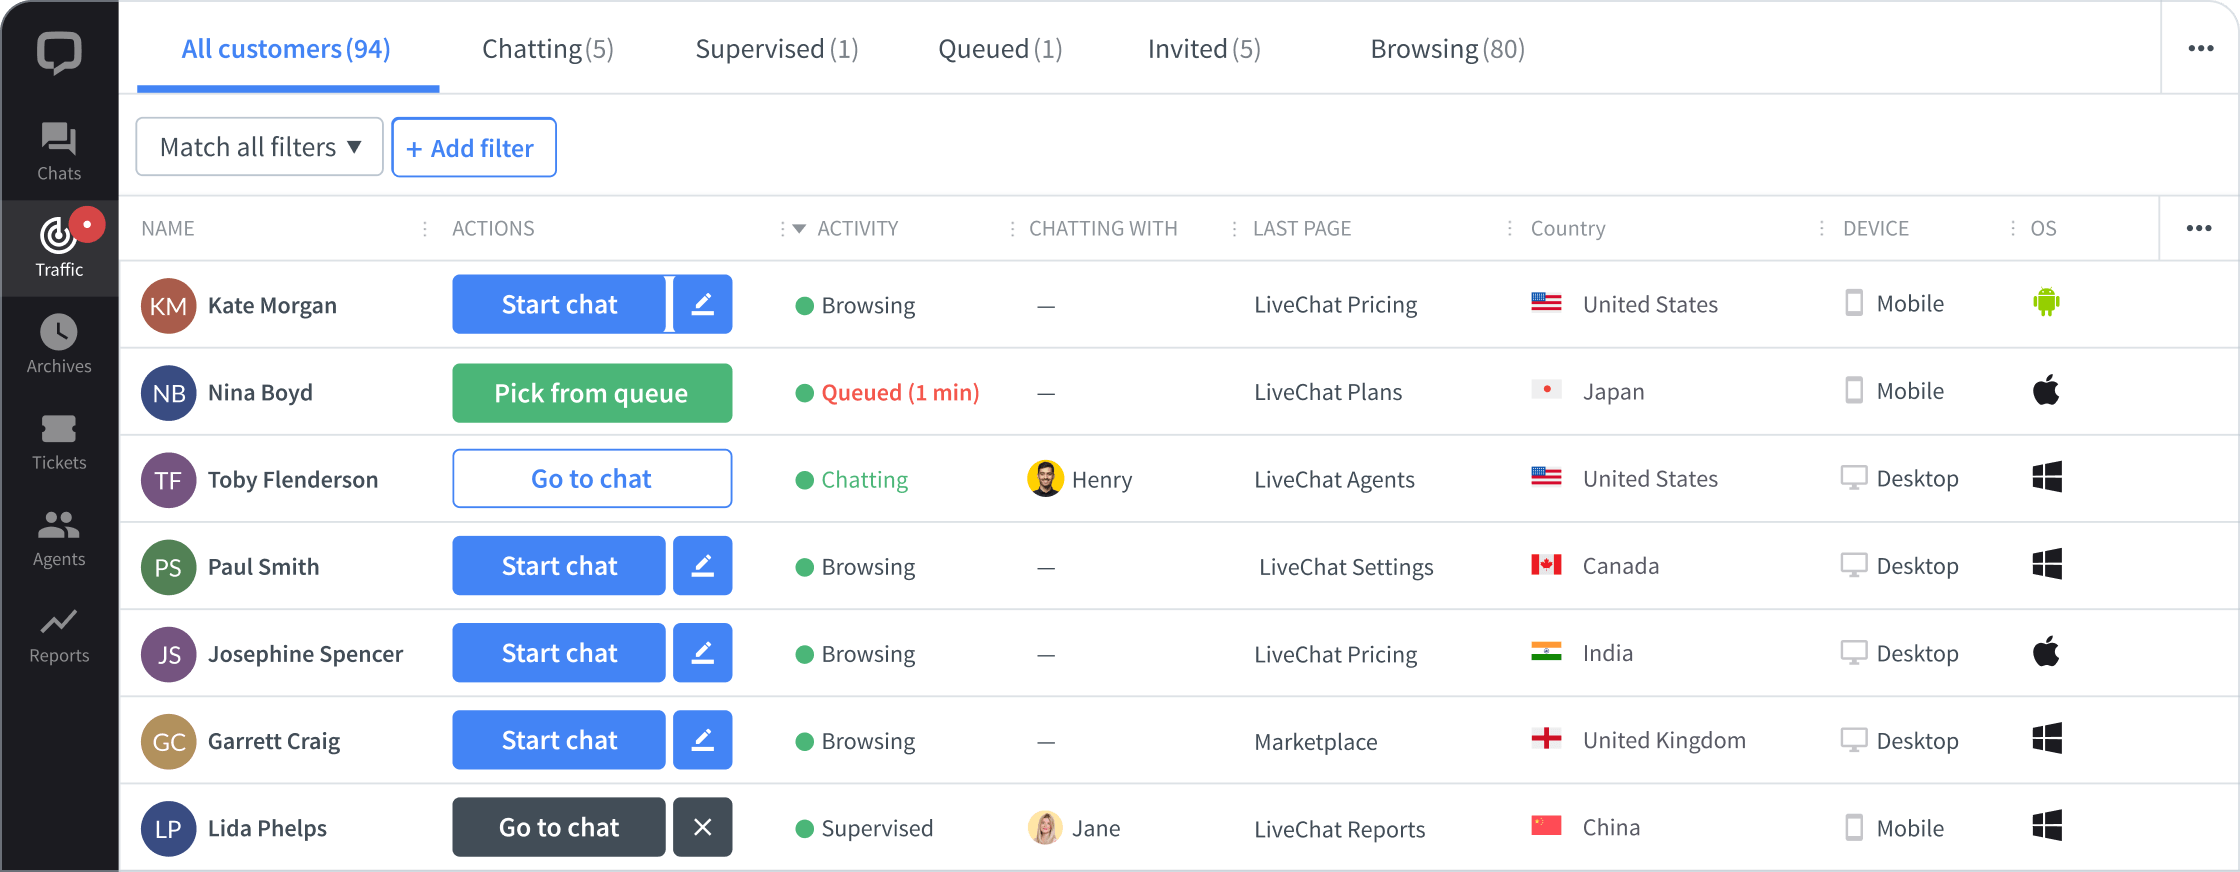
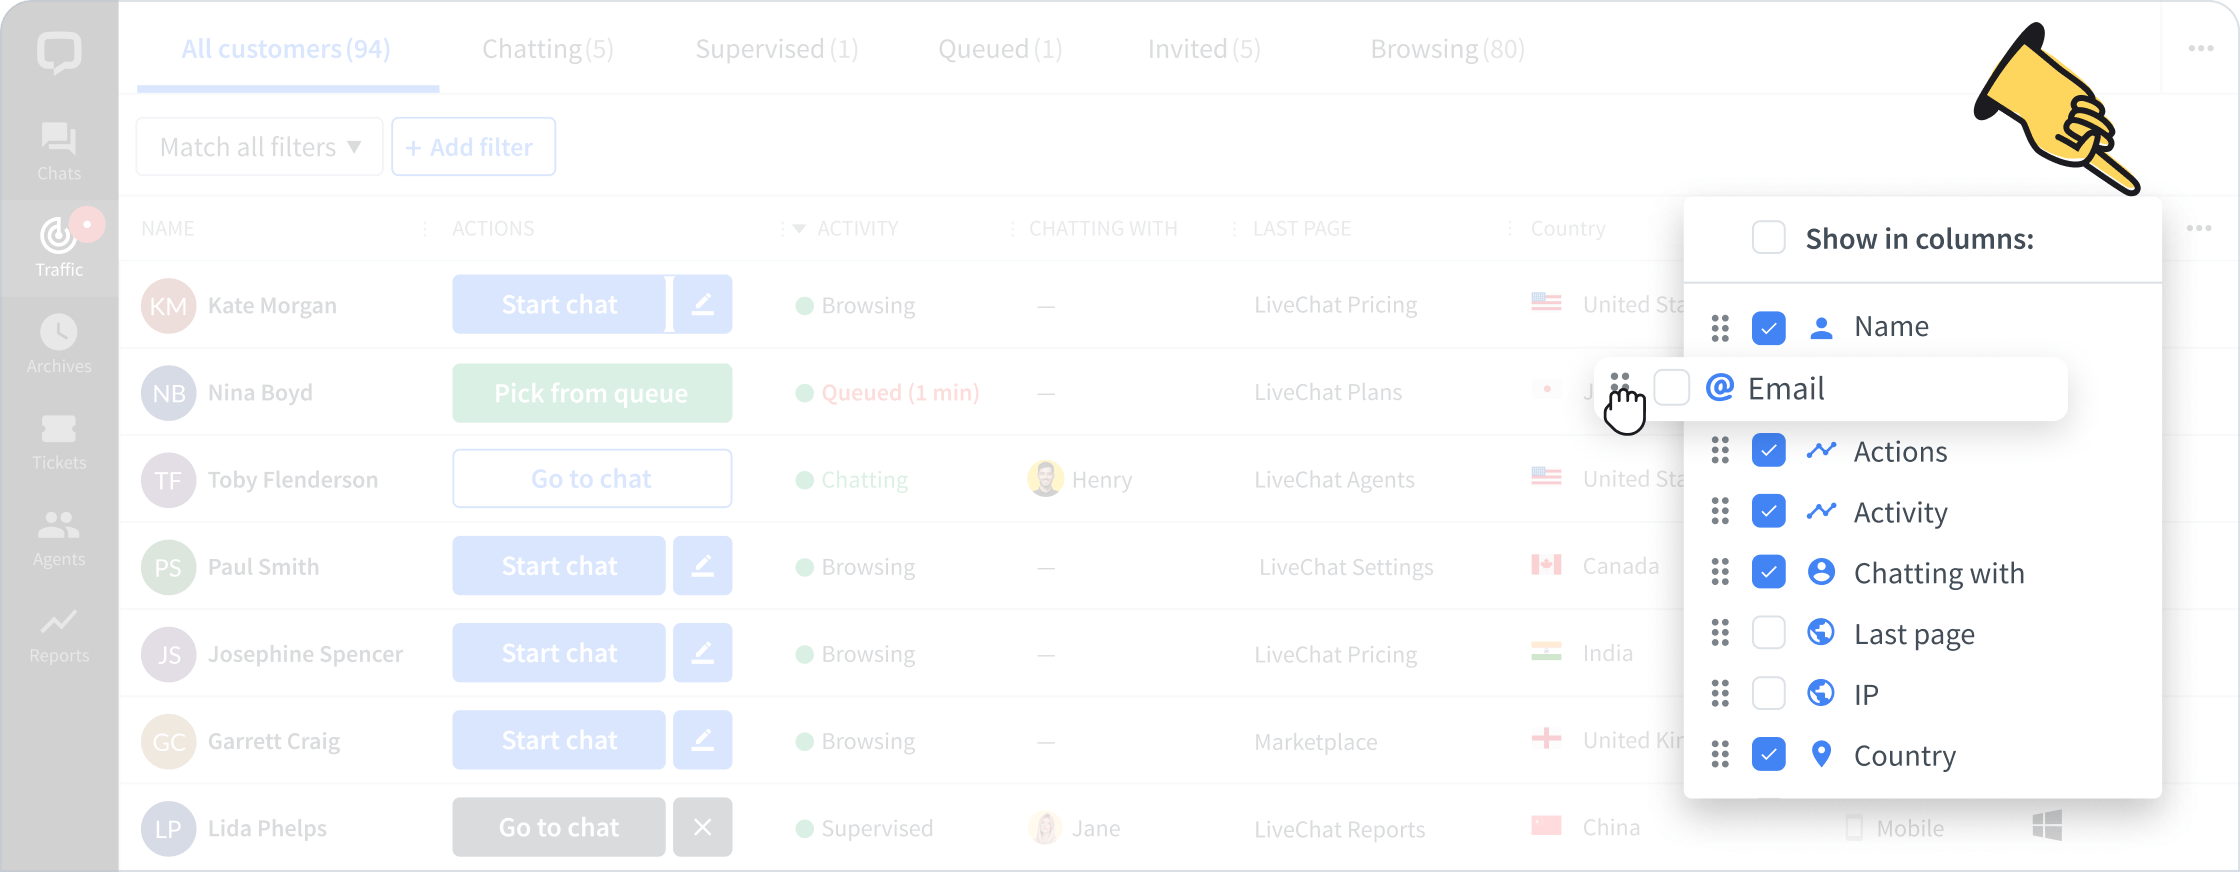
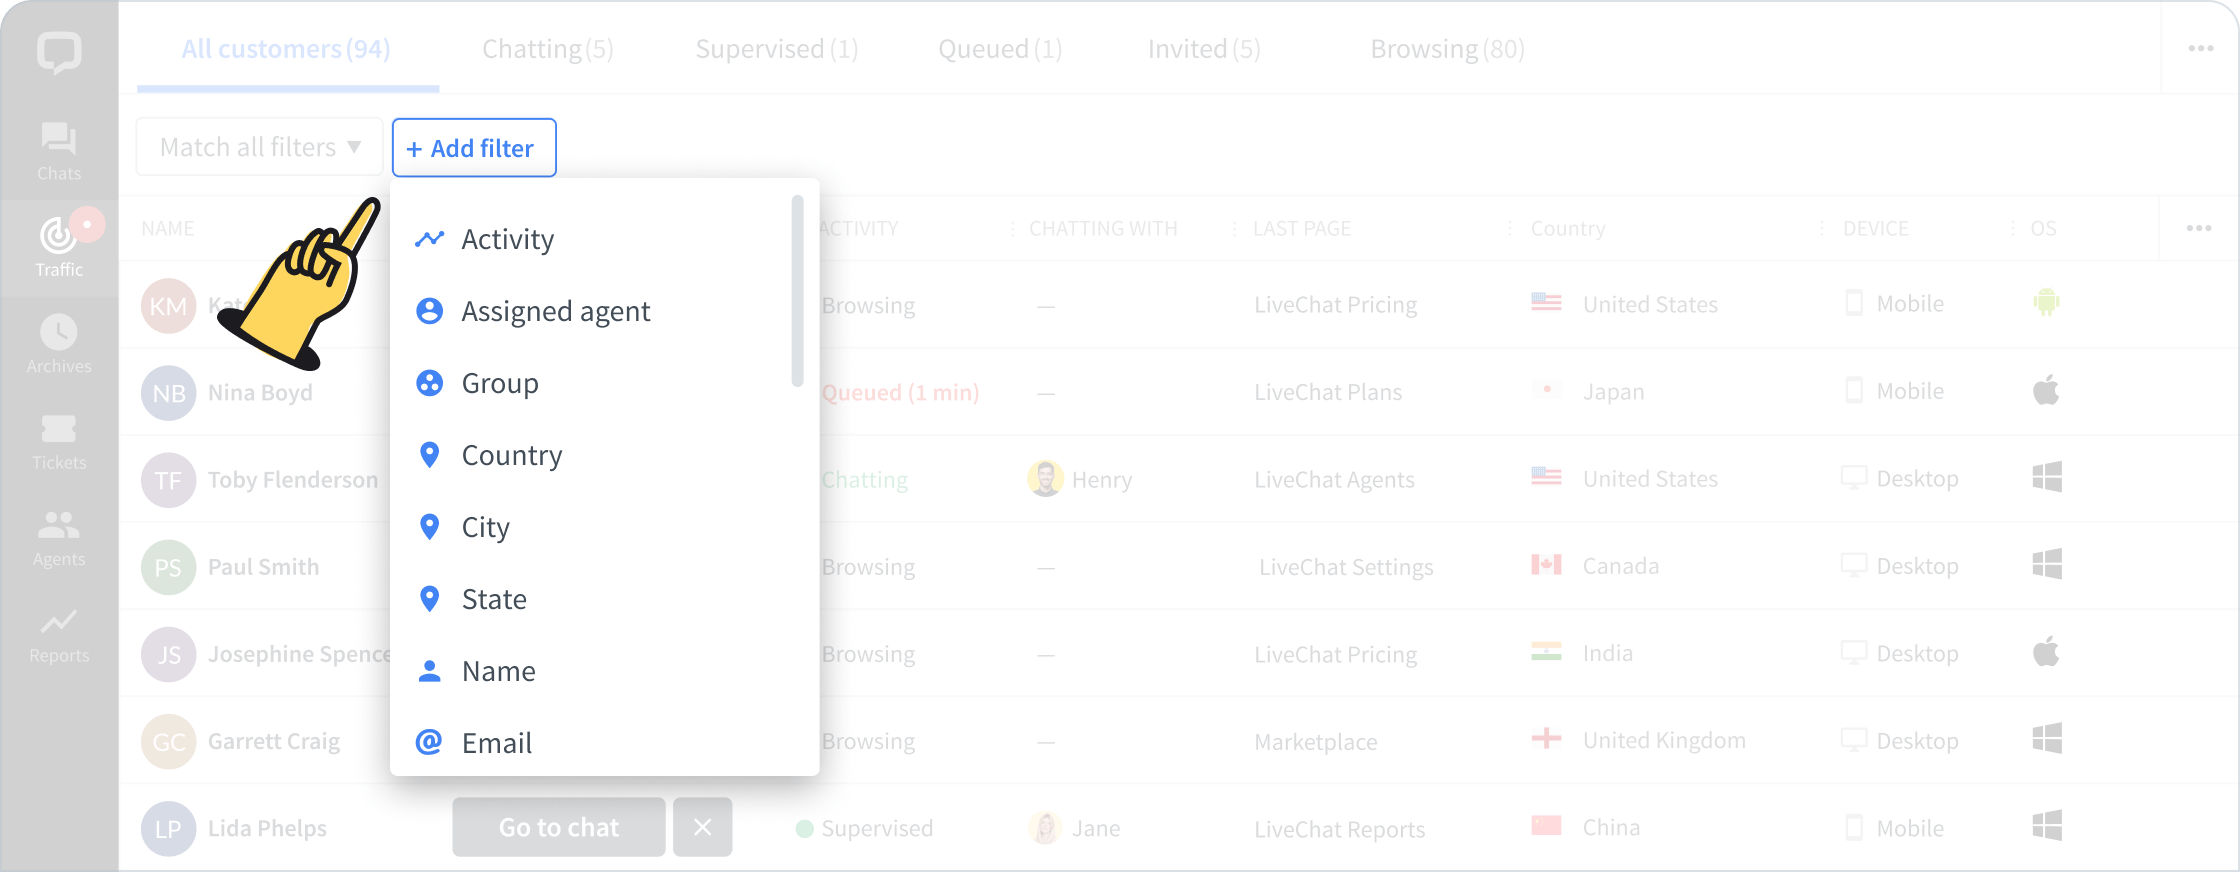
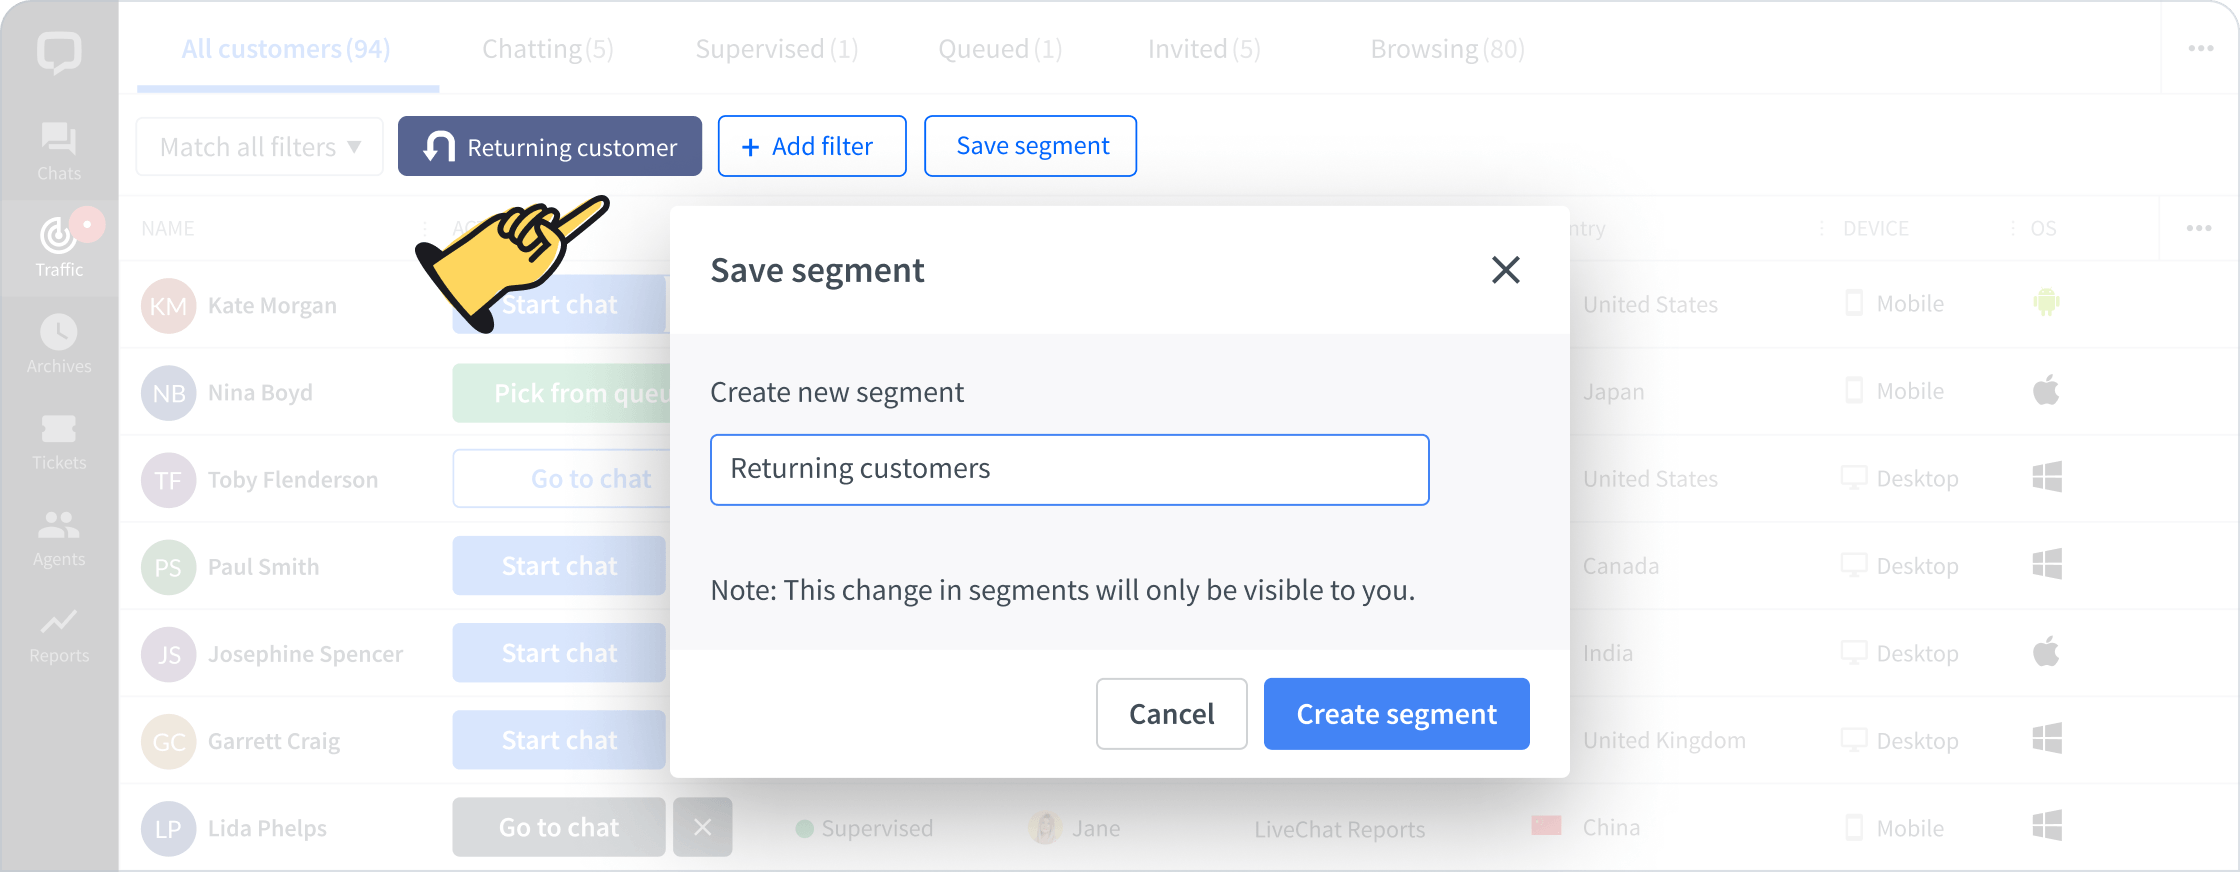
Use it to spot prospective customers or simply make their customer experience better.
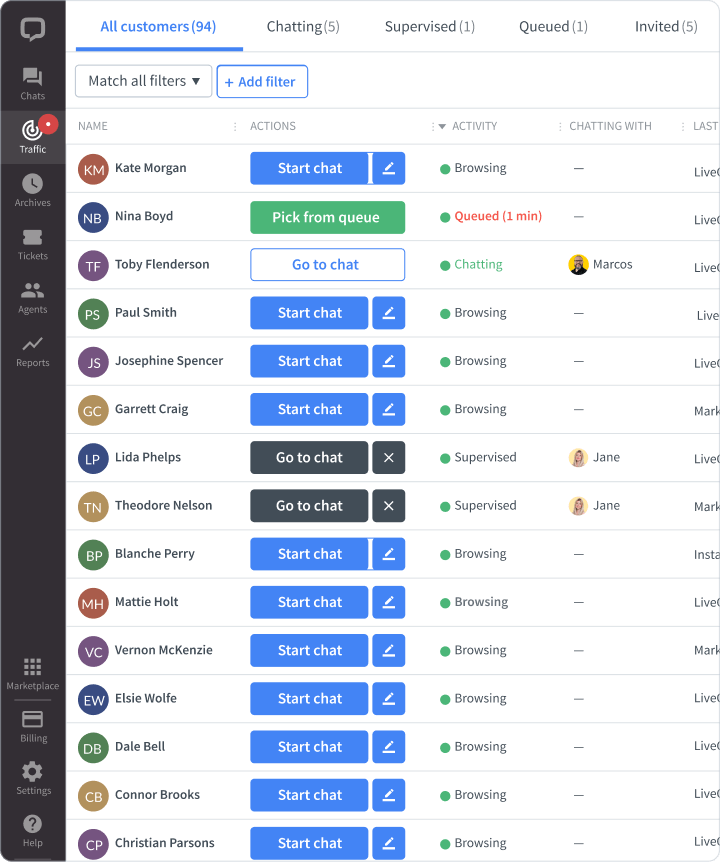
Add, remove, change the order of data columns. See what is relevant to your everyday work.
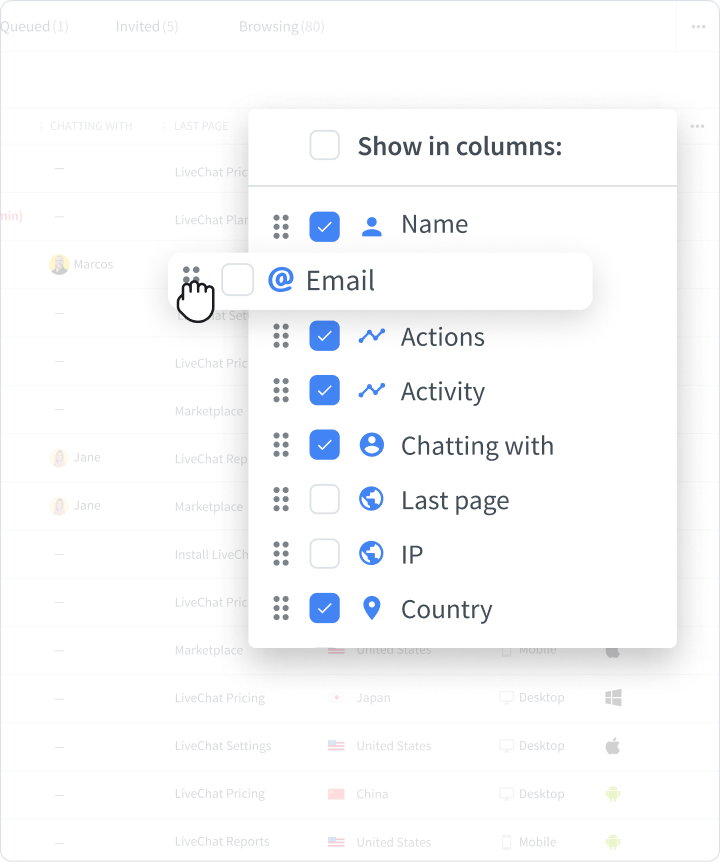
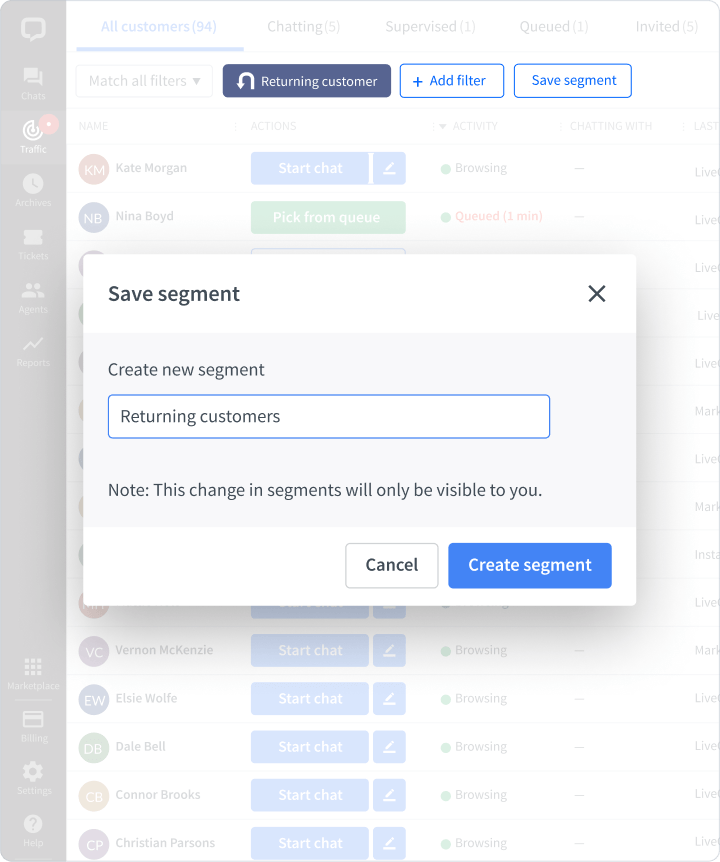
Filter the view by things like the customer‘s location, or the number of visits etc., to target a specific segment of customers.
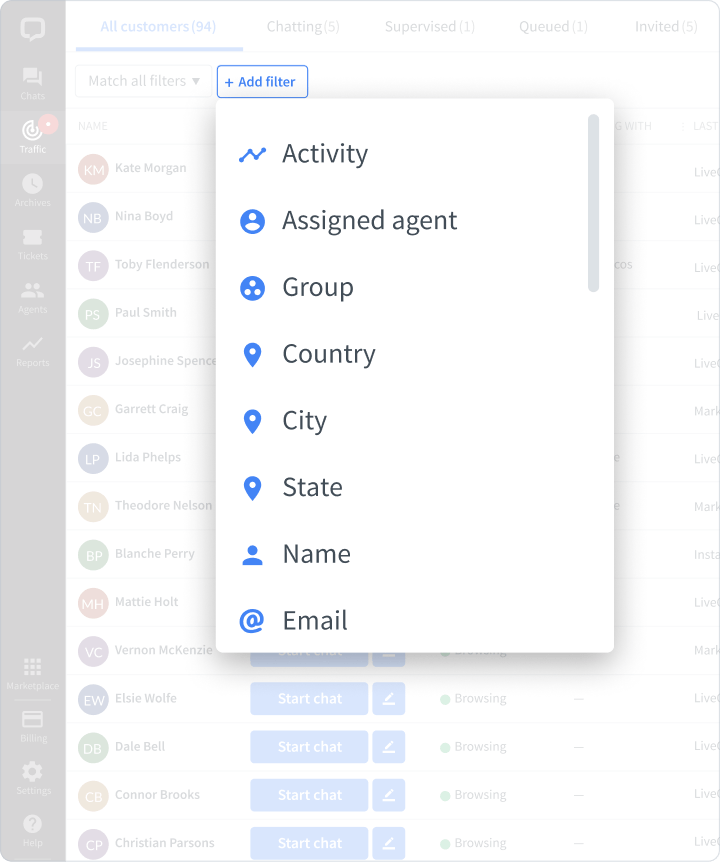
Save such filtered views as segments.

Make it personal
If the customer provided their name in the pre-chat, use it.
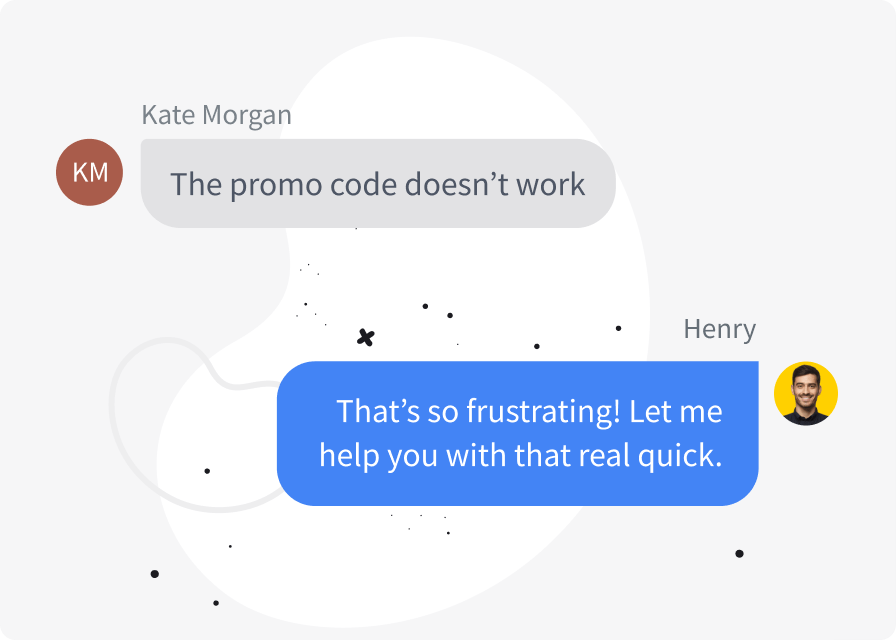
Put yourself in their shoes
As much as you can, try to look at every query from the customer’s perspective.
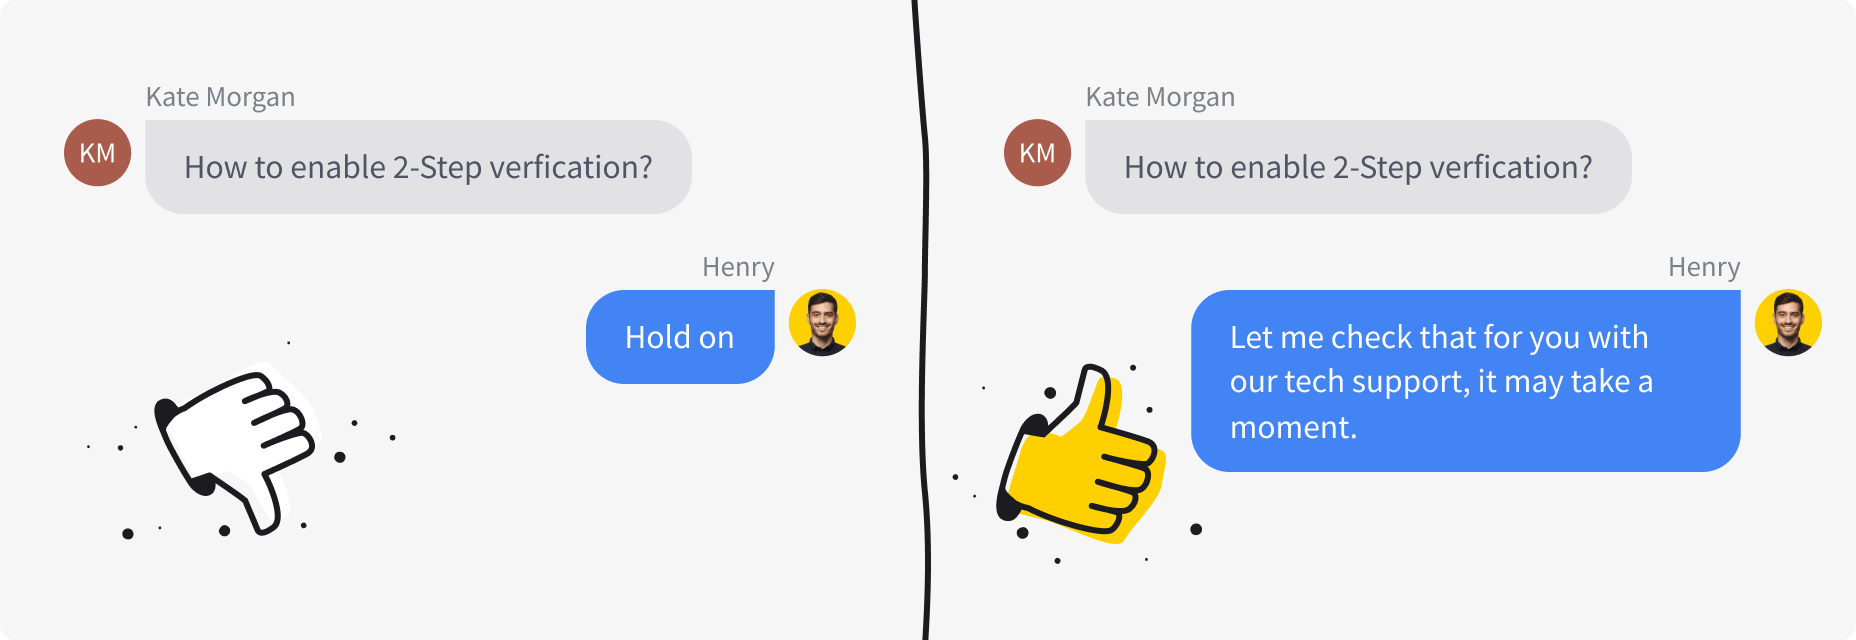
Be transparent
Speedy service makes a good impression, but being precise is even better. When you need the customer to wait a moment, let them know what you’re doing.

Create canned responses from chat
Create canned responses on the go from chats whenever you notice that you use a phrase regularly and for those phrases you know you’ll use.
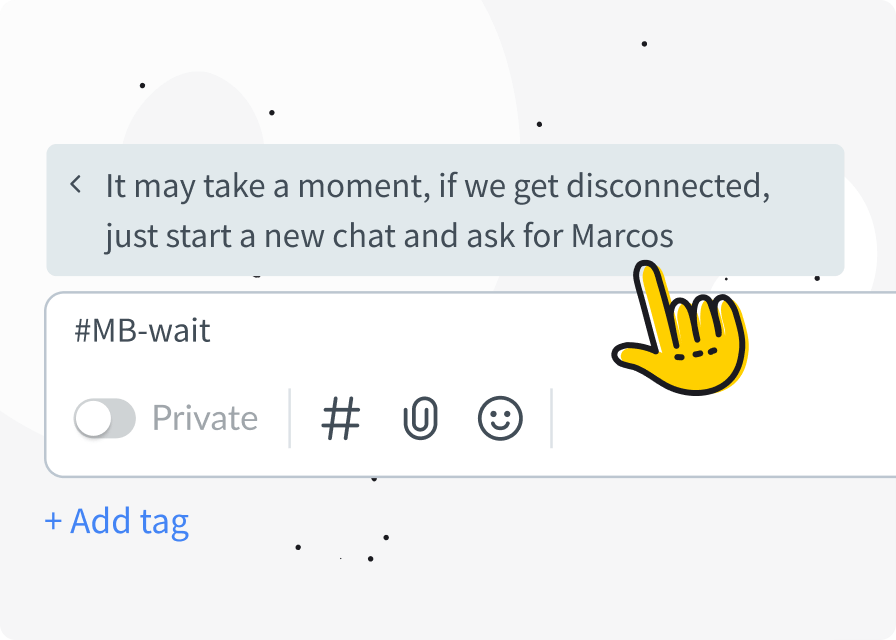
Make them your own
When you create canned responses just for yourself rather than the whole team, use your initial at the beginning of the shortcut to pull up your personal canned responses quickly.
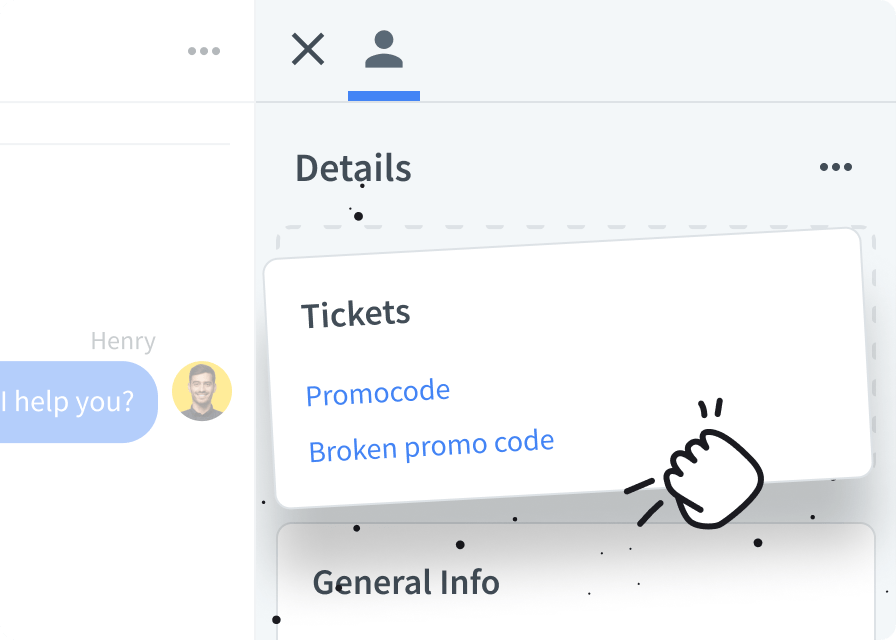
Customise details
Edit the Details section to only show the relevant information on the tiles you want. For example, move the Tickets tile to the top of the list to know immediately if the customer has tickets with your team.
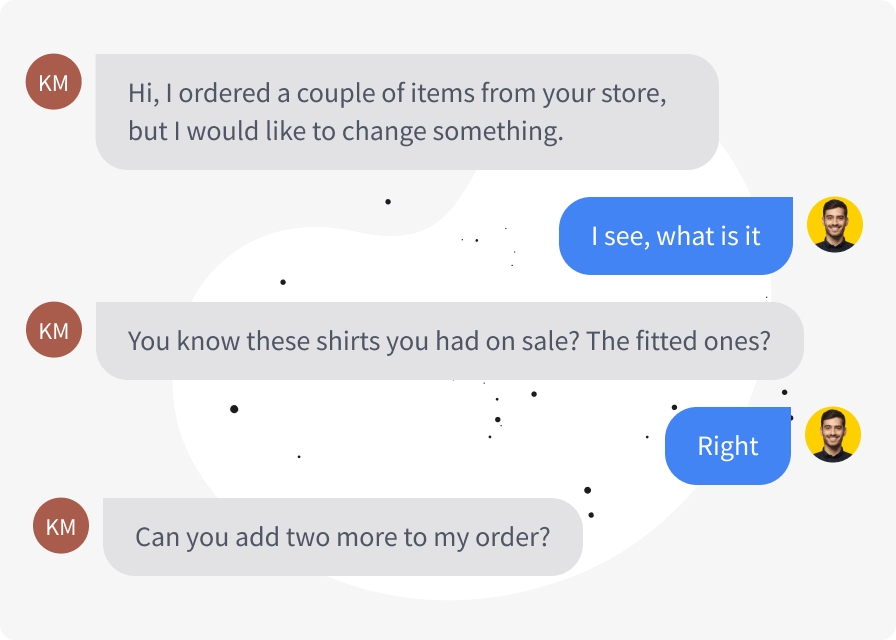
Listen actively
Let the customer know you’re there and you’re listening. Providing feedback while the customer explains a complicated case can make the customer’s experience great.
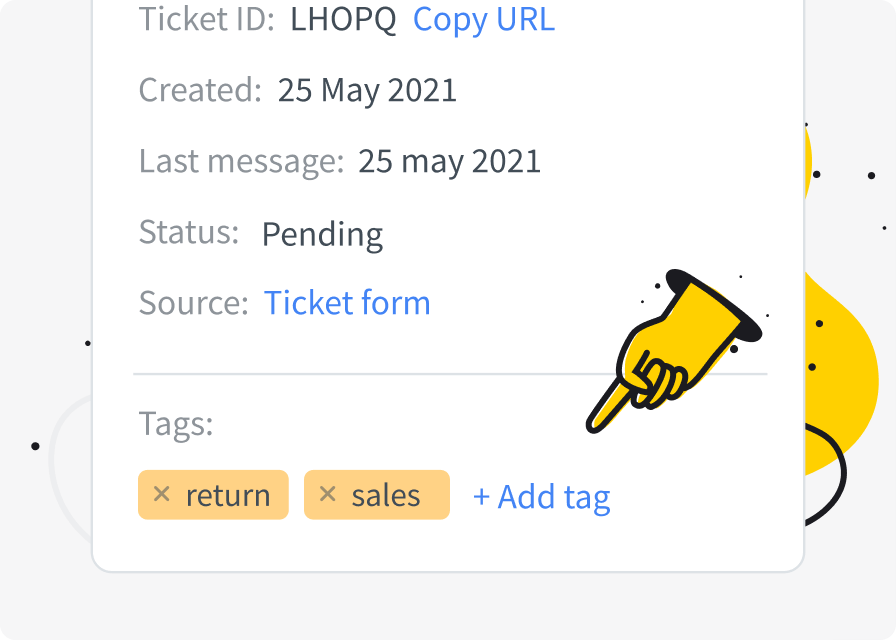
Tag your chats
Use tags to segment types of sales conversations. Be sure your whole team is on the same page as to how to use these.
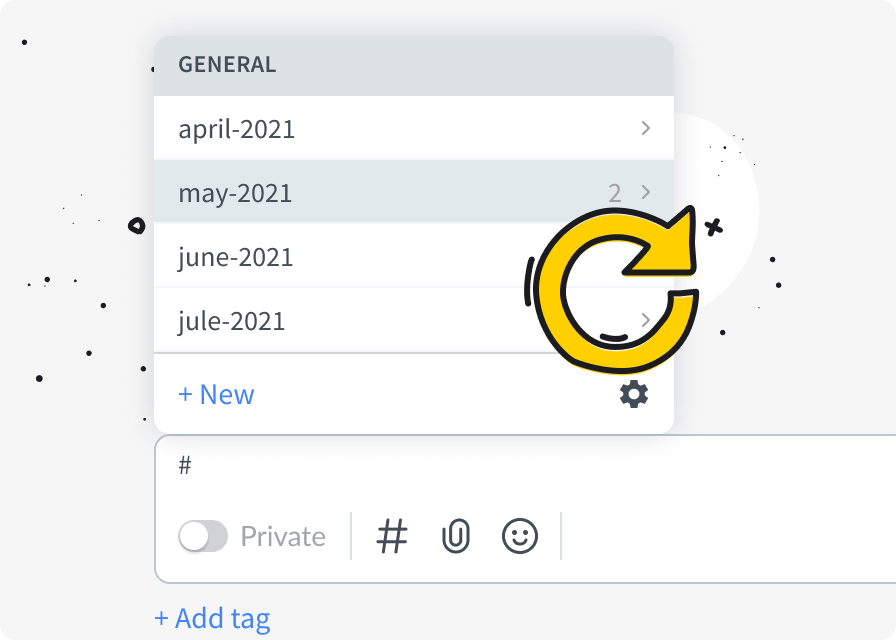
Be up to date
If using pricing in your canned responses, make sure this is updated when your pricing is.
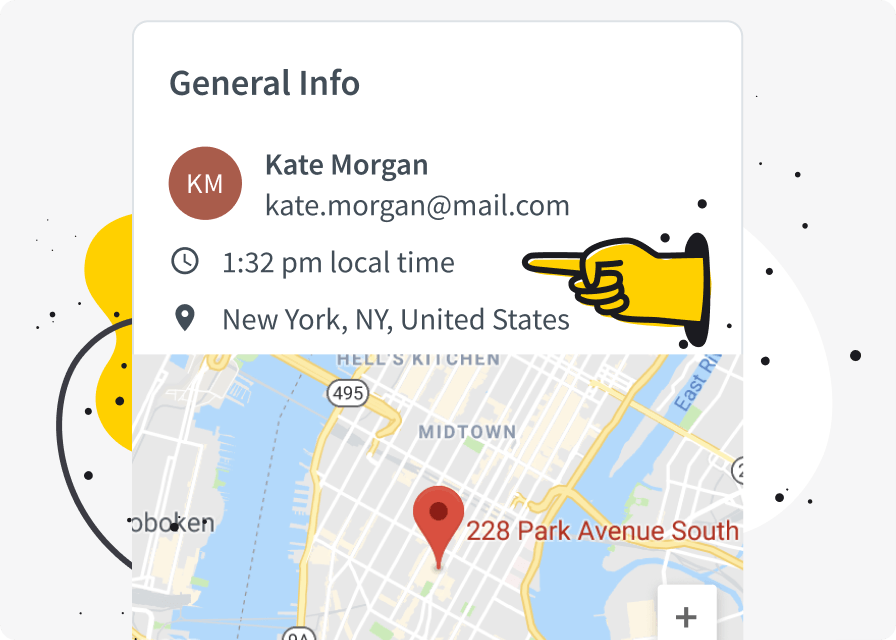
Check the time
If you’re working with customers globally, refer to their location to confirm their timezone.

Confirm contact info
If you have any technical questions, it’s a great opportunity to collect or confirm contact details. Don’t be afraid to transfer to the tech team or get back to the customer via email after you have consulted them yourself.
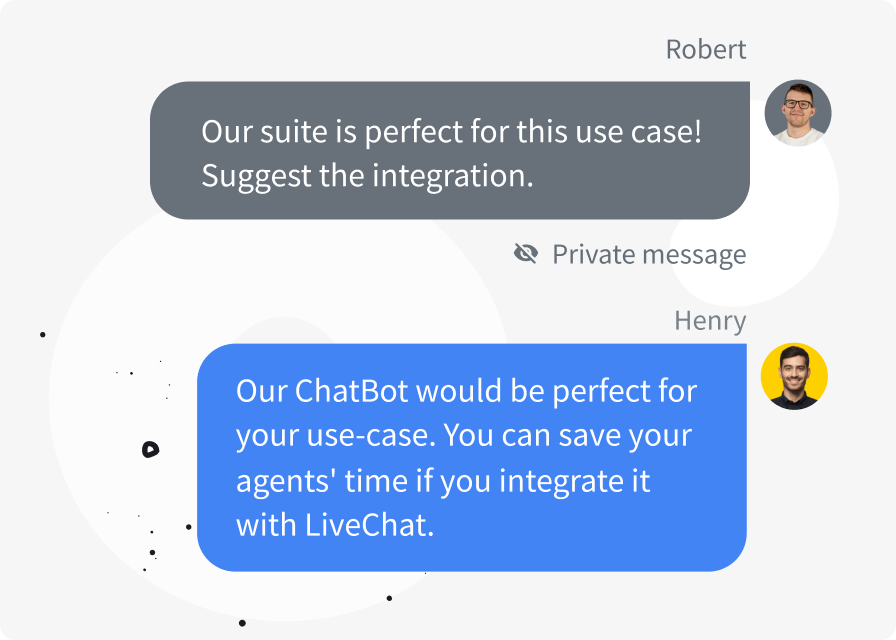
Ask for help
You can always ask a manager to supervise your chat so they can send you private notes if you’re unsure what to do in a particular case.

Send transcript
Use the Send transcript feature to save the chat in your CRM using integrations, or write the chat ID under the customer profile.
Want to level up your agents’ skills ASAP?
Reach out to our sales team — they’ll tell you everything you need to know about our training packages.
Book a call
Customer's first steps
Watch our webinar to see how the customer-facing side is set up!
Watch webinar