Our Hubspot integration is a hustle-free way to add your customers as new Contacts and enrich their profiles with the Notes that can include not only the transcript of conversations, but also additional information about your customer. And all of that possible without leaving the LiveChat app.
- Installation - learn how to connect your HubSpot to LiveChat;
- Usage - learn how to use your HubSpot app.
Installation
- Click here to access your LiveChat’s Marketplace. To proceed, go to the Apps section.

- On the list of available apps, look for Hubspot and click on Install button.

- After successful installation, go to the Tickets section of your LiveChat. If you have at least one ticket, you will see a new Hubspot icon, available at the top right section of your App. Click on it to proceed with Hubspot configuration.

- Now, click on Connect to link your Hubspot account with LiveChat.
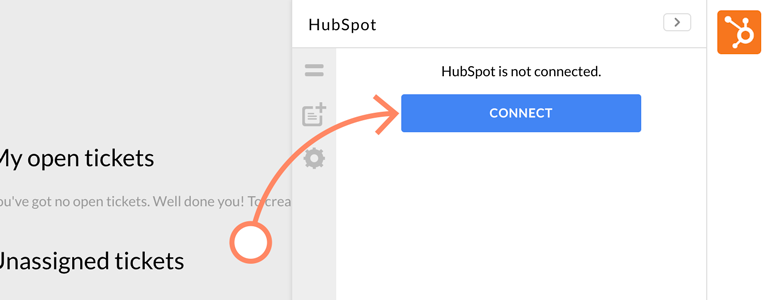
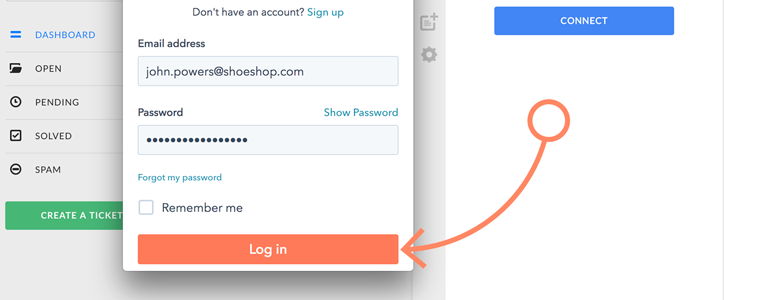
- You will be prompted with the Hubspot authorization screen. There, provide your Hubspot credentials and click on Log in.
- All that is left is to Grant access to your Hubspot account…
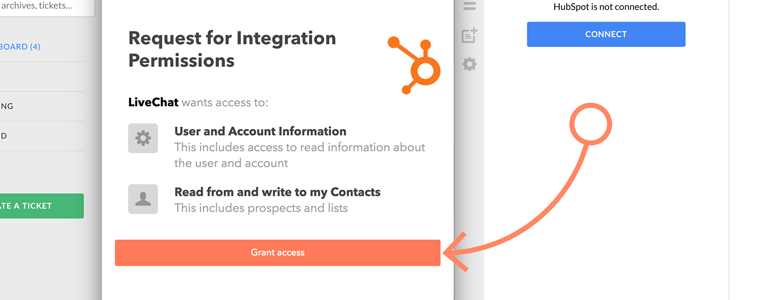
…and done! Your HubSpot is now connected with LiveChat, and you can start using this integration to close more deals. To learn how to do so, check out the chapter below.
Usage
With Hubspot app, you can add your customers as new Contacts, and save the transcript of the conversations, by attaching them as Notes. Additionally, you can edit your Notes so that they will include not only the chat transcript, but also additional information about a customer himself.
- Add new Contact - learn how to add your customer as a Contact;
- Assign chat transcript to Contact - learn how attach a transcript of a chat to a Contact.
Add new Contact
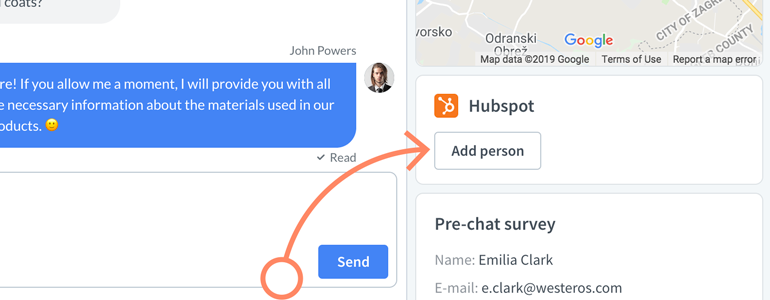
- There are two ways of adding new Contacts to your HubSpot account. First, go to the Chats section and choose one of your ongoing conversations.
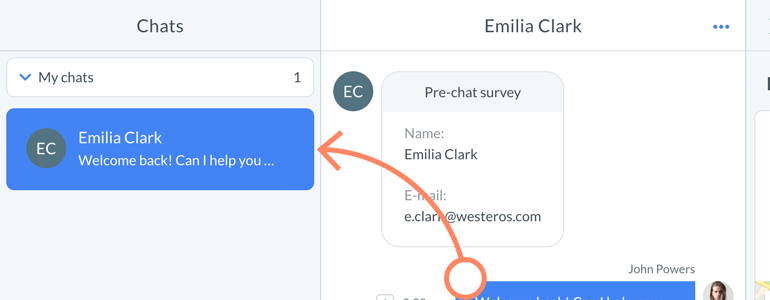
- Now, you can either click on the Add person button, available right under the Customer details section…
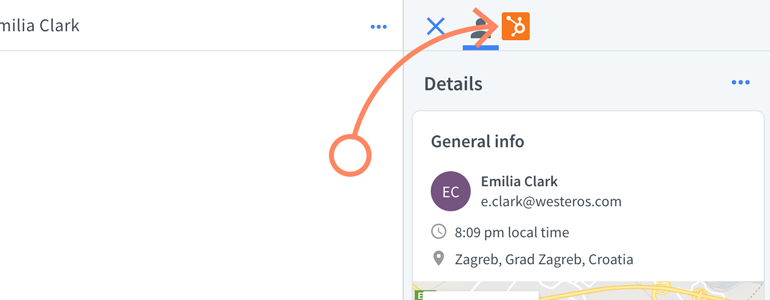
- …or you can open your Hubspot app, by clicking on the Hubspot icon available at the top right section of your LiveChat.
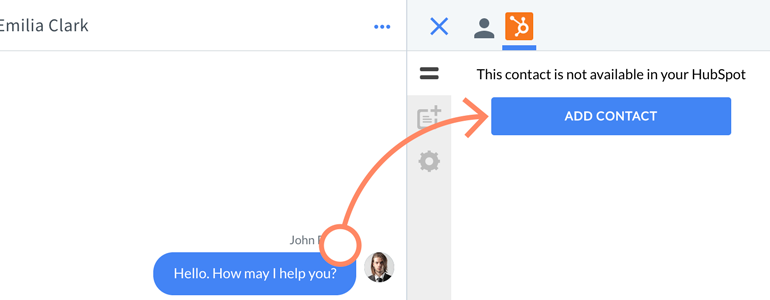
- To add a new Contact directly from Hubspot app, click on the Add Contact button.
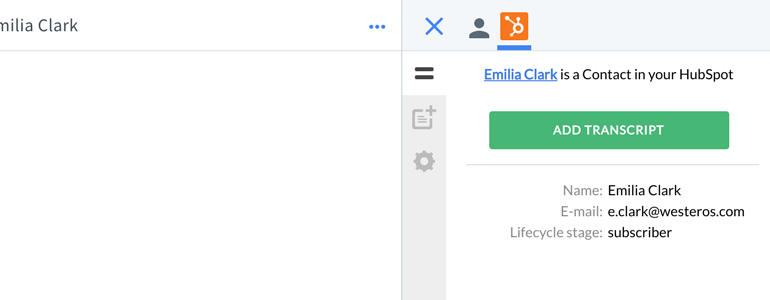
That is it! Your customers is now listed as a Contact, both in LiveChat and in your Hubspot dashboard.
Add chat transcript to Contact
Once your customer is listed as a Contact, you can enrich his profile with a Note. A Note can include not only a transcript of a chat with your customer, but also other information that you can add by editing a Note.
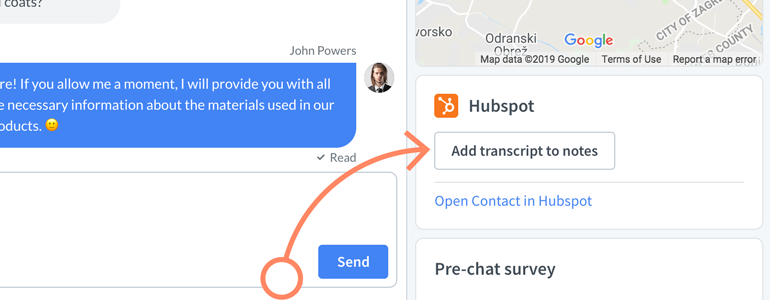
- To add a Note, you can either click on the Add transcript to Notes button available right under the Customer details section…
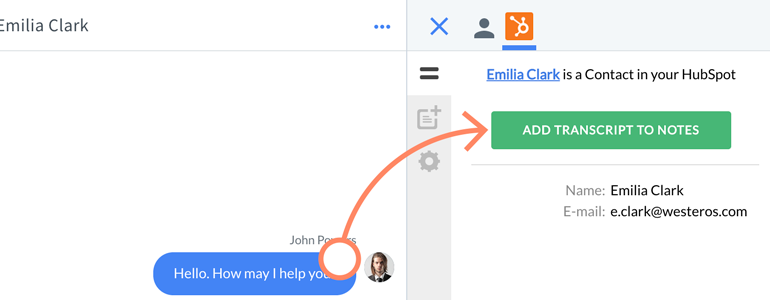
- …or you can click on the Add transcript to Notes button, available while viewing your customer’s profile in Hubspot app.
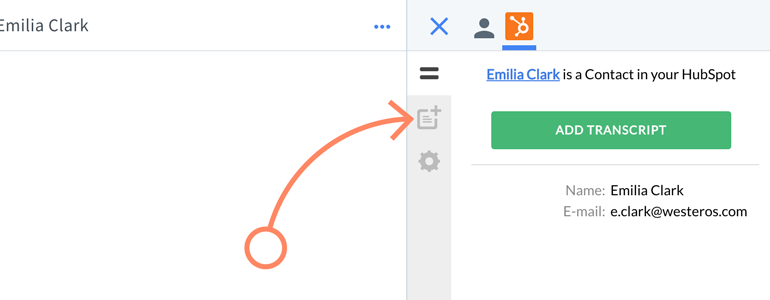
- To view all of the Notes attached to a Contact, visit the Notes section.
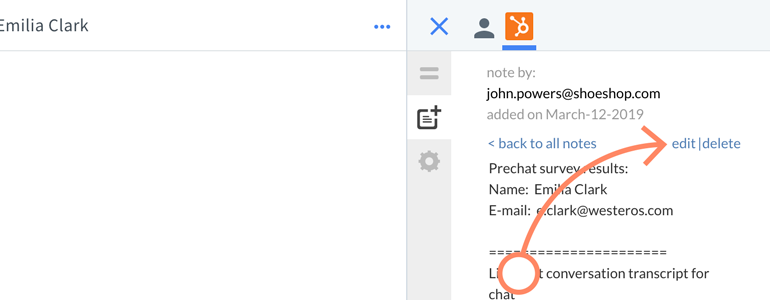
Remember that you can also edit or delete a note attached to a Contact.
Automate with Zapier
If you’d like the contact info and chat transcripts to be gathered in Hubspot automatically, connect your HubSpot account with LiveChat through Zapier. You can use the stored contact data to reach out to potential customers after a chat with a follow-up.
To connect HubSpot wiht LiveChat through Zapier, follow these steps:
- Log in to Zapier and click on the Make a Zap! button.
- Type in LiveChat in the search bar and select it from the list.
- Select Finished Chat as the Trigger Event and click on Continue.
- Click on Sign in to LiveChat. In a new window, enter your email (the one you use to log in to LiveChat) and your Personal Access Token (get yours in LiveChat Developers Console).
- Choose a Livechat account and click on Continue.
- Click on Test & Continue to test the connection.
- Now, type in Hubspot in the search bar and select it from the list.
- Select Create or Update Contact as the Action Event and click on Continue.
- Click on Sign in to Hubspot. Log in to your account, and authorize Zapier to access your HubSpot account.
- Once your account is connected, click on Continue.
- Next, you will need to choose which contact information will be passed from LiveChat to HubSpot. Click on the Insert LiveChat Fields button in the Email field and select Visitor email. Even though only the email address is required, you can pass other information like visitor name or chat transcript.
- When you are done, click on the Continue button.
- Next, click on Test & Continue to test the connection.
- When the test is done, click on the Finish editing button.
- Finalize the setup by naming the Zap and turning it on. To turn on the zap, flip on the toggle in the top right corner.
From now on, visitors’ contact information will be sent to your HubSpot account after each finished chat. You can filter these results to a specific set of chats/customers by using the aforementioned filtering options.
Now you know how to use the full potential of our Hubspot integration. Curious what other integrations LiveChat has to offer? Feel free to check out our other articles! Also, in case of any questions, feel free to start a chat with us - we are available 24/7/365!

