Pricing
Go to app
User Name
Upgrade Help Center

Apple Messages for Business: Connect with customers in Messages app

Ola Górska
12 min read
updated: Sep 25, 2023

The integration with Apple Messages for Business allows you to receive and reply to messages sent from your customers via the Messages app on Apple devices. It comes with handy features to help you provide a better customer experience.
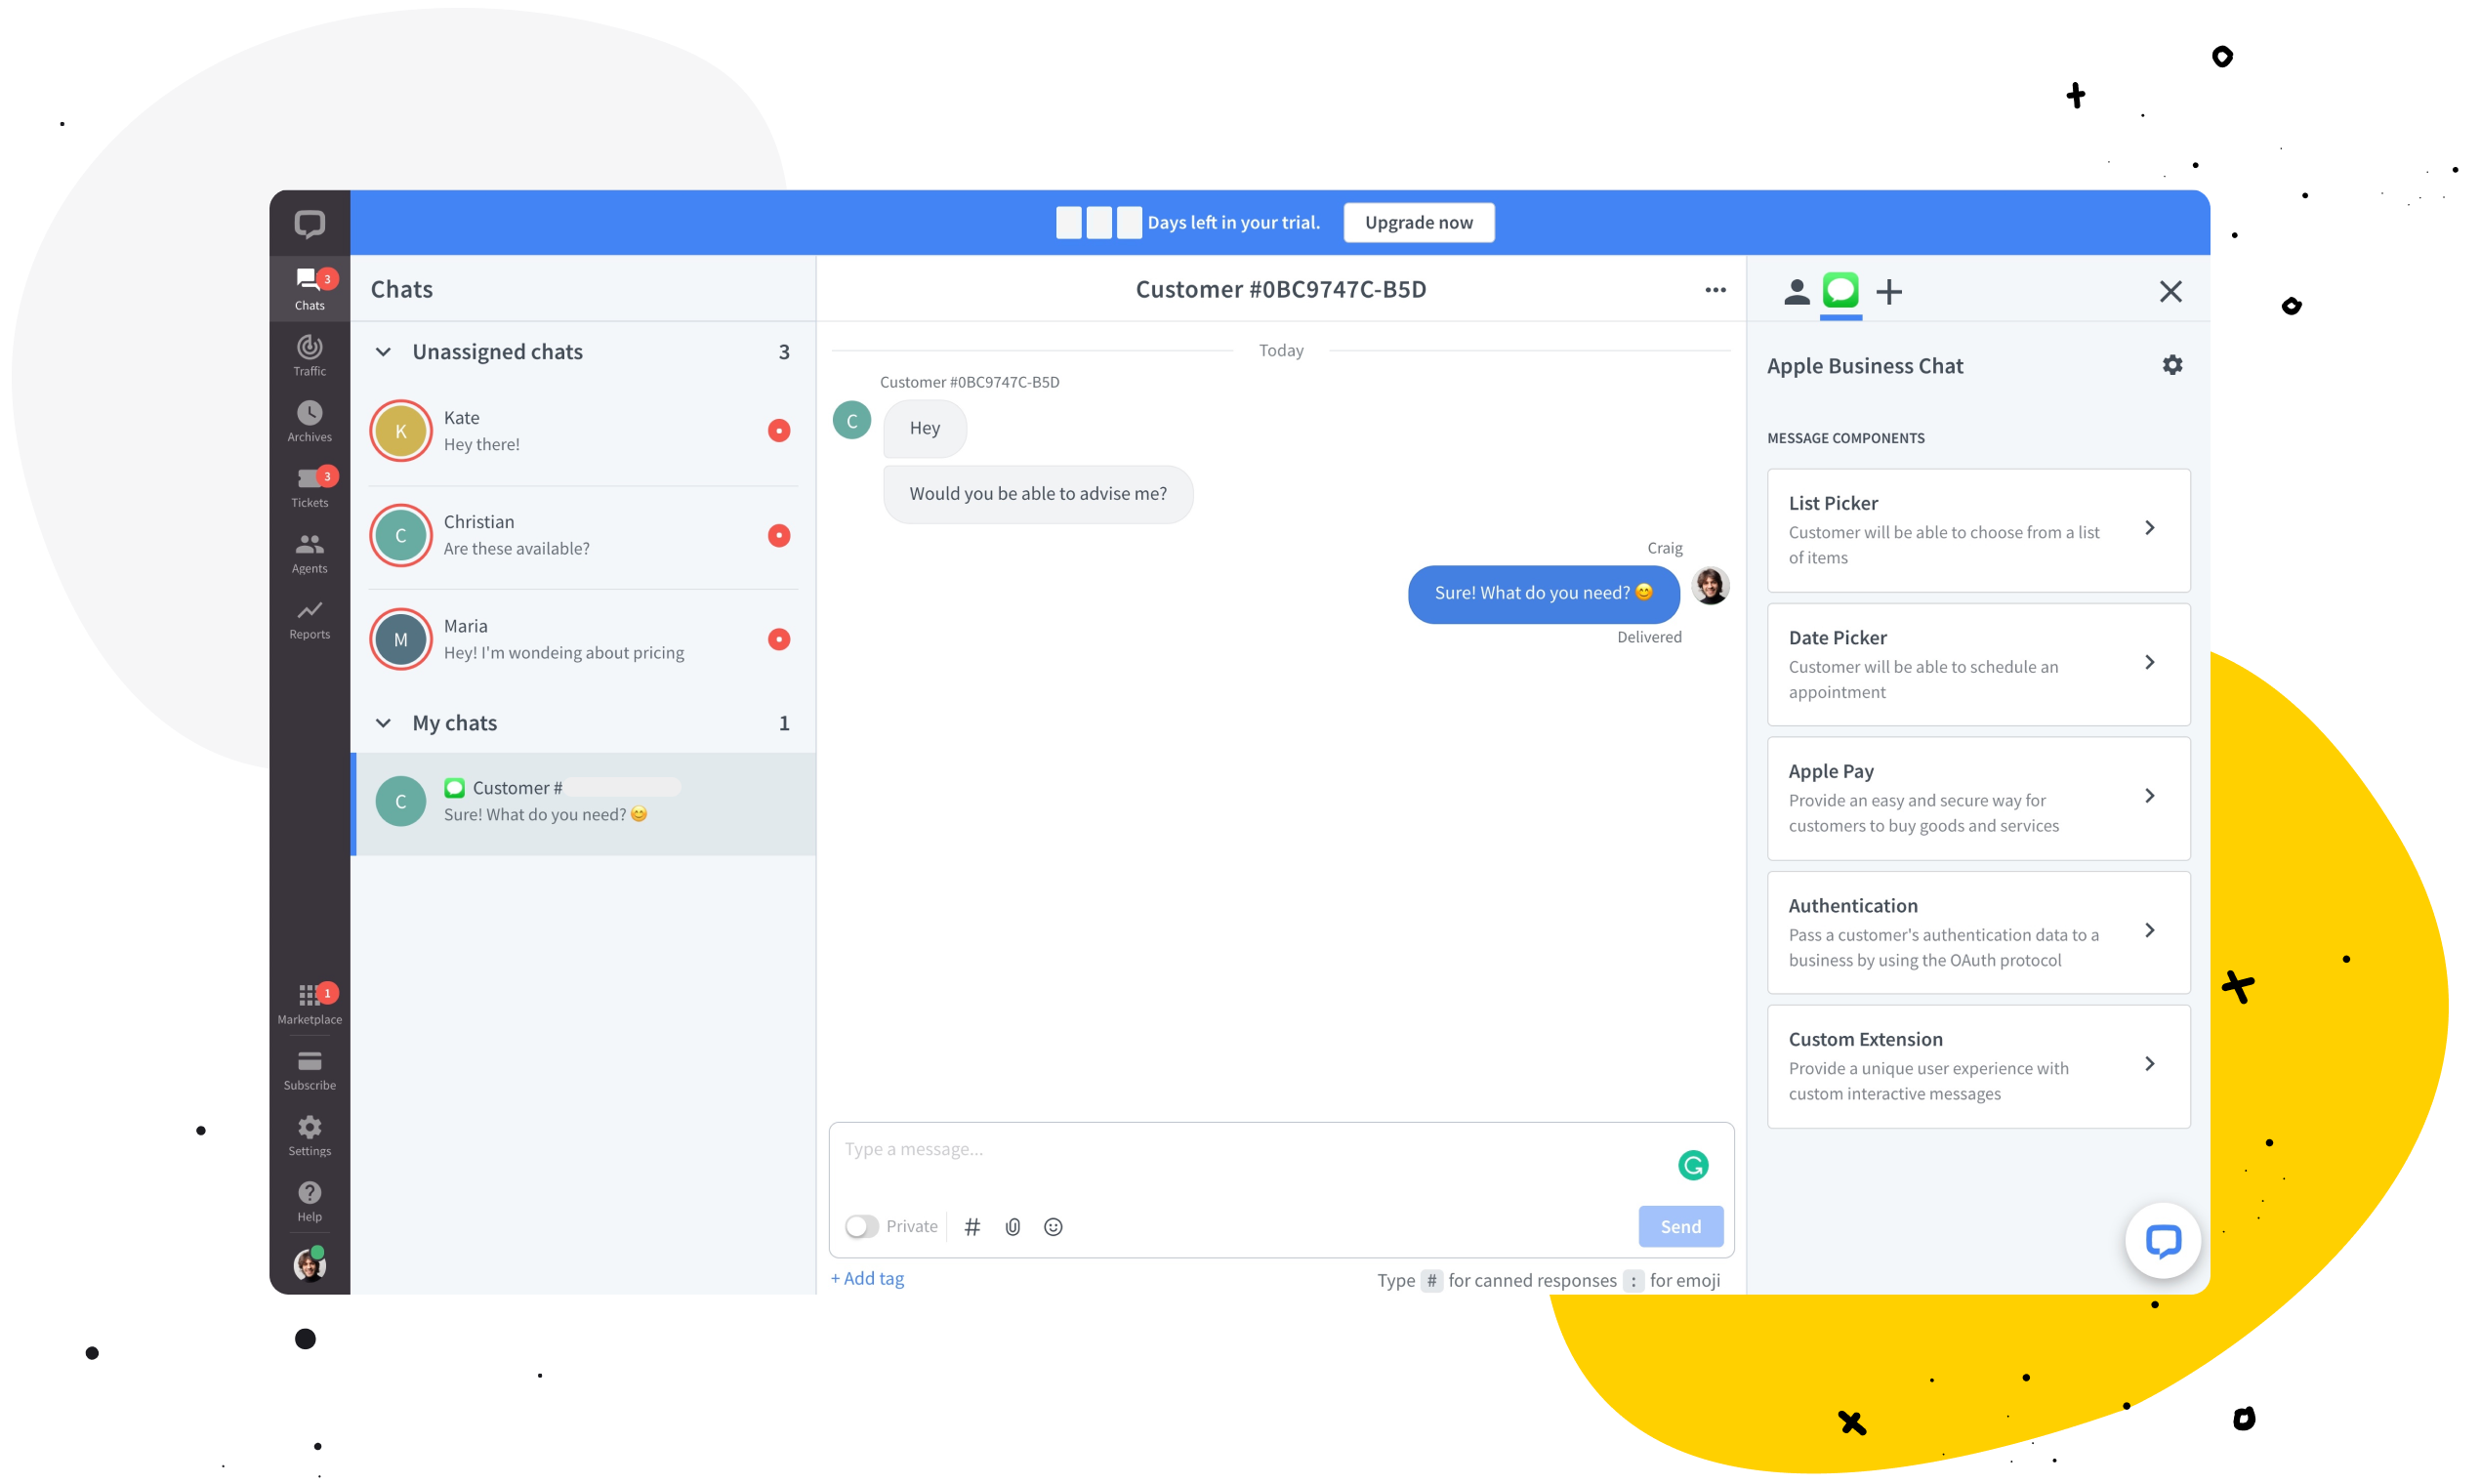
The service is seamless from your agent’s perspective. Chats, incoming from the Apple service, are managed within the LiveChat Agent Application. There is no need for customer service agents to learn a new interface.

For the full list of benefits of Apple Messages for Business and to test it out live with our support, skip to How the integration works.

Integration tutorialLink icon

To integrate LiveChat with Apple Messages for Business, you’ll need to set up and configure your Apple Messages for Business, connect your Apple Messages for Business account with LiveChat, and add a way for your customer to contact you via Messages. Here’s how to do it:

Create a Messages for Business AccountLink icon

First, go to Apple Business Register and connect your Apple ID with Apple Business. We recommend using an Apple ID that is connected to your business email.

Add Business Account for MessagesLink icon

Next, add a Business Account for Messages:

  1. Go to Manage connections.

  1. In the Messages section, find Business Accounts for Messages and click + Add service.

  1. Click Done at the bottom of the page.

Configure your Messages for Business AccountLink icon

Next you will need to add a Messages for Business Account:

  1. In Your connections, select Messages for Business Accounts.
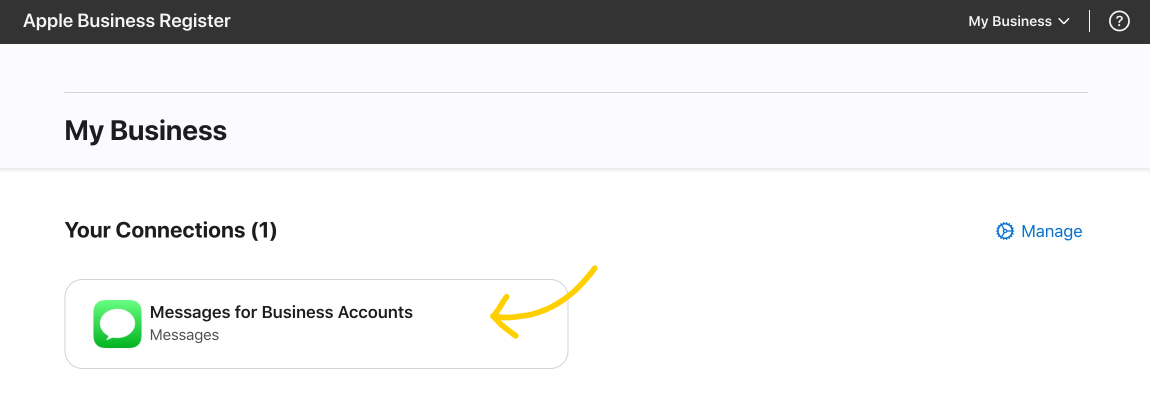
  1. In the new window, click on + Add new in the top left corner.
  1. Then, click on Get Started.
  1. Read and agree to Apple Messages for Business policies. Check all boxes and click Next to proceed.

Now you need to fill out your application. It will need to be reviewed by Apple before you can start using Messages for Business.

  1. The first part of the application consists of general questions about your business, such as basic company details and the contact person in your company. Fill out all mandatory fields, and click Next to move on to the next steps.
  1. In the second part of the application, you need to provide information that will be displayed on the Brand Information Card. For example, your website address and agent response hours.
  1. In the third part of the application, you’ll need to upload your brand logo that will be displayed in the Messages app.
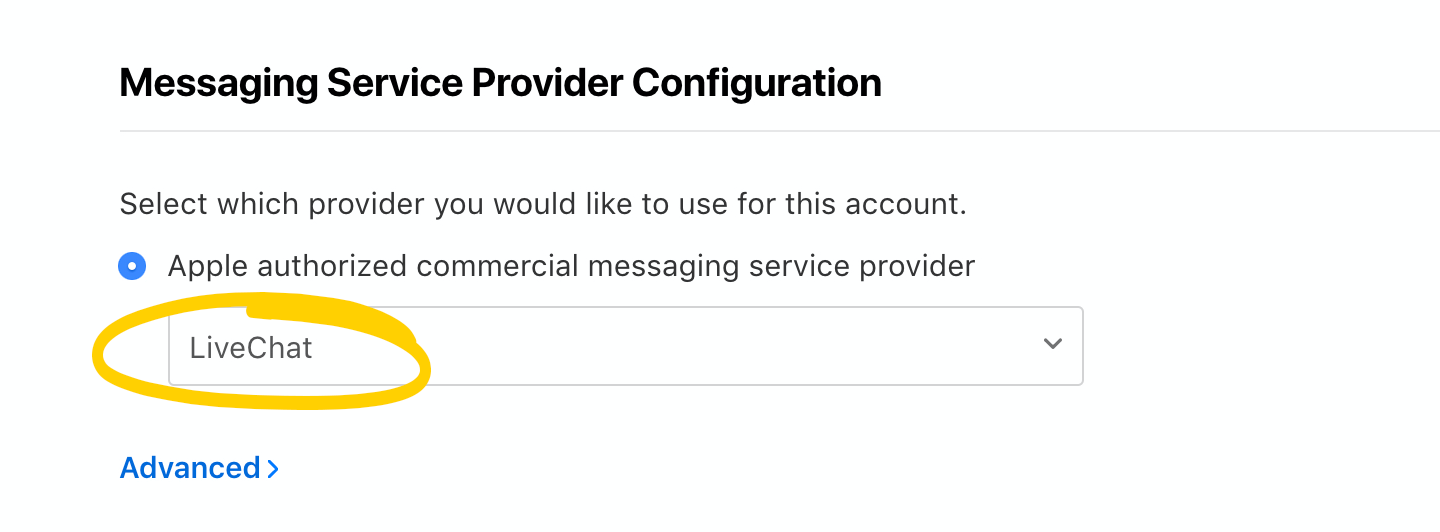
  1. In the last part of the application process, you need to select the messaging service provider – in this case it’s LiveChat.

    To do so, click on the dropdown list, and select LiveChat from the list.
  1. Finally, check if all the information you provided is correct and click Send for review.
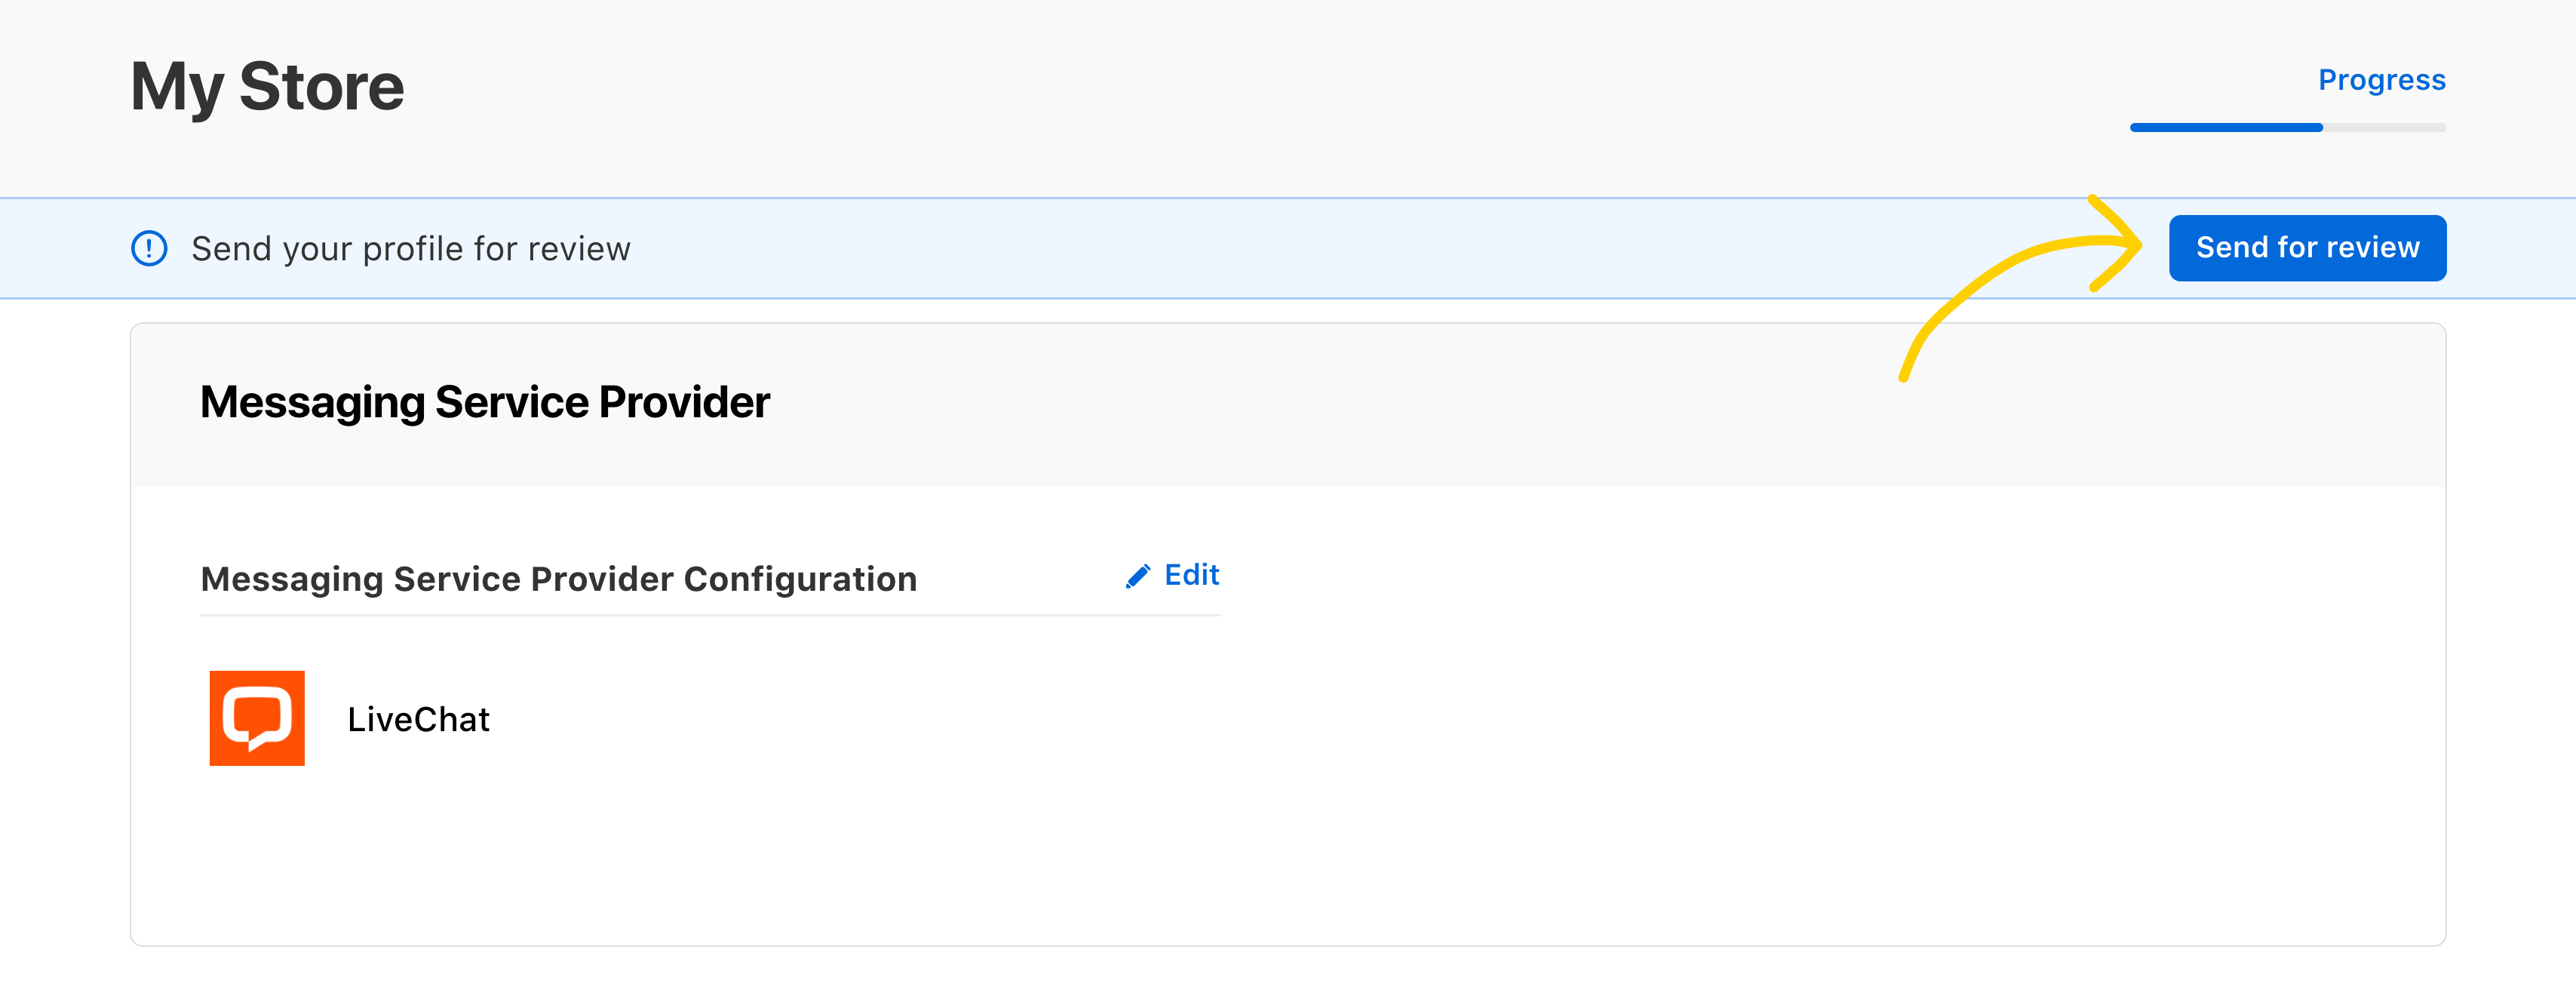
You will now enter the review process with the Apple QA Team. You will be provided with precise information about further steps. If you are setting up Apple Messages for Business for the first time, allow additional time for the review process.

You’ll need answers for the following questions:

  • What are your use cases for Apple Messages for Business?
  • Which entry points do you plan to use?
  • Is your Support Team ready to use the integration?

Connect with LiveChatLink icon

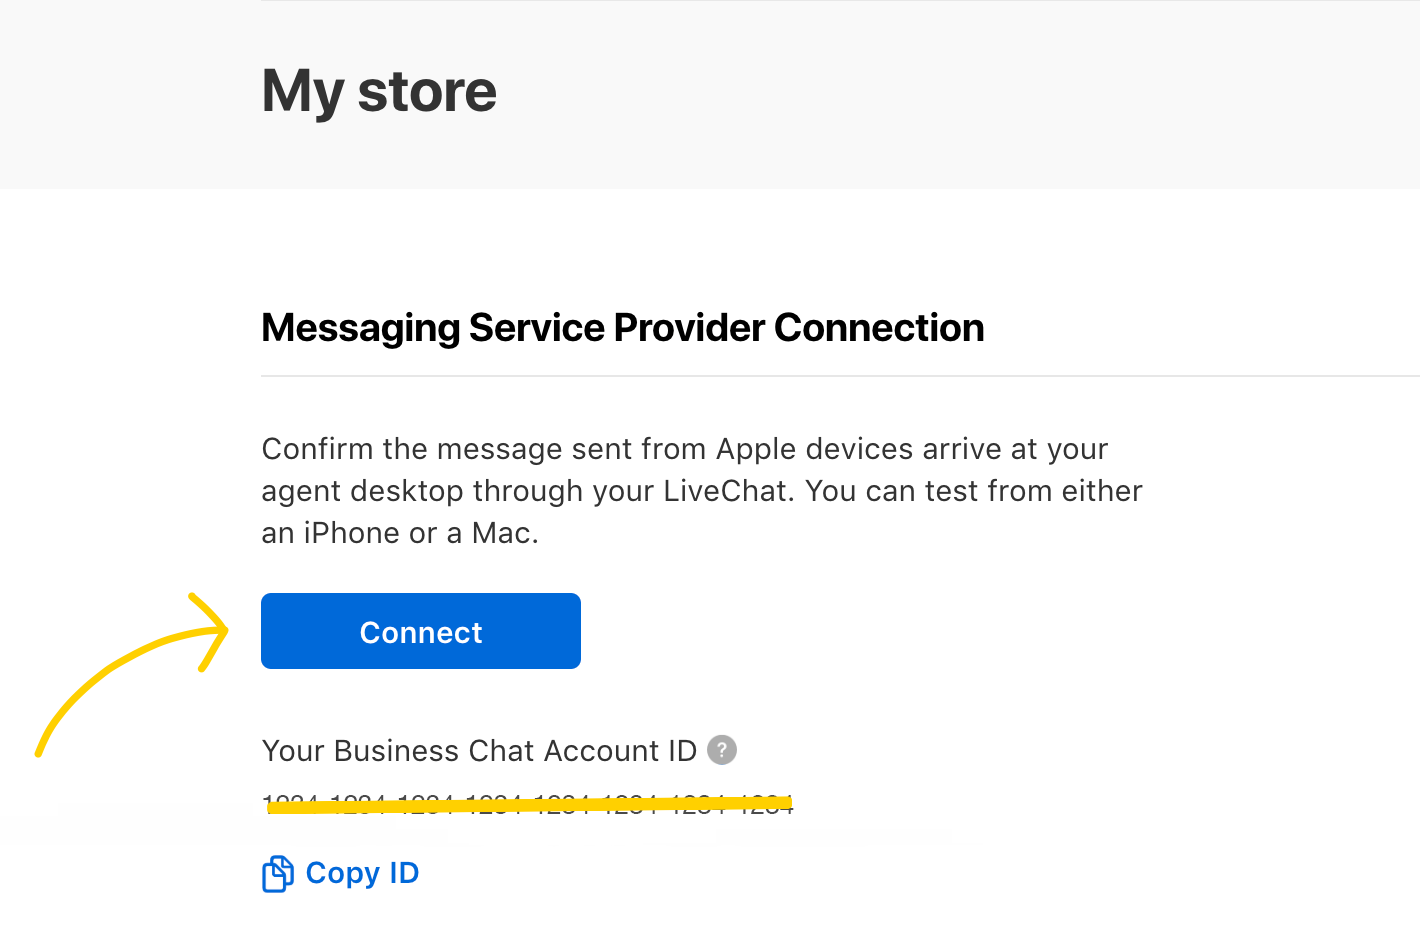
  1. Once your application has been approved, you will be able to connect your Apple Messages for Business account with LiveChat. You will then be asked to test your Messaging Service Provider connection. You need to click on the link.
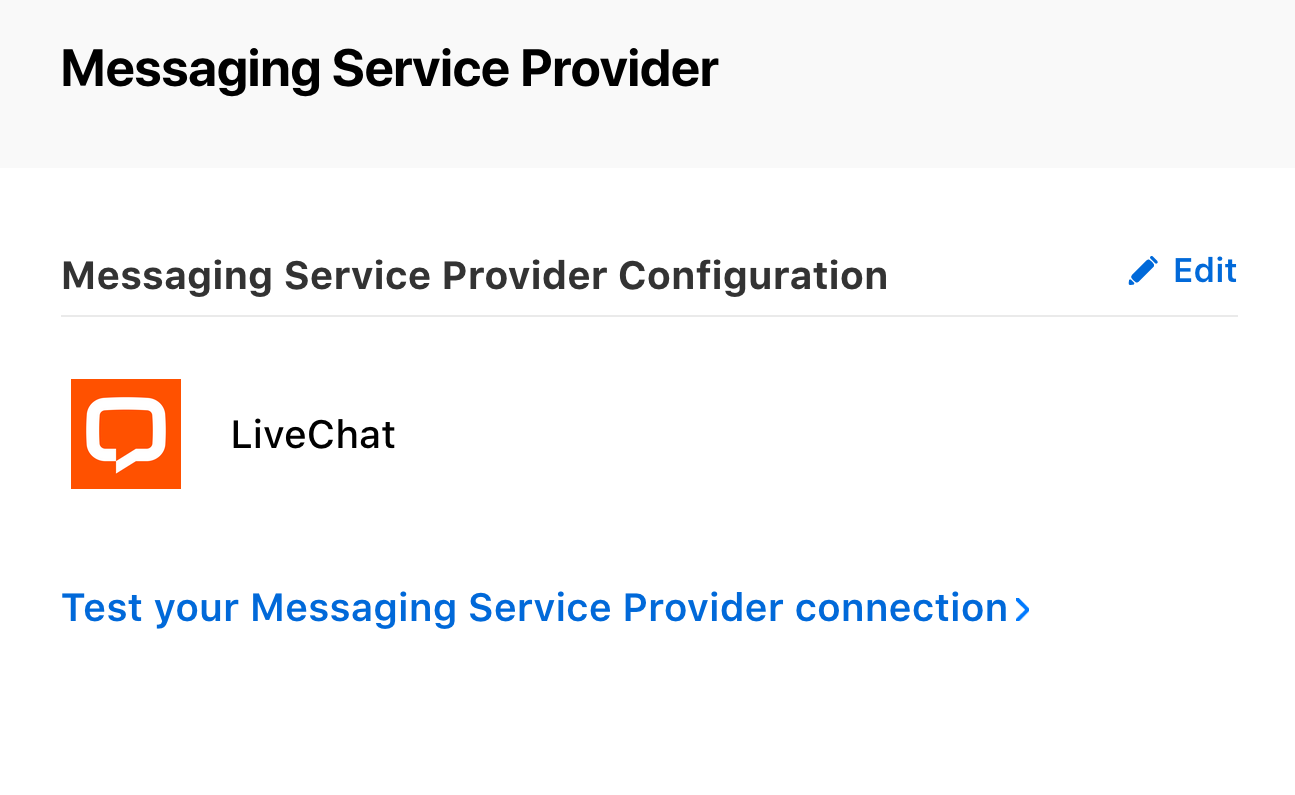
PLEASE NOTE: If this is not available for you at a given moment, wait until your Messages for Business account has been approved.

Test your Messaging Service Provider connection.

  1. Then click on the Connect button.

  1. Sign in using your LiveChat credentials and follow the instructions.

  1. Once you sign in with LiveChat credentials, you should see the below screen informing you which LiveChat license is going to be connected with your Apple Messages for Business. If you are ready to proceed, click Connect Messages for Business Account.

Connect LiveChat with Messages for Business

Set up entry pointsLink icon

Setting up entry points is a crucial part of your setup. It defines how your customers can reach you via Apple Messages for Business. Make sure your entry points match your business use-cases.

1. Starting a Chat from your AppLink icon

If you have an app, you can add a button that will redirect the customer to start a chat with you in the Messages app. Keep in mind that the design must be approved by Apple, it must follow Apple’s design guidelines and include a call to action and context.
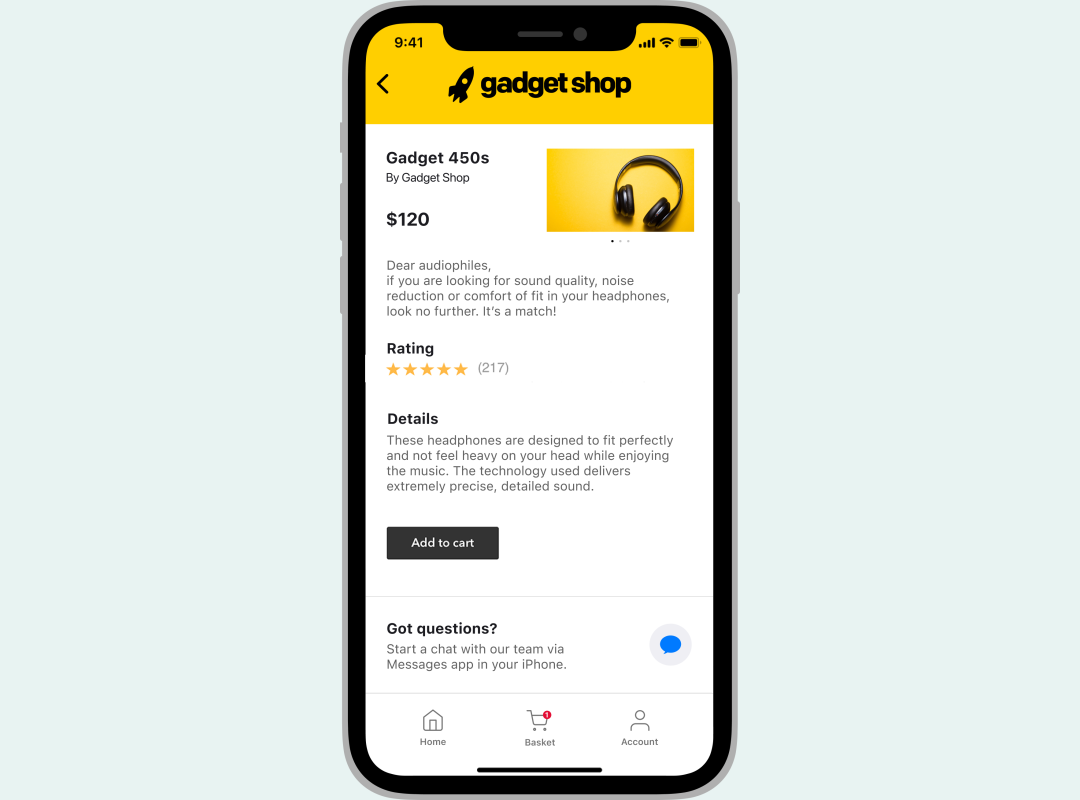
2. Adding a Messages for Business Button to Your WebsiteLink icon

Make sure that the chat button is visible and well incorporated on your website. Without it, customers might miss out on the advantages of this communication channel. It’s a good idea to place the button on the contact information, support, order confirmation, product, and order history pages. Make sure that it also follows Apple’s design guidelines.

3. Enabling Message SuggestLink icon

Make sure that you have your company phone numbers connected with Apple Messages for Business. Contact the Messages for Business Team and they will set it up for you. This is an important entry point for your customers. You can use it to deflect your call volume and increase your agent’s productivity.
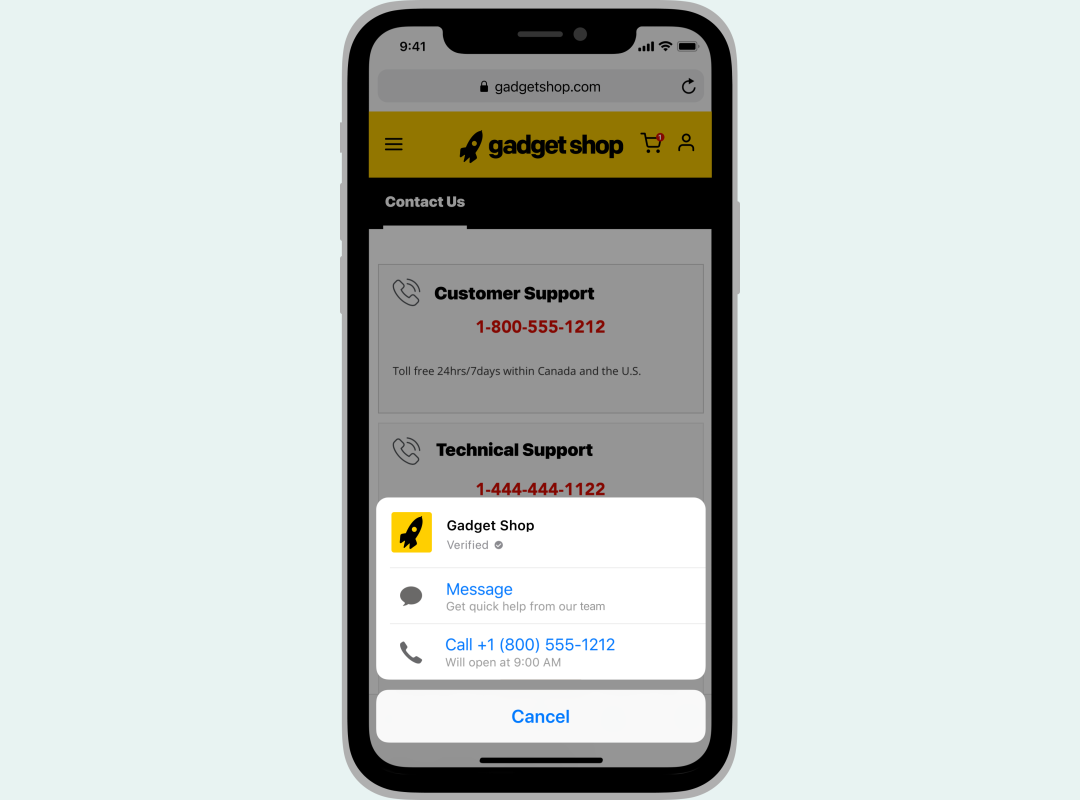
4. Starting a Chat from a URLLink icon

You can find your Conversational link in your Messages for Business account within the Apple Register portal

or by accessing the Apple Messages for Business settings in LiveChat, under Routing.
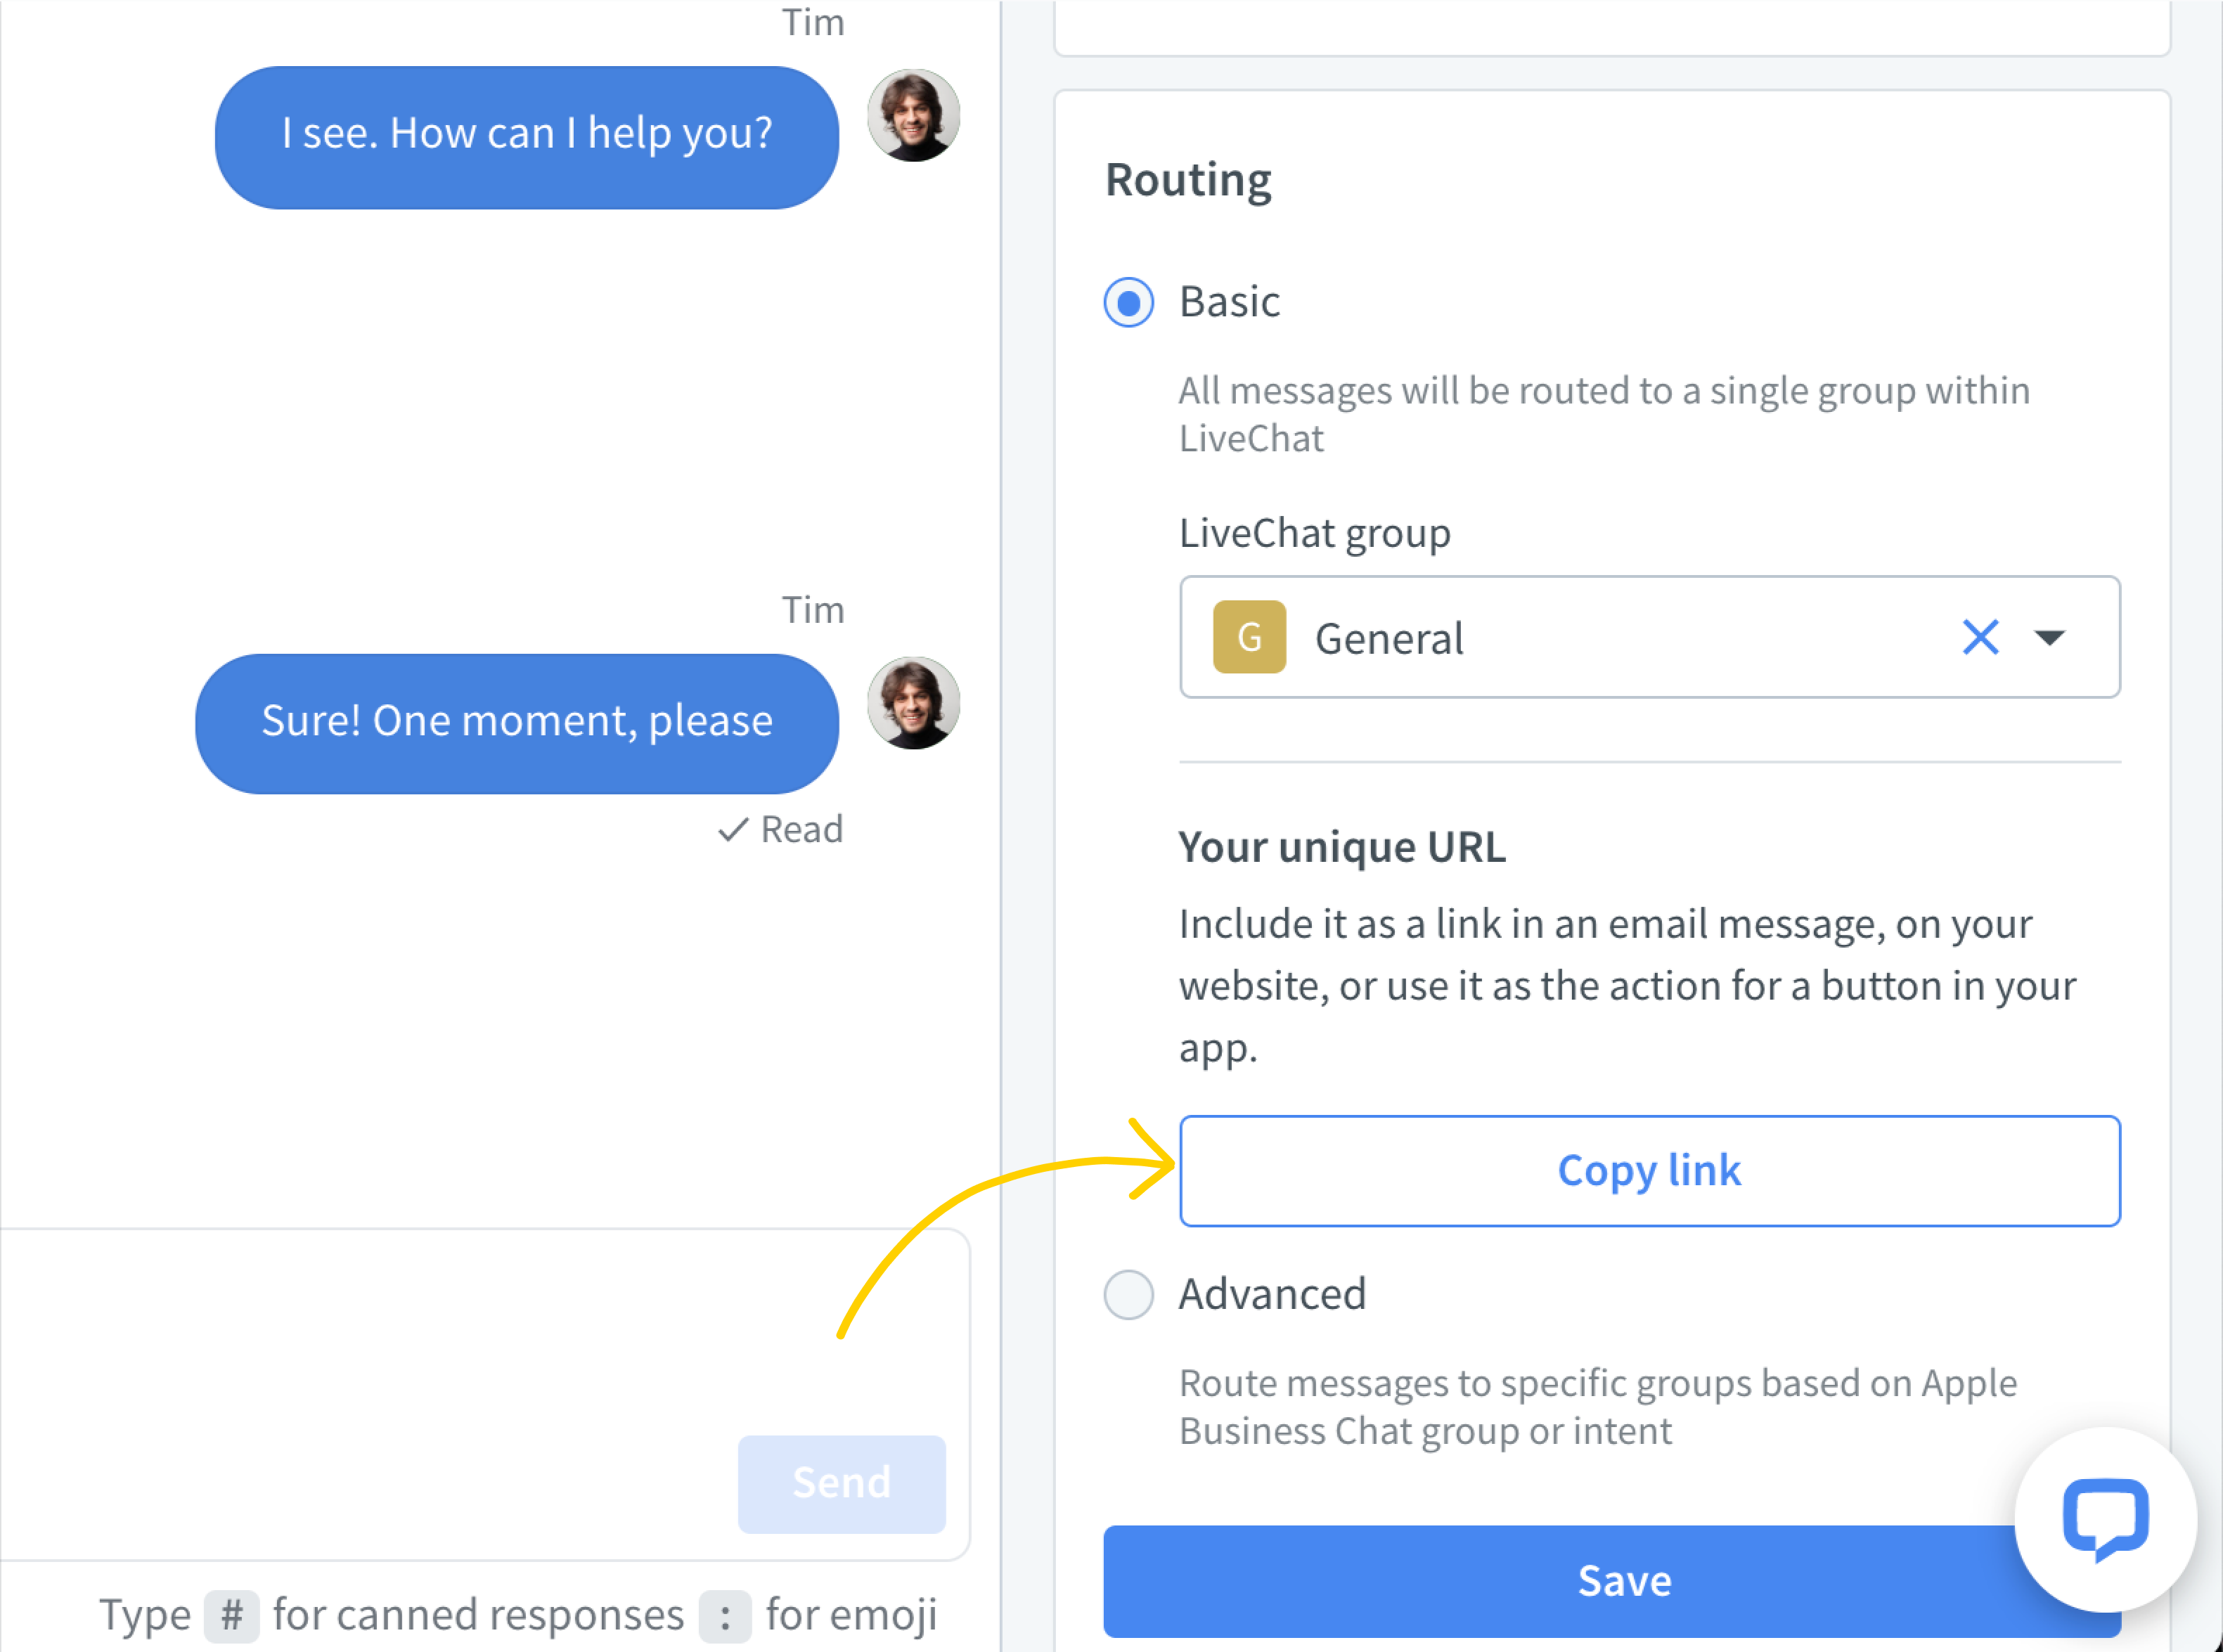
When customers land on the URL, they get redirected to the Messages app so they can contact your business. It can also be used to e.g. create QR codes. For the best user experience, make sure that the link opens up the Messages app or the URL directly, and there are no redirects in between.

To learn about the usage of Apple Messages for Business in LiveChat see this article.

Please note that Apple Messages for Business integration is only available for customers using our Business or Enterprise plans.

How the integration worksLink icon

Once the integration is implemented, your customers can send you messages. Customers messaging you via Apple Messages for Business will appear in the Chats list with the integration logo, and will automatically be named according to the following format: Customer #<12 LiveChat CustomerID characters>.

The Apple Messages for Business messages will appear in the Chats tab, just like all chats do. You will find them in the Unassigned chats section on the chats list. To reply to a message, select the chat from the list and click on Assign to me. Then you can send a message as usual.

Unassigned messages stay on the Chat list until they are assigned to an agent and closed. So you can answer whenever it is convenient.

You can also use a few extra features that make for an even better chatting experience.

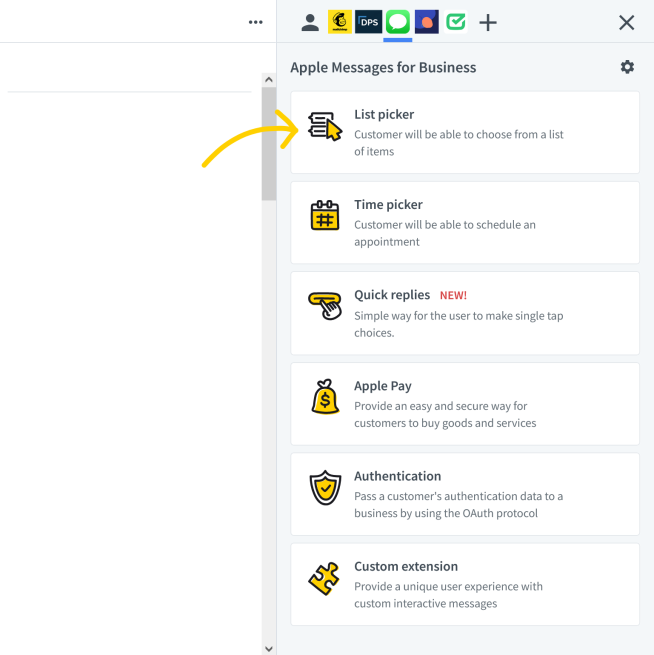
In order to use those features, select a chat coming from Apple Messages for Business integration and open the integration app from the details section on the right.
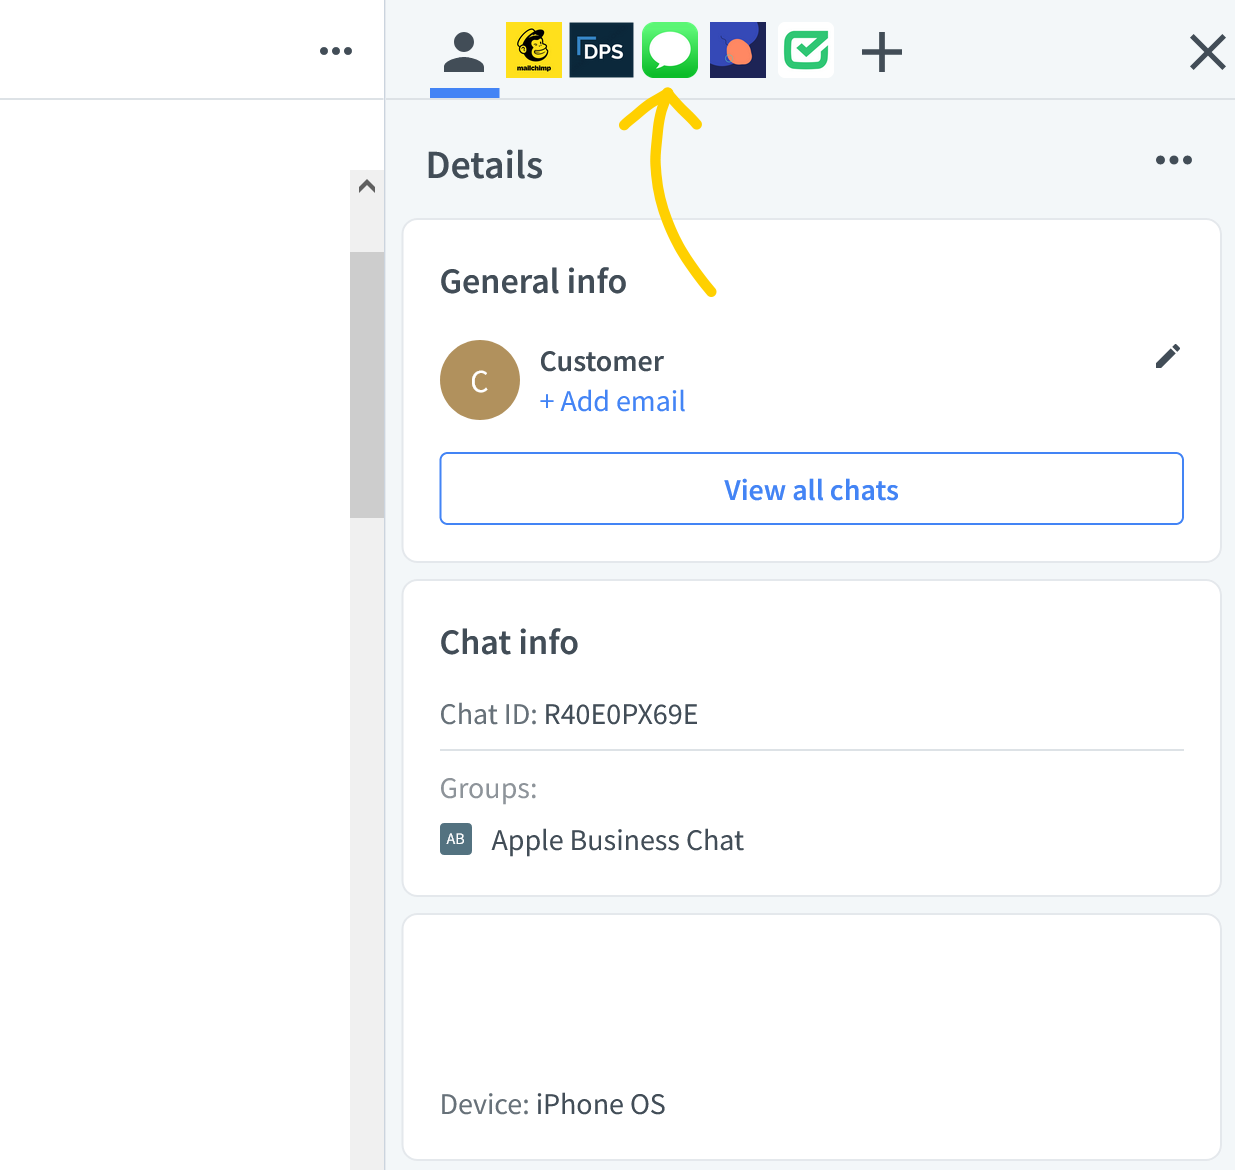
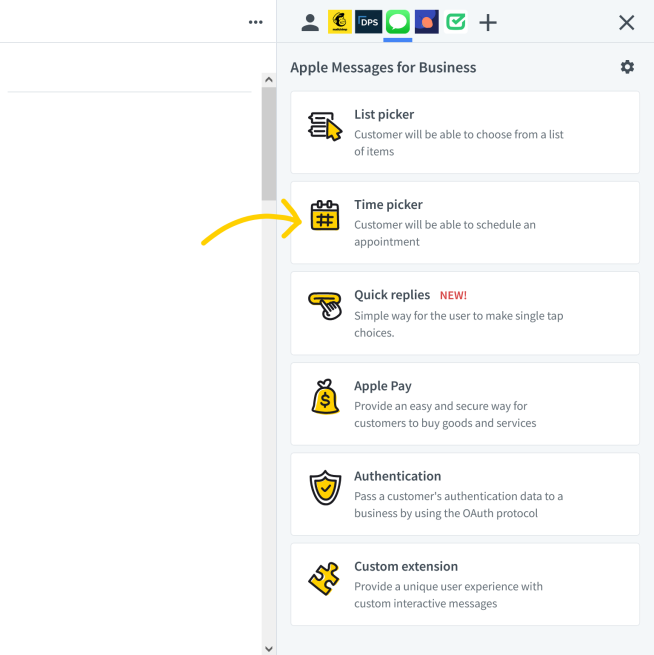
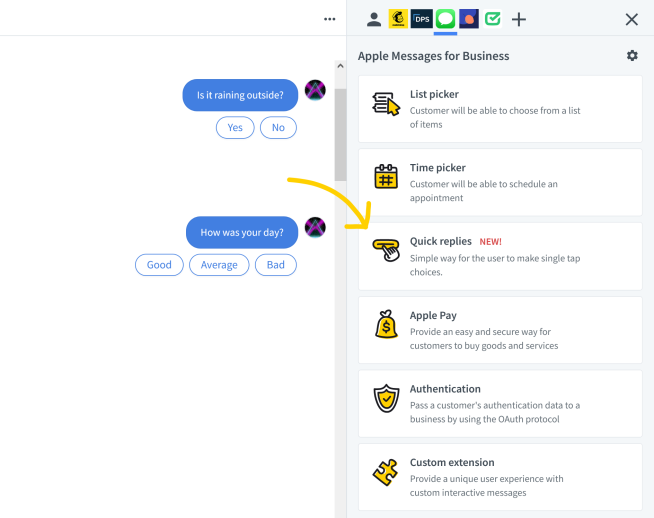
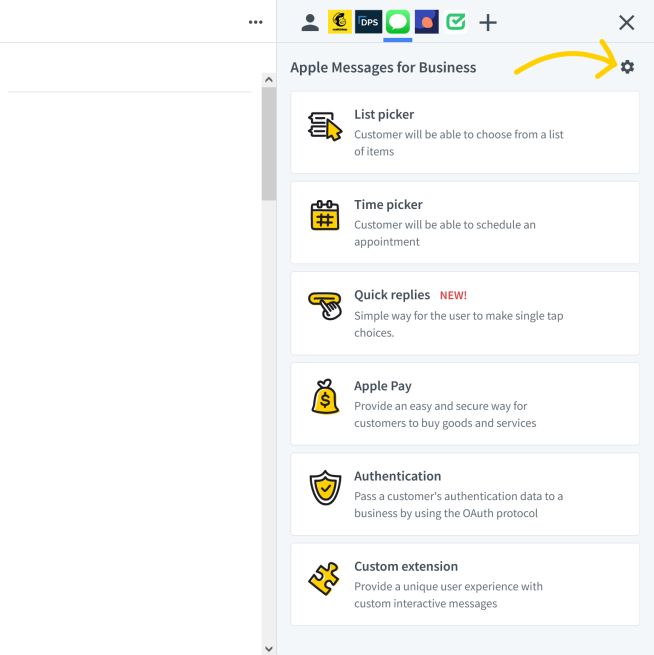
The integration app consists of 5 tabs, one for every message component or feature available, and a settings button. A message component is a rich message that you can send over chat. The Settings button is the gear icon in the upper right corner.

List pickerLink icon

You can create a list of items, for example, a few similar products that might interest the customer.

To send a list:

1
Go to a chat and open the Apple Messages for Business app from the details bar on the right.
2
Select and click on the List picker tile.
3
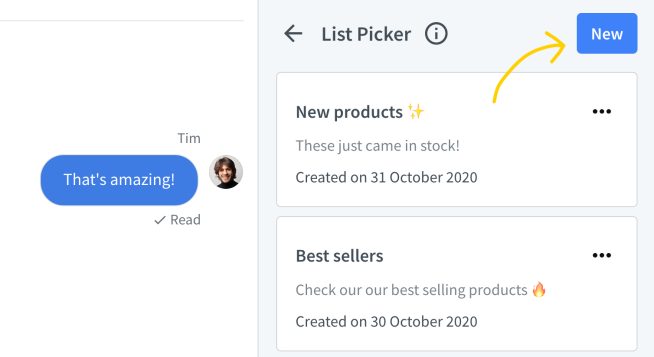
Click on the New button in the upper right corner.
4
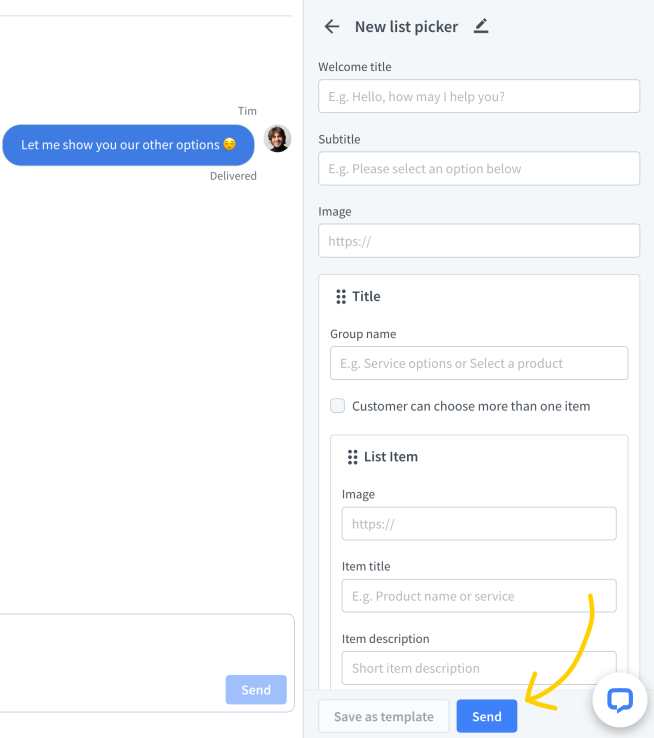
Fill out all relevant fields and click Send. You can also choose to Save as template and have it ready to send when you need it.

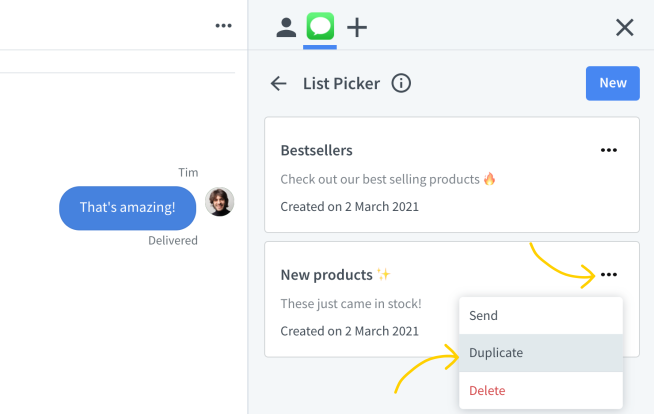
To save, duplicate or use saved templates, simply:

1
Go to a chat and open the Apple Messages for Business app from the details bar on the right.
2
Select and click on the List picker tile.
3
Click on the three dots on the list picker of your choice.
4
Choose the action you want to perform.

Time pickerLink icon

Propose time and date options for a meeting and let customers reserve one in chat. They will be able to see any potential conflict thanks to an automatic cross-check with the Calendar app on their iPhone.

To create a time picker:

1
Go to a chat and open the Apple Messages for Business app from the details bar on the right.
2
Select and click on the Time picker tile.
3
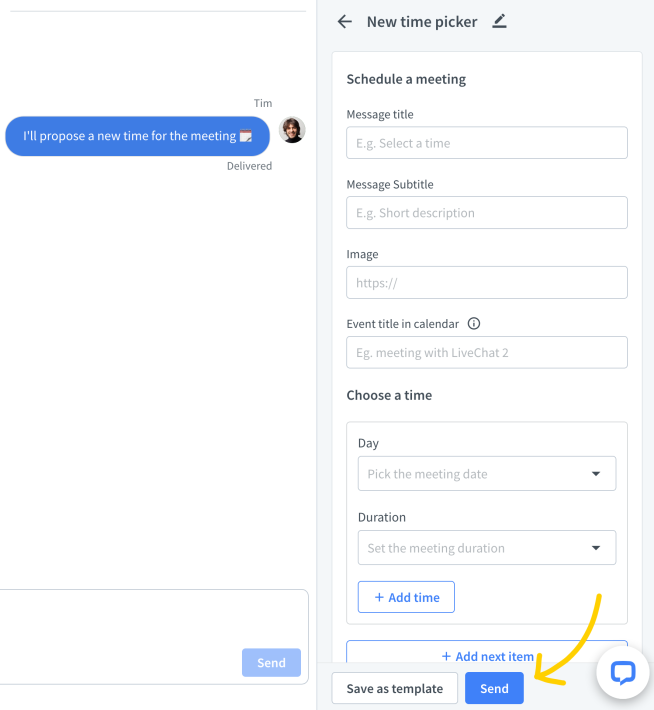
Fill out all relevant fields and click Send. Or Save as template and have it ready to send when you need it.

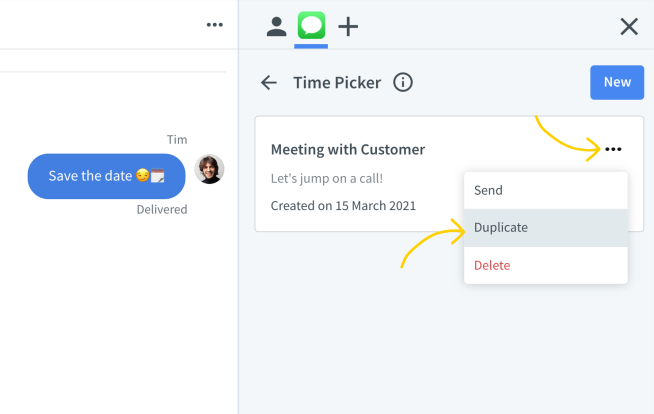
To send, duplicate or delete a template:

1
Go to a chat and open the Apple Messages for Business app from the details bar on the right.
2
Select and click on the Time picker tile.
3
Click on the three dots on the time picker of your choice.
4
Choose the action you want to perform.

There are a few additional features, that need work on the developer side and can’t be used out of the box. You can read more about them in the developer docs: Apple Pay, Authenticationtion, and Custom extension.

Quick repliesLink icon

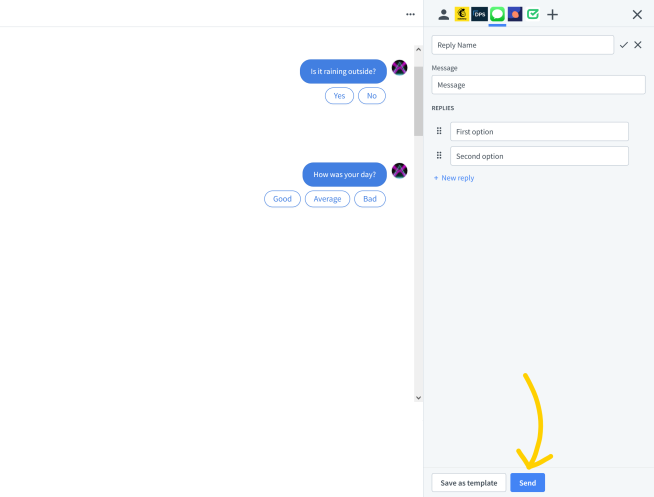
Present a range of choices with a single tap during an ongoing conversation. You can have between two and five customizable answers for your visitors to choose from.

To create a quick reply:

1
Go to a chat and open the Apple Messages for Business app from the details bar on the right.
2
Select and click on the Quick replies tile.
3
Fill out all relevant fields and click Send. Or Save as template and have it ready to send when you need it.

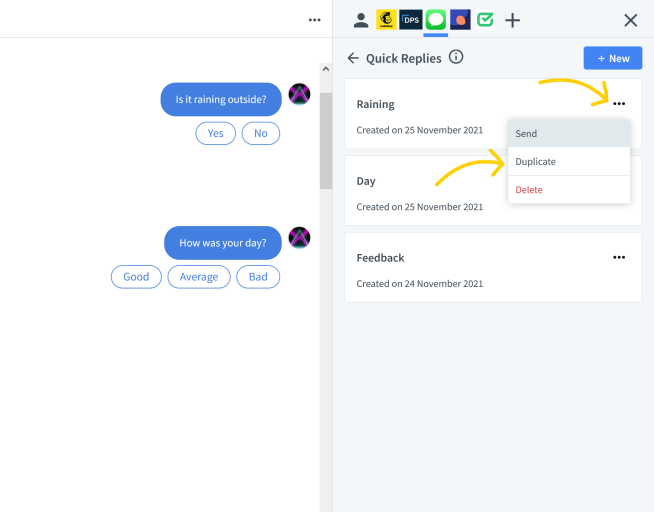
To send, duplicate or delete a template:

1
Go to a chat and open the Apple Messages for Business app from the details bar on the right.
2
Select and click on the Quick replies tile.
3
Click on the three dots on the quick reply of your choice.
4
Choose the action you want to perform.

SettingsLink icon

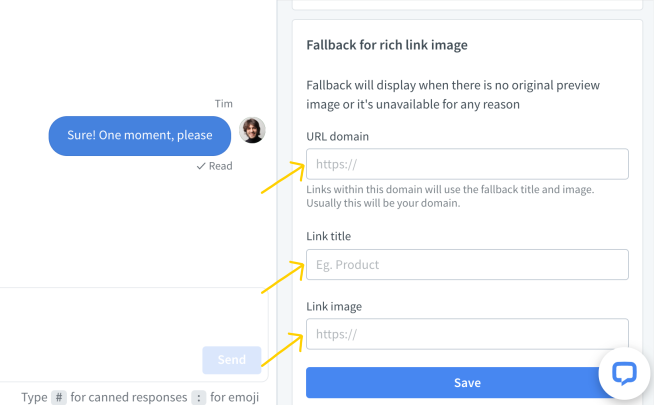
In the Settings tab, you can route chats to specific groups and set up a fallback Rich Link title and image.

The fallback image comes in handy when there is no original preview image for a given website, when the image is not available, or there are problems with passing the preview image. To learn more about why it’s important, head over here.

To set up the fallback image:

Rich messagesLink icon

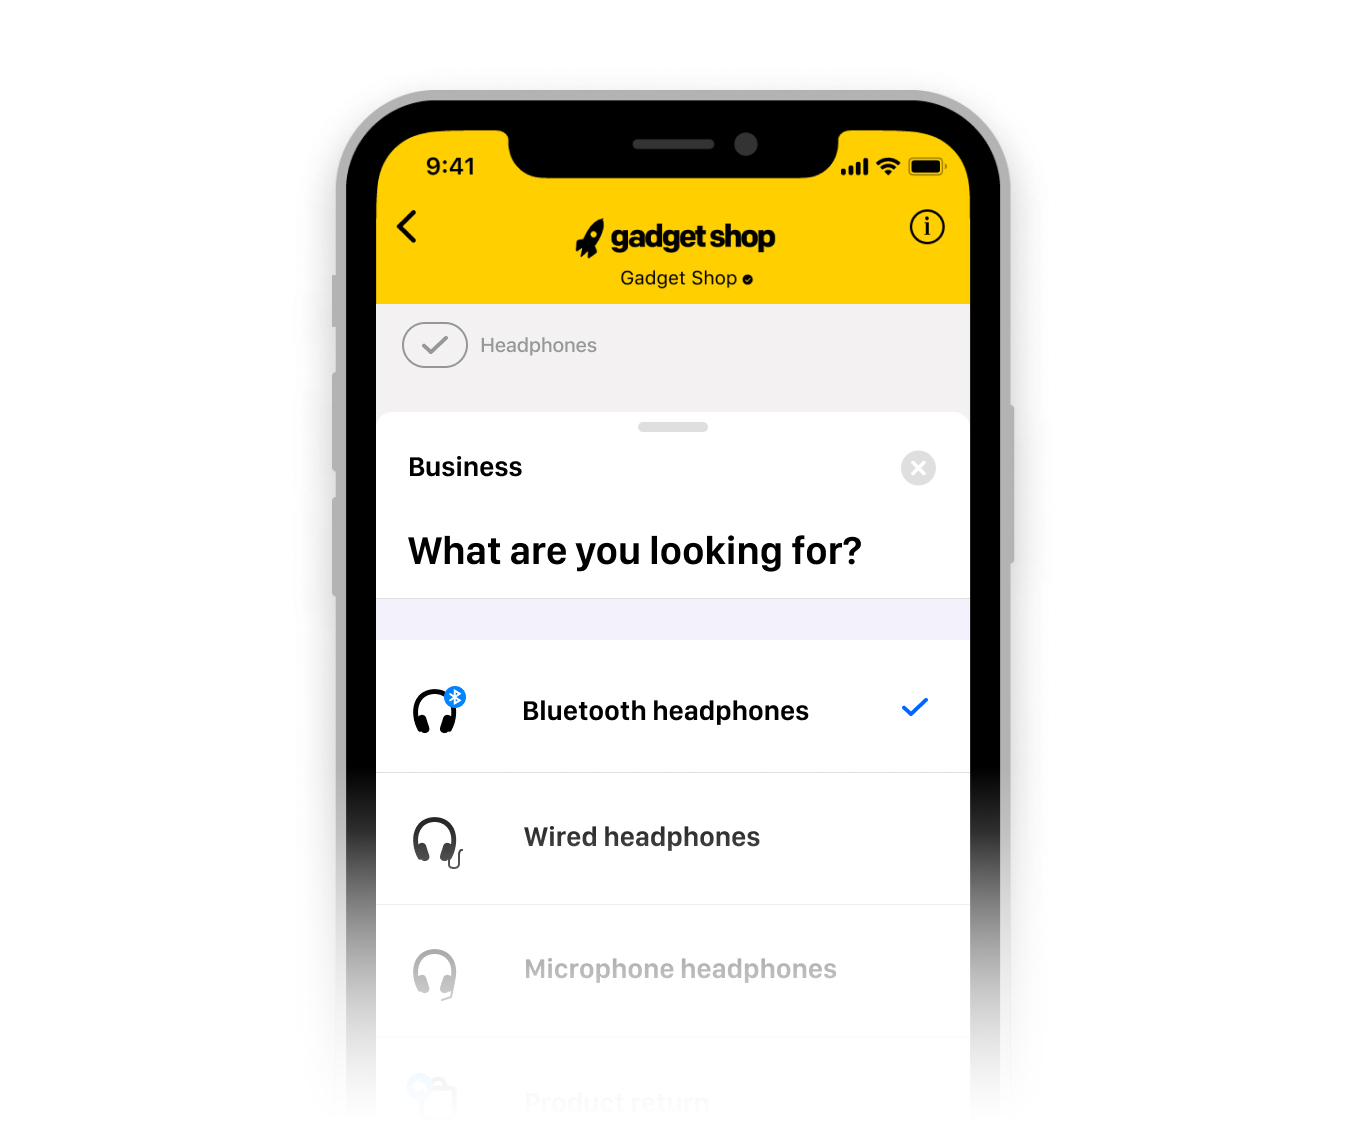
If you’re using an integration with ChatBot or the Rich Messages integration, you can send Quick Replies, Cards and Carousels in the Apple Messages for Business, and they will be displayed as List Pickers.

Rich message presented in Messages app as a list picker.

The integration supports rich messages, however, it does not support multiple types of buttons within one message. If you’re using ChatBot, make sure that each rich message contains only one type of button, e.g. only quick replies, only URLs, etc.

Routing chats to groupsLink icon

There are two basic routing configurations for integrating LiveChat with Apple Messages for Business. You can route all such chats to one group in LiveChat, or you can direct them with different Groups/Intents in Apple Messages for Business to different groups in LiveChat.

Routings all chats to one groupLink icon

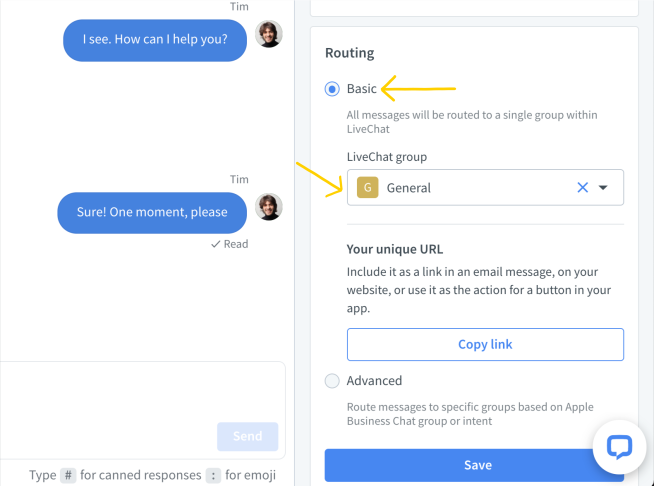
To direct all your Apple Messages to a specific group in LiveChat, use the Basic routing setting. To do that:

1
Go to a chat and open the Apple Messages for Business app from the details bar on the right.
2
Click on the gear icon to open Settings.
3
Pick the Basic option.
4
Choose the desired group from the dropdown list and click Save

Routing chats to specific groupsLink icon

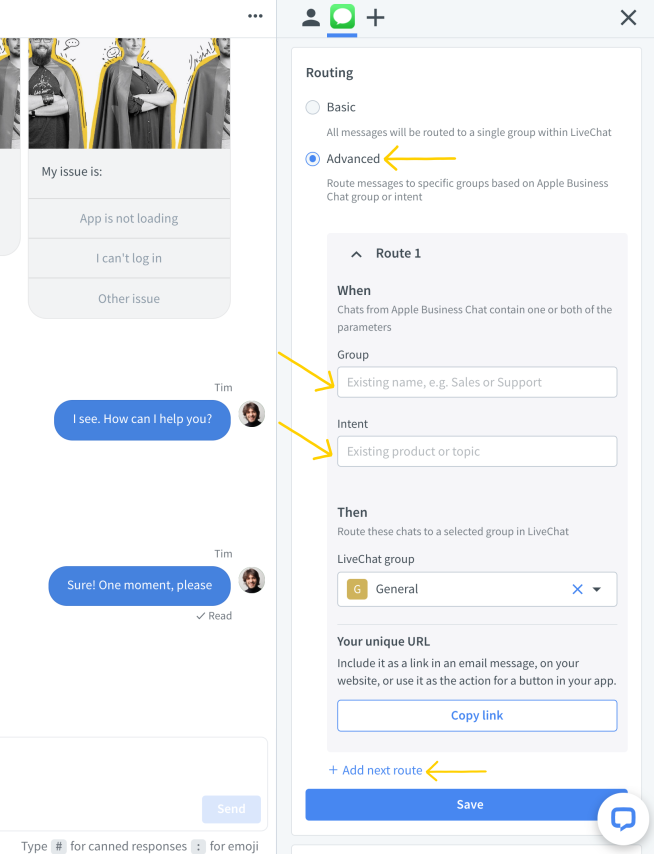
Use Advanced routing to set any number of rules for each Group or Intent in the Apple Messages for Business. Each such rule can direct the chats to a different group in LiveChat. See this article for information on how to set up groups in LiveChat. Once your LiveChat groups are set up follow the steps below.

1
Go to a chat and open the Apple Messages for Business app from the details bar on the right.
2
Click on the gear icon to open Settings.
3
Pick the Advanced option.
4
Click on Add next route to set up more rules or fill out the relevant fields and click Save.

This way all chats started on a given page can be directed to your Sales team, and chats started on other pages to the Support team, for example. More information about Apple Groups and Intents can be found here.

For now, the integration allows only one Messages for Business account to be connected to one LiveChat license.

SecurityLink icon

Using LiveChat together with Apple Messages for Business is safe and secure. There are no additional considerations when it comes to using Apple Messages for Business as an additional channel alongside the website widget.

Both the connections between an Apple user and Apple Messages for Business, and between Apple Messages for Business and LiveChat, are secured using sophisticated encryption methods and don’t use any propriety services underneath.

The integration that routes messages from Apple Messages for Business to LiveChat (and the other way around) is hosted within the same, thoroughly secured infrastructure as other LiveChat services. You can read more about LiveChat privacy policy here.

Apple Messages for Business itself is a service that operates as a transmitter – Apple doesn’t store any of the chats. All the messages are instantly transmitted to MSP (LiveChat). You can read more about Apple Messages for Business privacy here.

Please note that Apple Messages for Business integration is only available for customers using our Business or Enterprise plans.

Was this article helpful?

Got it!

Thanks for your feedback.

Thank you!

We’re happy to help.

RELATED ARTICLES

Customer Insight for BigCommerce

With Customer Insight, you can see your customers’ information as soon as the chat starts right in the LiveChat app. View your customers’ cart, review their orders, and send Product Cards without switching tabs for all the stores you have on BigCommerce. Install Customer Insight for BigCommerce today. You’ll not only shorten your customers’ path to reaching you, but you’ll also equip your representatives with the means to serve your customers faster and better.

Read the article

Welcome to the LiveChat Marketplace

If this is the beginning of your adventure with LiveChat, you’ve come to the right place. If you’ve been using LiveChat for a while, it’s high time we introduce you to all the ways the experience can be even better for you and your customers. Our Marketplace offers over 200 integrations that will help you take your customer engagement to the next level. They can: save your agents’ valuable time. enhance your customers’ experience.

Read the article

Start using LiveChat now!

Free 14-day trial Team plan features No credit card required

Still not convinced? Discover all LiveChat features

Discover text| products: